Posted on — Leave a comment

Better, or Just Safer? How to Know a Wood Floor Lacquer Is Good Before It Goes Down

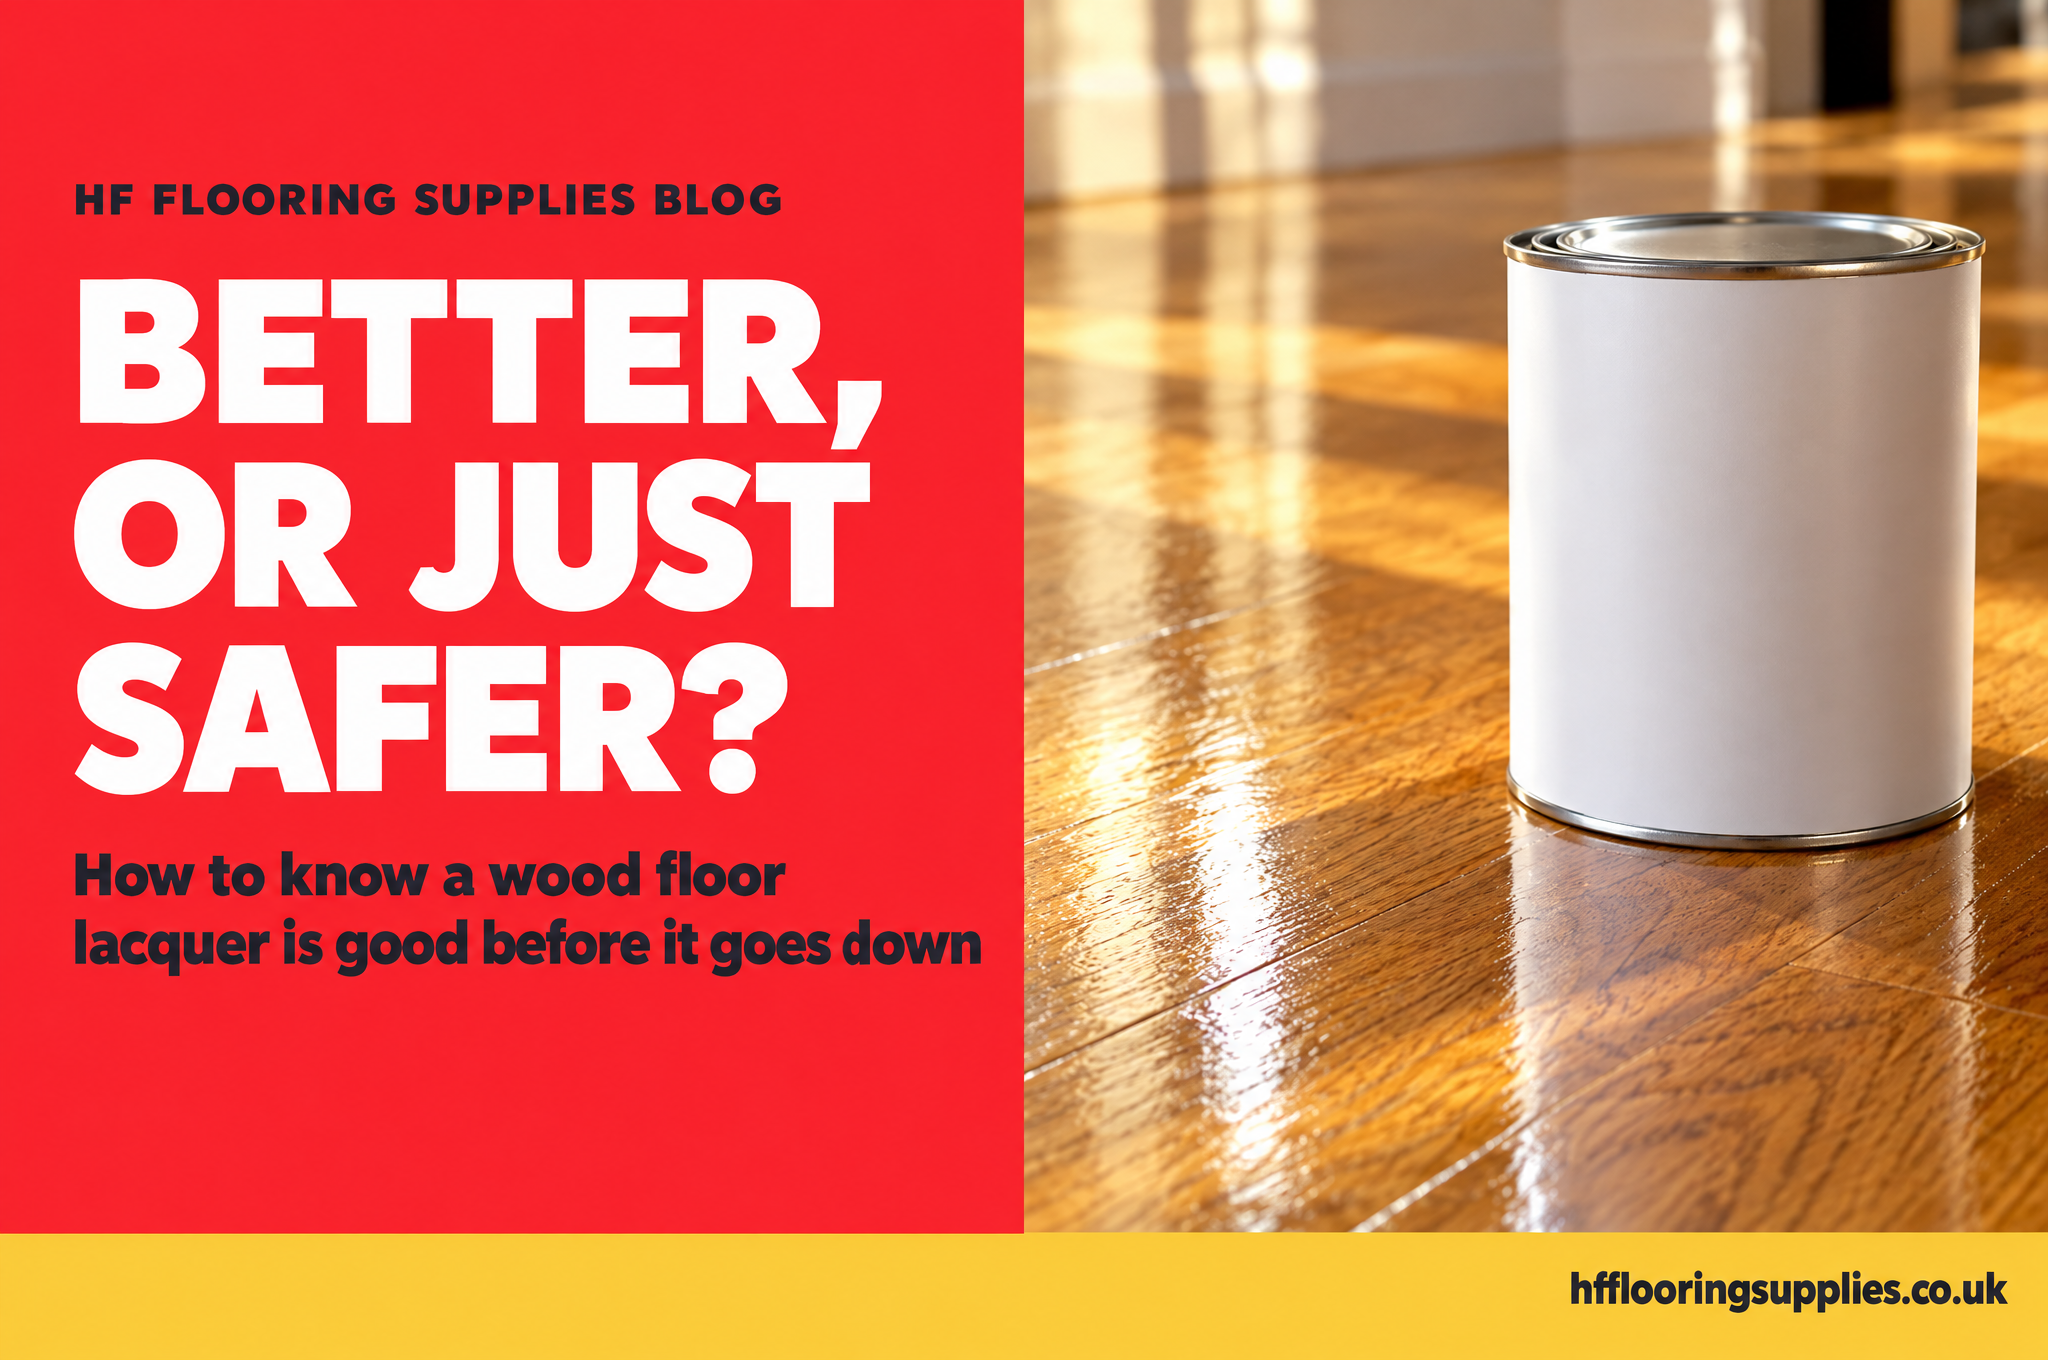
Five questions to ask before choosing a wood floor lacquer, shown with a lacquer tin on an oak floor

It is the night before a big kitchen job. The floor is booked for sanding tomorrow, the client wants it finished by Friday, and you are ordering the lacquer. Ask most contractors what they are looking for and they will say the best finish. Watch what they actually order and it is something different: the one least likely to let them down.

That is not a criticism. It is how sensible people make decisions when they cannot see inside the tin. We rarely choose one product over another because we think it is better. We choose it because we are more certain it is good.

So the useful question when choosing a wood floor lacquer is not which one claims to be the best. It is how you can be certain a finish is good before it goes down on a paying job. This guide sets out five questions you can ask of any lacquer, explains why the words on the tin cannot answer them, and shows how Arboritec answers each one.

The short version

  1. Claims are cheap. Every tin says durable and hard wearing, so the label alone cannot give you certainty.
  2. Five questions cut through it: who makes it, what is in it, how the chemistry works, who supports it, and whether the maker invests in you.
  3. Then test it yourself. A sample board you have made and abused yourself is worth more than any brand name.

The question was never which lacquer claims to be best. It is which one you can be certain of.

01
The problem

Why the words on the tin cannot give you certainty

Every lacquer on the market says it is durable, hard wearing and easy to apply. Those are cheap claims: they cost nothing to make, so anyone can make them. They tell you what the maker wants you to believe, not what the finish will do in a hallway with two dogs.

  • Everyone uses the same wordsWhen every tin promises toughness, the promise stops carrying any information.
  • A familiar name proves marketing, not chemistrySeeing a brand everywhere online tells you about advertising budget and distribution. It is a reasonable shortcut, because a big name has a reputation to protect, but it says nothing about what is in the tin.
  • The failure shows up laterA finish that goes on beautifully can still wear through in a year. By then the client is living with it, and you are the one they call.
Certainty comes from things that are hard to fake: where a product comes from, what is in it, how it works, who stands behind it, and whether the maker invests in the people using it.
02
The checklist

Five questions to ask of any wood floor lacquer

Use these whatever brand you are looking at. A finish that answers all five clearly is one you can trust on a paying job.

QuestionA good answer looks likeWhy it matters
Who makes it, and for how long?A named manufacturer with years of floor finish historyA long track record is a reputation the maker cannot afford to lose
What is in it, and will they tell you?Current SDS and TDS, and real answers when you askOpenness is a sign of confidence in the formula
What does the chemistry actually do?A clear explanation of how the film resists wearA mechanism you understand is one you can explain to a client
Who answers when something goes wrong?Someone technical who has done the job themselvesSupport only matters on the day you need it
Will the maker invest in you?Training and recognition from the manufacturer itselfNobody spends money training people on a product they expect to fail
03
The answers

How Arboritec answers the five questions

Question oneWho makes it, and for how long?

Founded
1999
Where
Jörlanda, west coast of Sweden
First name
Nanofloor
Synteko
Floor finishes since 1944

Arboritec was founded in 1999 by a small team of Swedish coatings specialists. They set out to solve a problem contractors had lived with for decades: how to make a waterborne floor finish that performs like the old solvent based systems, without the fumes. Their answer was ceramic nanoparticles built into the lacquer, and they developed their first products under the Nanofloor name, after the technology itself.

Arboritec is owned by the Swedish industrial group Röko, and in 2019 it also took over Synteko, a Swedish floor finishes business founded in 1944. The name may be new to many UK contractors, but the company behind it has been making floor finishes for longer than most of us have been sanding them.

Question twoWhat is in it, and will they tell you?

Safety data sheets and technical data sheets are available across the Arboritec range, and when a question comes up that the paperwork does not answer, it goes straight to Arboritec's R&D team in Sweden.

An example

The nano ceramic in Vibrant primer does not appear in Section 3 of its safety data sheet. That is not an omission. Arboritec's R&D team confirmed the particles are chemically bonded into the polymer itself rather than added as a separate free ingredient, so they are not listed as one. A maker that will explain a detail like that is comfortable with you looking closely.

Question threeWhat does the chemistry actually do?

  • Bonded nano ceramicArboritec primers and lacquers contain ceramic particles under 14 nanometres across, surface treated so they bond chemically into the resin as it cures. Think of steel reinforcing bar tied into concrete, compared with gravel scattered on top. Loose particles are passengers in a film. Bonded ones carry load, from primer right through to topcoat.
  • A primer that fills, not just coatsParticles that small can get into the open pores and micro fissures sanding leaves behind, which are the same routes oils and extractives use to migrate up into a finish. That is why Vibrant is the primer to look at on awkward species such as iroko, always with a test patch first.
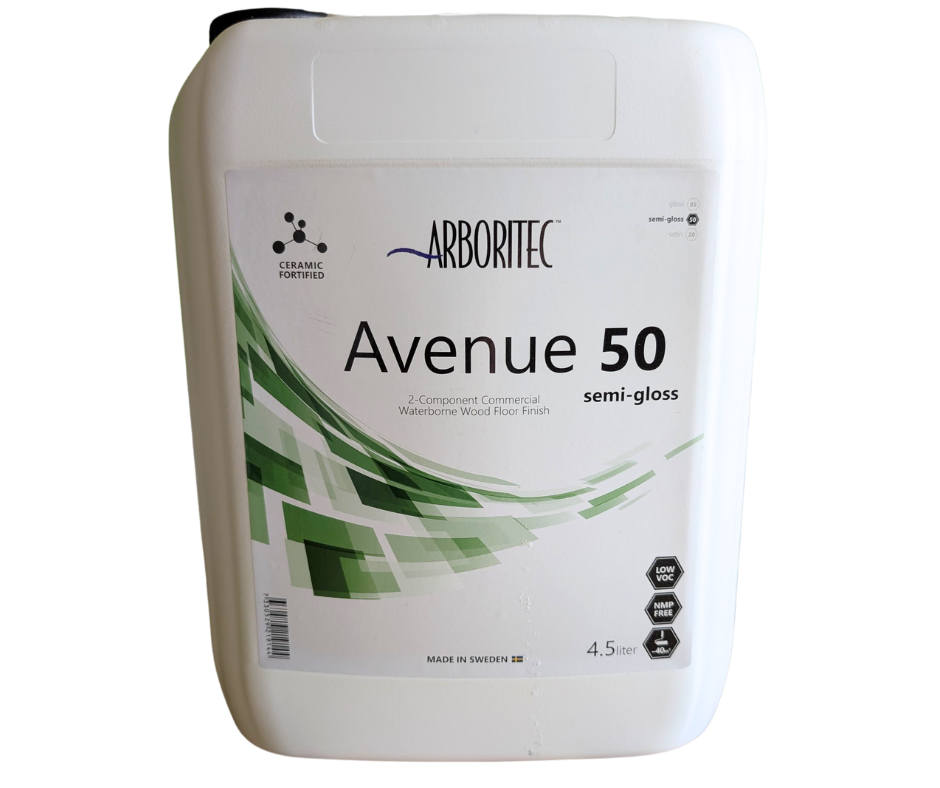
  • Crosslinking for toughnessAvenue 2K and Genuine 5 use Dual Cure Technology: water evaporates to form the film while the hardener crosslinks the resin into a tougher, more chemically resistant network. Classic+ is a 1K with a built in ADH crosslinker, so it keeps crosslinking as it cures without any mixing.
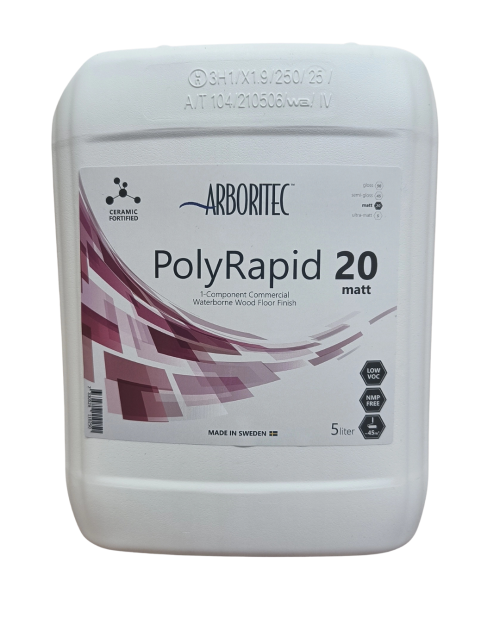
  • More build per coatPolyRapid shares the Classic+ formulation at a higher viscosity, so each coat lays down a thicker wet film. That makes a full system of primer plus two coats of PolyRapid.
Most primers coat the wood. Arboritec's primer fills it.

Question fourWho answers when something goes wrong?

  • One point of accountability. HF Flooring Supplies is Arboritec's sole UK distributor, so there is no chain of resellers passing your question along.
  • People who do the job. You speak to people who sand and finish floors themselves.
  • A short line to the chemist. Anything we cannot answer goes directly to Arboritec's technical and R&D staff in Sweden. When a job throws up an unusual timber, an old contaminated floor or an odd reaction, that matters more than any promise on a label.

Question fiveWill the maker invest in you?

This is the hardest signal to fake. Anyone can say they are committed to the UK market. Flying senior people over to train contractors in person costs real time and money, and that tells you far more about how long a manufacturer plans to be here than any words could.

Arboritec training course, 4 and 5 February 2027

Arboritec's CEO, two of its technical team and its R&D manager will be in the UK for a two day wood floor coatings course run through HF. Contractors who complete it can join the Arboritec endorsed Approved Applicator register. Places are limited, so contact us to register your interest.

04
The cost

The price question: count it differently

The price per tin is the wrong way to judge any finish. Work it out per square metre, then per year of wear. The finish is a small part of the cost of a sanding job, yet it is the only part the client touches every day for years. A finish that holds up longer between recoats, and keeps callbacks away, is cheaper in the way that matters to your business.

  • Arboritec First Coat waterborne wood floor primer, 5L
    PrimerFirst CoatNano ceramic primer for most timbers£82.37 + VATTrade price shown after loginView product
  • Arboritec Vibrant deep ambering wood floor primer, 3.78L
    PrimerVibrantDeep ambering primer for awkward species£71.79 + VATTrade price shown after loginView product
  • Arboritec PolyRapid high build 1K wood floor lacquer
    1K lacquerPolyRapidHigh build 1K, primer plus two coats£102.31 + VATTrade price shown after loginView product
  • Arboritec Avenue 2K waterborne wood floor lacquer for heavy traffic
    2K lacquerAvenue 2KDual cure for the heaviest traffic£132.69 + VATTrade price shown after loginView product

Prices shown are our standard prices. Trade account holders see lower trade pricing once logged in.

Trade customers

Your trade price is lower

Open a free trade account to see trade pricing across the full Arboritec range when you log in.

Open a trade account
05
For contractors

How to find out for yourself

Certainty you have earned yourself is worth more than anything we can tell you. Here is a simple way to get it.

  1. Order for a job you know well. Pick a hallway or kitchen where wear shows quickly, and order the system online.
  2. Make a sample board. Finish one half with Arboritec and the other with your usual system, following each technical data sheet.
  3. Test it yourself. Once fully cured, drag keys across it, leave a damp glass on it overnight and try a drop of red wine. Use whatever your clients actually put their floors through.
  4. Show the client. Let them see the board and hear why you chose the finish. A contractor who has done the test has something better than a brand name to point to.
  5. Go back and look. Revisit the floor after a few months of traffic and judge it on how it has worn.

Want to see finished floors first? Our case studies show real jobs by named contractors.

06
For homeowners

If you are a homeowner reading this

You do not need to understand lacquer chemistry to make a good choice. Ask your floor sander three things.

  • Which exact finish, and how many coats? A good contractor will answer without hesitating.
  • Why did you choose it for this room? A busy kitchen or hallway needs a tougher finish than a bedroom.
  • What training have you had in applying it? Manufacturer training shows they have invested in doing the job properly.

If you would like an Arboritec finish on your floor, ask your floor sander about it, or contact us and we will help where we can. Still deciding on the type of finish? Our guide to oiled versus lacquered wood floors explains the difference.

07
Conclusion

Certain before it goes down

The key takeaways

  • People choose the finish they are most certain is good, not the one they think is best, and that is a sensible way to decide.
  • The words on the tin cannot give you certainty, because every tin says the same thing.
  • Five questions cut through the claims: who makes it, what is in it, how it works, who supports it, and whether the maker invests in you.
  • Arboritec answers all five: Swedish floor finish chemistry since 1999, open data, bonded nano ceramic and crosslinking chemistry, a single UK distributor with a direct line to R&D, and manufacturer led training.
The question was never which lacquer claims to be best. It is which one you can be certain of, and now you know how to check.

Try Arboritec on your next job

We are the sole UK distributor for Arboritec, with stock on the shelf and technical support from people who finish real floors. Log in to see your trade price.

  • Orders placed Mon to Fri before 2PM are dispatched the same day for next working day delivery
  • Not sure which Arboritec system suits a job? Contact us
Questions

Choosing a wood floor lacquer

How do I choose a wood floor lacquer?

Look past the claims on the tin and ask five questions. Who makes it and for how long? What is in it, and are the SDS and TDS available? How does the chemistry resist wear? Who gives technical support when something goes wrong? Does the manufacturer offer training? A finish that answers all five clearly is one you can be confident in. Then make a sample board and test it yourself before using it on a paying job.

Is Arboritec a reliable brand?

Arboritec has been developing professional floor finishes in Sweden since 1999, when its first products were developed under the Nanofloor name. It is owned by the Swedish industrial group Röko, and in 2019 it took over Synteko, a Swedish floor finishes business founded in 1944. HF Flooring Supplies is the sole UK distributor and provides technical support with a direct line to Arboritec's R&D team.

What makes Arboritec lacquer different from other waterborne lacquers?

Arboritec primers and lacquers contain ceramic particles under 14 nanometres across that bond chemically into the resin as it cures, rather than sitting loose in the film. The 2K lacquers, Avenue 2K and Genuine 5, add Dual Cure Technology, where a hardener crosslinks the resin for extra chemical and abrasion resistance. Classic+ uses a built in ADH crosslinker to toughen a 1K finish without mixing.

Which Arboritec lacquer should I use for a busy kitchen or hallway?

For the heaviest residential and commercial traffic, Avenue 2K is the usual choice because its hardener crosslinks the film for the highest chemical and abrasion resistance in the range. For a ready to use 1K, Classic+ or PolyRapid works well, with PolyRapid laying a thicker film per coat. Use an Arboritec primer underneath, and choose Vibrant on oily or extractive rich timbers such as iroko, with a test patch first.

Is a more expensive floor lacquer worth it?

Judge a lacquer by its cost per square metre and per year of wear, not per tin. The finish is a small part of the total cost of a sanding job but takes all the wear afterwards. A finish that lasts longer between recoats and avoids callbacks usually costs less over the life of the floor.

I am a homeowner. What should I ask my floor sander about the finish?

Ask which exact finish and how many coats they plan to use, why they chose it for your room, how to clean and maintain it, and what training they have in applying it. A professional should answer all of these clearly. The finish is the layer that takes the wear, so it matters as much as the sanding.

Where can I buy Arboritec in the UK?

HF Flooring Supplies is the sole UK distributor of Arboritec. The full range, including First Coat and Vibrant primers, Classic+, PolyRapid, Avenue 2K, Genuine 5, Genuine Naked and Nordic Elastic, can be ordered online from hfflooringsupplies.co.uk, with next working day delivery on orders placed Monday to Friday before 2pm.

Posted on — Leave a comment

Nobody Ever Got Fired for Buying the Big Brand: What Rory Sutherland Teaches Us About Wood Floor Lacquer

It is nine at night, you are ordering for next week's job, and you have three lacquers open in different browser tabs. You add the one you always add to the basket. Not because you have tested it against the other two, but because if anything goes wrong, nobody will blame you for choosing it.

That instinct is completely normal, and many of our customers have described it to us in almost those words. It is also the biggest reason Arboritec wood floor lacquer is still a name many UK contractors have not tried, despite decades of professional use in Sweden and beyond.

One person has spent a career explaining why people make choices like this. Rory Sutherland, vice chairman of Ogilvy UK and author of the book Alchemy, argues that human decisions run on psychology far more than on logic. This article looks at three of his ideas, shows how each one plays out in the way floor finishes get chosen, and explains how HF Flooring Supplies is making Arboritec the safe choice as well as the better one.

The short version

  1. Satisficing: when we are uncertain, we pick the option that is good enough and unlikely to get us blamed, not the best one.
  2. Signalling: effort, cost and commitment build trust in a way words cannot. Training and endorsement are hard to fake.
  3. Perception: what something means to us matters as much as what it does. Unfamiliar can mean distinctive, once it is framed properly.

Good chemistry earns a place on the floor. It also has to feel safe to choose.

01
The thinker

Who is Rory Sutherland, and why does he matter to your floor?

Sutherland is one of the best known figures in British advertising. His central argument is that the most effective solutions to business problems often look illogical on a spreadsheet, because the people buying things are not spreadsheets. In Alchemy he groups the hidden reasons behind our choices into a handful of themes, including:

  • SatisficingWhen we are uncertain, we do not hunt for the best option. We pick one that is good enough and unlikely to embarrass us. The term comes from the economist Herbert Simon, and Sutherland returns to it often.
  • SignallingEffort, cost and commitment communicate trust in a way that words cannot.
  • PerceptionWhat something means to us can matter as much as what it physically does.

Every one of those is at work every time a contractor chooses a lacquer, and every time a homeowner agrees to it.

02
Satisficing

Why the safe choice wins

There is an old saying from the computer industry that nobody was ever sacked for buying IBM. IBM never used it as a slogan, yet Sutherland points out it became one of the most powerful marketing ideas ever, because it spoke to what buyers really feared. They were not trying to buy the best computer. They were trying to avoid being blamed.

Floor finishing works exactly the same way.

  • Blame is lopsidedIf a famous brand fails, it is bad luck. If an unfamiliar brand fails, it is your judgement that gets questioned.
  • The downside is visible, the upside is notA floor that fails costs you a callback and your reputation. A floor that wears a bit better than expected rarely earns a thank you.
  • Familiarity feels like evidenceSeeing a brand at the top of every search and listed by every online supplier feels like proof it works, even though that tells you about marketing budget and distribution, not chemistry.
So the real barrier for a better product is not proving it performs. It is removing the fear of being the person who tried something new.
03
Signalling

The black cab lesson

One of Sutherland's favourite examples of signalling is the London black cab. To get a licence, drivers spend years learning around 25,000 streets for the Knowledge. A sat nav could do the routing, but that is not the point. The sheer cost of qualifying tells you something about the person driving: they are committed, and they are not going anywhere.

Contractors send signals to clients all the time, whether they mean to or not.

Cheap signalCostly signal
Saying you use quality productsNaming a specialist system and explaining why you chose it
A logo on the vanFormal training with the manufacturer's own technical team
A low quoteA clear specification of coats, build and cure
Saying you know your stuffBeing on a manufacturer endorsed register

The cheap signals are easy for anyone to copy. The costly ones are hard to fake, which is why they are a far better guide for a homeowner deciding who to trust with their floor, and a far better way for a good contractor to stand out.

04
Perception

What Red Bull teaches us about being unfamiliar

Sutherland opens Alchemy with Red Bull. Before launch, it reportedly scored the worst taste test results the research agency had ever seen. It was expensive and came in a small can. By any logical measure it should have failed. Instead, those odd features made people believe it was potent, and it became one of the most successful drinks in history.

The lesson for flooring is not that a product should be unpleasant. It is that the features which look like weaknesses on paper can become strengths once you frame them properly. Being unfamiliar is one of those.

  • Unfamiliar means distinctiveYour client's neighbour did not get this finish on their floor. That makes your work stand apart.
  • A specialist import suggests specialist knowledgeA Swedish professional finish, sourced through a single UK distributor, tells the client you went looking for the right product rather than grabbing the nearest one.
  • A reason is worth more than a recognised nameA contractor who can explain why they chose a finish, and what it does on this floor, is showing real knowledge. Recognising a logo is not the same thing.
05
The solution

Making Arboritec the safe choice

Good chemistry earns a place on the floor. Sutherland's point is that it also has to feel safe to choose. Here is how both halves come together.

Part oneHow the chemistry works

  • Nano Ceramic FormulaArboritec lacquers use 12 nanometre ceramic silica particles that are surface treated so they bond chemically into the polymer as the film cures, rather than floating in it as a loose filler. A loose particle is a passenger in the film. A bonded one is load bearing. That bonded ceramic content runs through the whole range, from primer to topcoat.
  • Dual Cure TechnologyAvenue 2K and Genuine 5 2K are two component lacquers, mixed with a hardener just before use, and they cure in two ways at once. Water evaporates to form the film, while the hardener (Part B) crosslinks the resin into a tougher, more chemically resistant network.
  • Self crosslinking in a 1KClassic+ contains a built in ADH crosslinker, so it keeps crosslinking as it cures instead of relying on drying alone. That narrows the gap between a convenient 1K, single component and ready to use from the tin, and a full 2K system.

Part twoHow we remove the risk

  • Unfamiliar does not mean new. Arboritec was founded in 1999 in Jörlanda, on Sweden's west coast, and developed its first products under the Nanofloor name, after the ceramic technology it was built on. It is owned by the Swedish industrial group Röko, and in 2019 it also took over Synteko, a Swedish floor finishes business founded in 1944. The name may be new to the UK trade, but the chemistry and the company behind it are well established.
  • One UK distributor, one point of accountability. HF Flooring Supplies is Arboritec's sole UK distributor, so there is no chain of resellers between you and the people who know the product.
  • Technical backup from people who sand floors. Our team has hands on contracting experience and a direct line to Arboritec's own technical and R&D staff in Sweden.
  • Training with the manufacturer. Arboritec training courses run through HF, with Arboritec's own technical team in the room.
  • An Approved Applicator scheme. Contractors who complete the training can join an Arboritec endorsed Approved Applicator register. That is the black cab signal, applied to wood floors.
Next Arboritec training course

Our next wood floor coatings course runs on 4 and 5 February 2027, with Arboritec's technical and R&D team attending. Places are limited, so contact us to register your interest.

06
For contractors

How to present it to your client

  1. Name the system. Tell the client exactly which Arboritec products are going on and how many coats.
  2. Explain one feature in plain English. Pick the Nano Ceramic Formula or the dual cure, and describe what it means for their floor.
  3. Show your credentials. If you are trained or approved, say so and show the certificate.
  4. Own the choice. Present it as a deliberate specification, not an alternative to a brand they know.

Real floors help too. Our case studies show finished Arboritec floors by named contractors, which you can share with clients who want to see the result before they agree.

07
For homeowners

If you are a homeowner reading this

You do not need to know lacquer chemistry to choose a good contractor. A few simple questions will tell you a lot.

  • Ask which finish they are using. A good contractor will name the exact product and number of coats without hesitating.
  • Ask why they chose it for your room. A busy kitchen or hallway needs a tougher finish than a bedroom, and they should be able to explain the difference.
  • Ask about training. Manufacturer training or an approved applicator certificate shows they have invested in doing the job properly.
  • Ask how to look after it. The right cleaning products and a recoat plan will keep the floor looking good for years.

Still deciding between a lacquered and an oiled finish? Our guide to oiled versus lacquered wood floors explains the difference.

08
Conclusion

Safe to choose, and better on the floor

The key takeaways

  • People choose to avoid blame more often than to find the best. Rory Sutherland calls this satisficing.
  • Costly signals such as training and endorsement build trust that words alone cannot.
  • Being unfamiliar can be a strength once it is framed as distinctive and deliberate.
  • Arboritec combines the Nano Ceramic Formula and Dual Cure Technology with UK distribution, technical support and training that take the risk out of switching.
Nobody ever got fired for buying the big brand. But nobody ever stood out for it either.

Give your next floor a finish that sets your work apart

We are the sole UK distributor for Arboritec, with stock on the shelf and technical support from people who finish real floors. Log in to see your trade price.

  • Orders placed Mon to Fri before 2PM are dispatched the same day for next working day delivery
  • Not sure which Arboritec system suits a job, or want to talk trade pricing? Contact us
Questions

Choosing Arboritec wood floor lacquer in the UK

Who is Rory Sutherland?

Rory Sutherland is vice chairman of the advertising agency Ogilvy UK and author of Alchemy, a book about why people make choices that look illogical but make psychological sense. His ideas on satisficing, signalling and perception explain a lot about why contractors stick with familiar products, and how a lesser known brand can earn trust.

Why do most UK contractors use the same few lacquer brands?

Mostly because those brands feel safe. They are listed everywhere and clients recognise them, so if something goes wrong the contractor is not blamed for the choice. That is a decision about avoiding risk, not proof that those products perform best.

Is it risky to use Arboritec wood floor lacquer if my client has not heard of it?

The risk is lower than it seems. Arboritec has been developing professional floor finishes in Sweden since 1999, it is owned by the Swedish industrial group Röko, and HF Flooring Supplies is its sole UK distributor, with technical support and manufacturer training available. Trial it first on a floor you know well and follow the technical data sheet.

How can I convince a client to accept a finish they do not know?

Name the exact system you are using, explain one feature such as the Nano Ceramic Formula in plain English, and show any training or approval you hold. Clients trust a contractor who has clearly chosen a specification on purpose far more than one who simply uses whatever came up first.

I am a homeowner. Should I ask my contractor which lacquer they are using?

Yes. A professional floor sander should be happy to name the exact finish, explain why it suits your room and tell you how to look after it. If they cannot, it is worth asking more questions before work starts. The finish is the layer that takes all the wear, so it matters as much as the sanding.

What is the Arboritec Approved Applicator scheme?

It is an Arboritec endorsed register for contractors who have completed Arboritec training through HF Flooring Supplies. It confirms the contractor has had technical training from the manufacturer in applying the products effectively, giving clients an independent signal of competence.

Where can I buy Arboritec wood floor lacquer in the UK?

HF Flooring Supplies is the sole UK distributor of Arboritec. The range, including Classic+, PolyRapid, Avenue 2K, Genuine 5, Genuine Naked and Nordic Elastic, is available to order online from hfflooringsupplies.co.uk, with next working day delivery on orders placed Monday to Friday before 2pm.
Rory Sutherland's ideas are discussed here as commentary. He is not connected with HF Flooring Supplies or Arboritec.

Posted on — Leave a comment

Limestone Floor Restored After 30 Years Under Carpet Glue

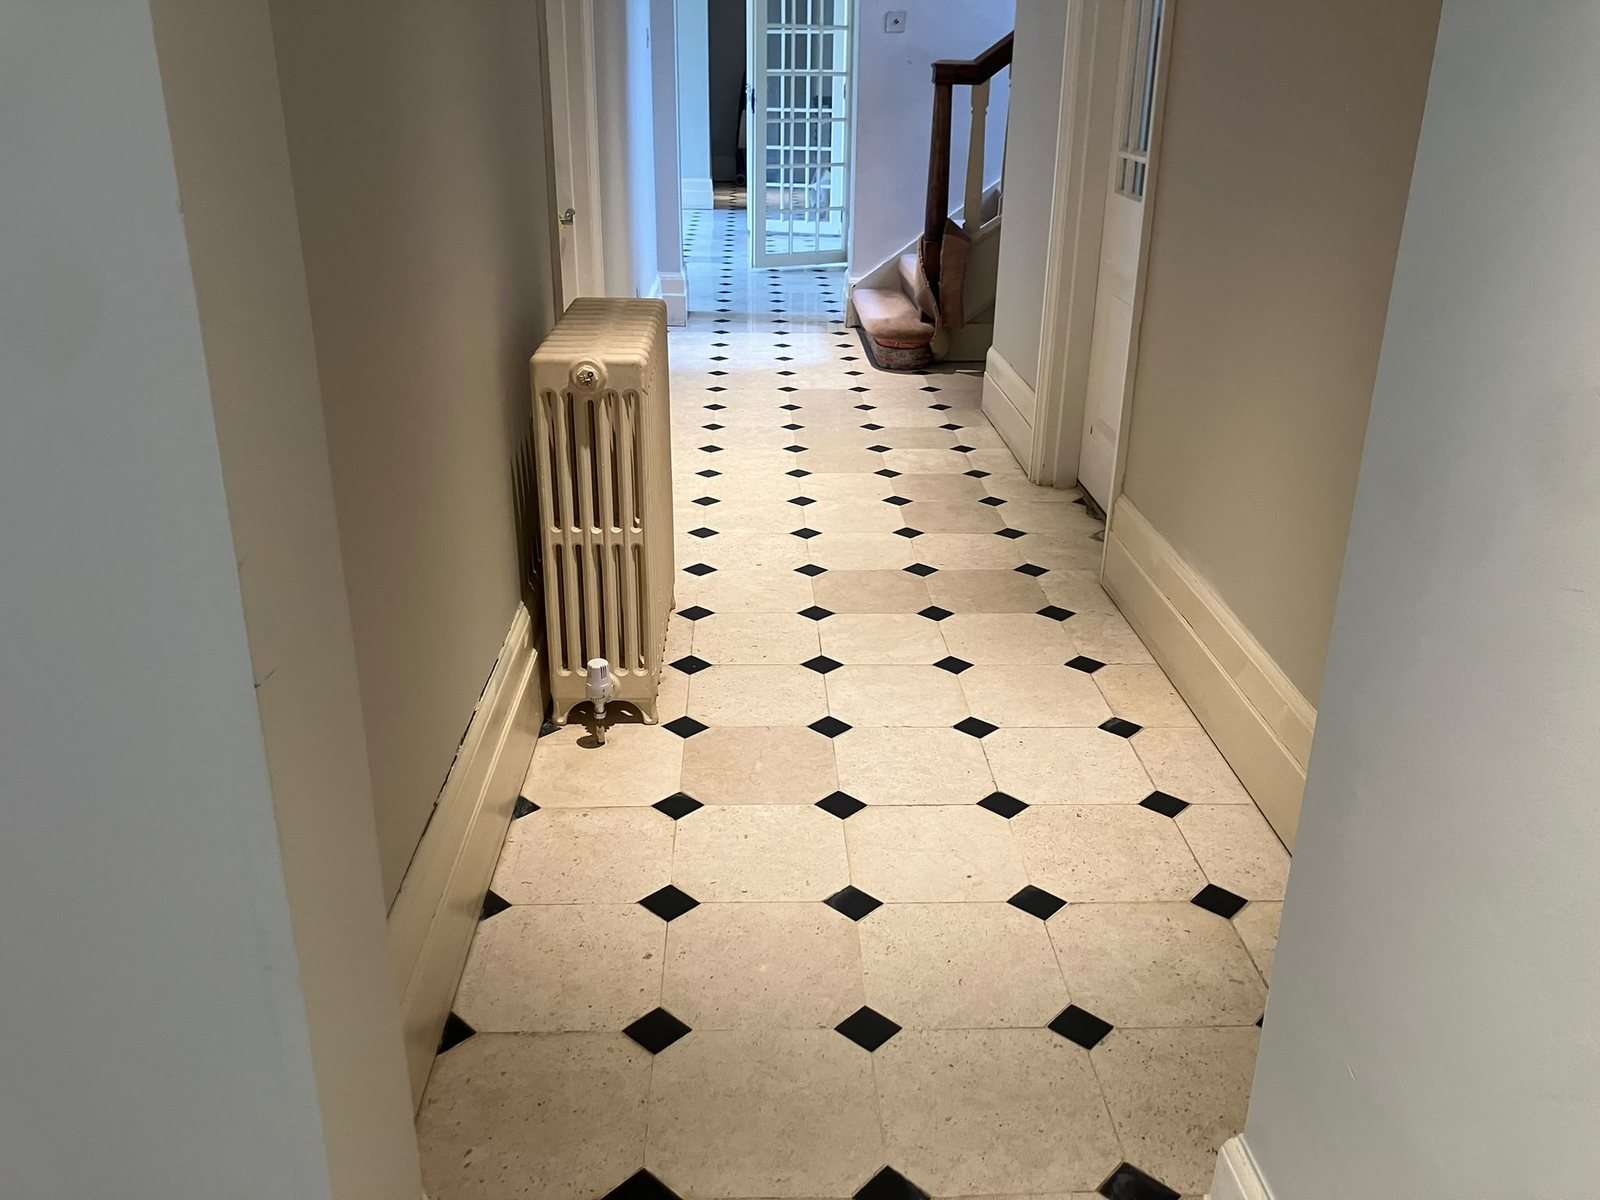
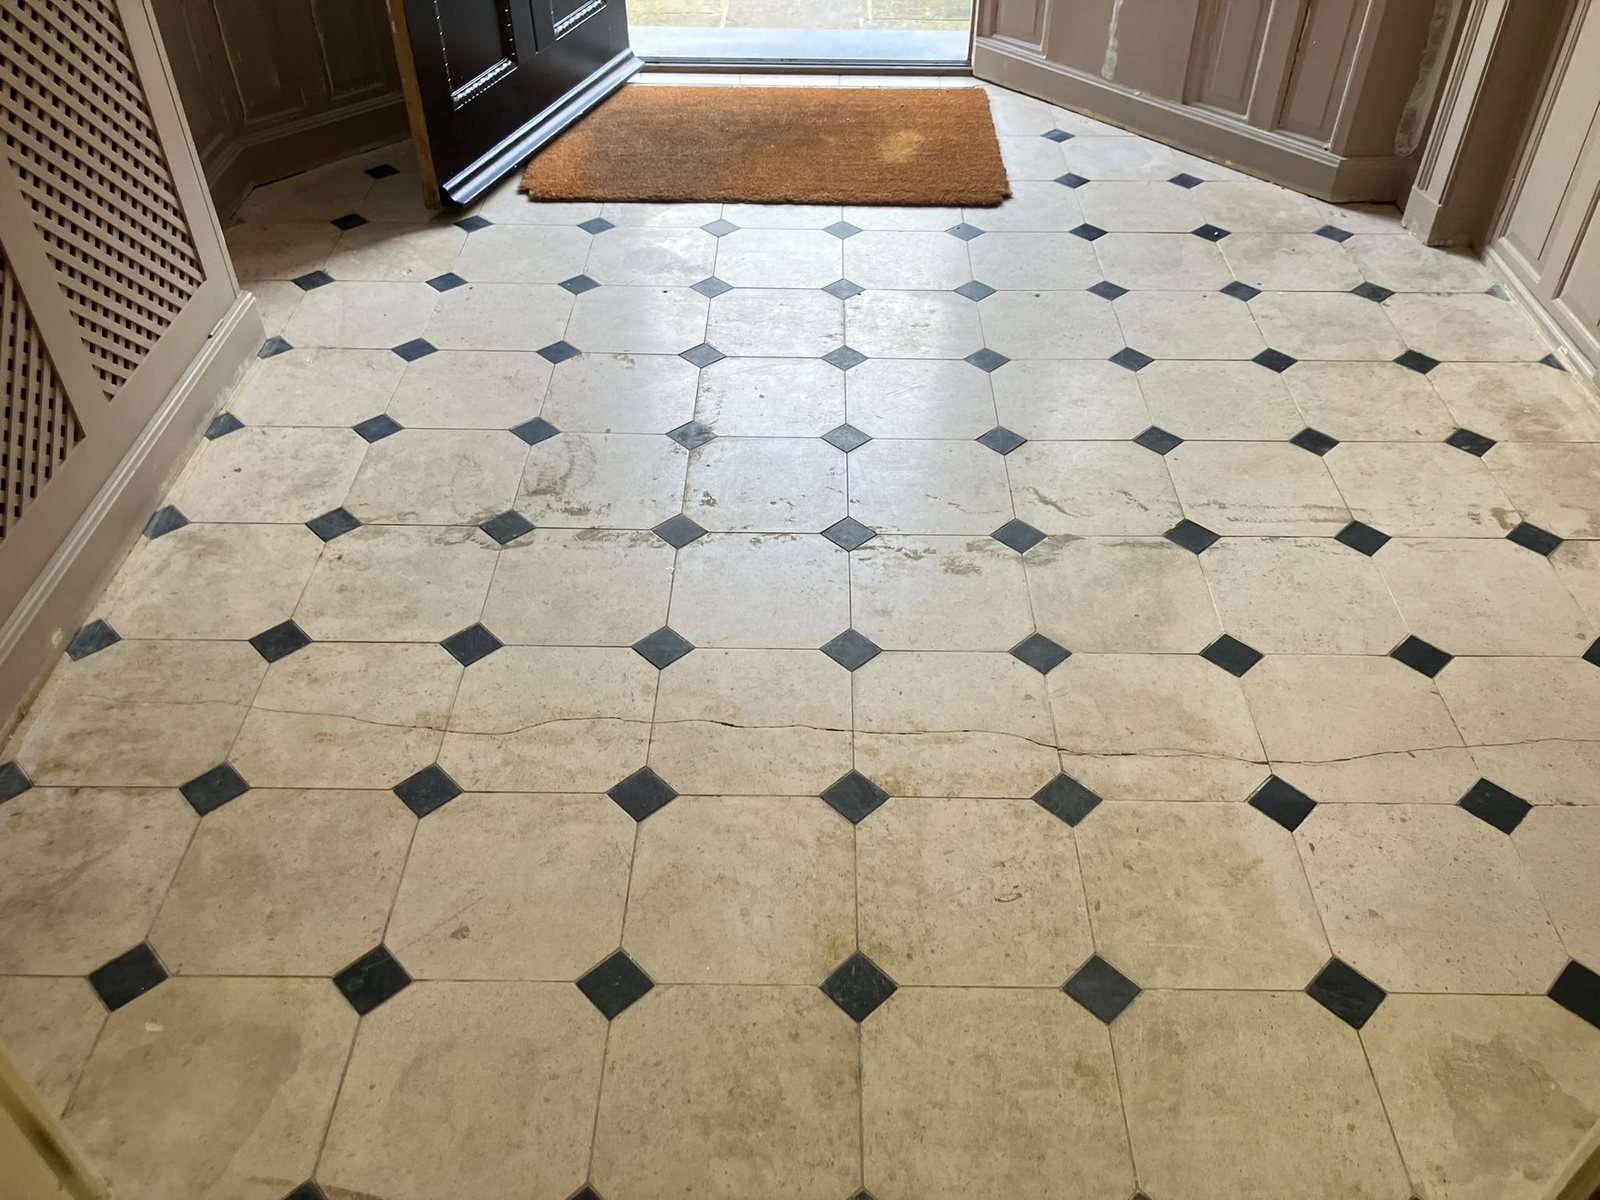
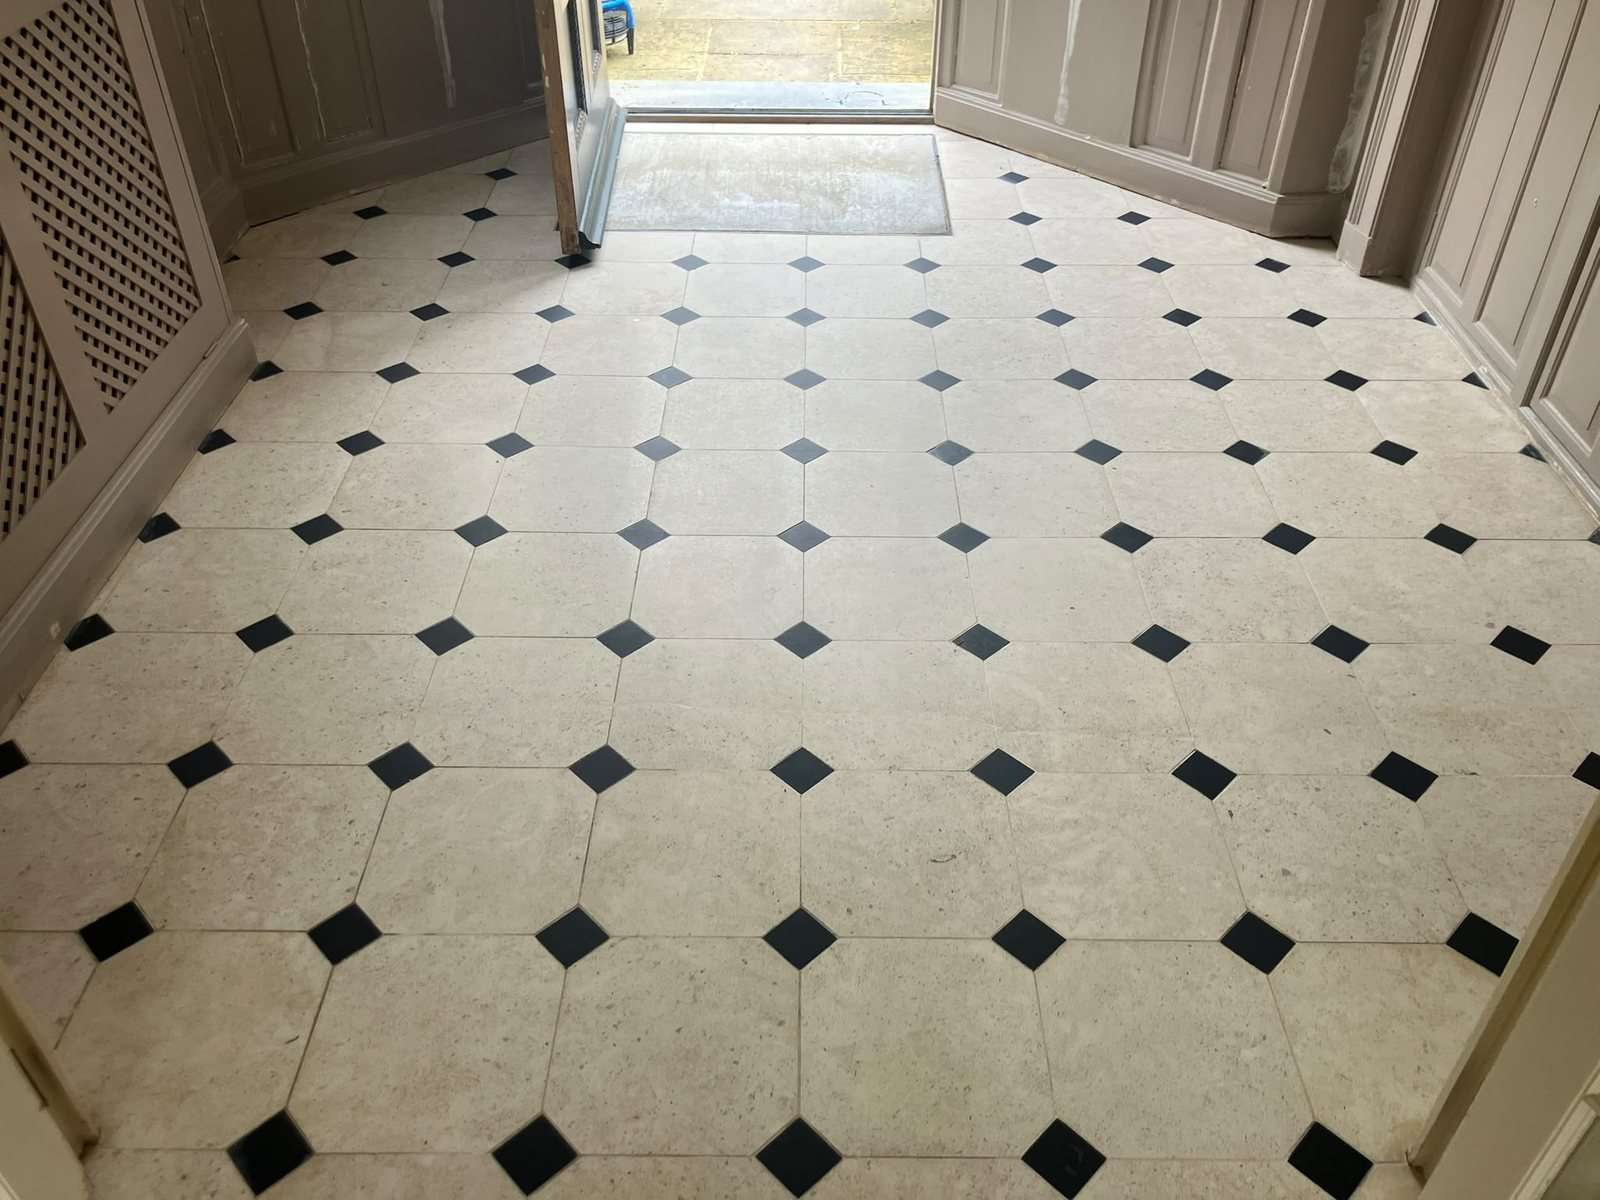
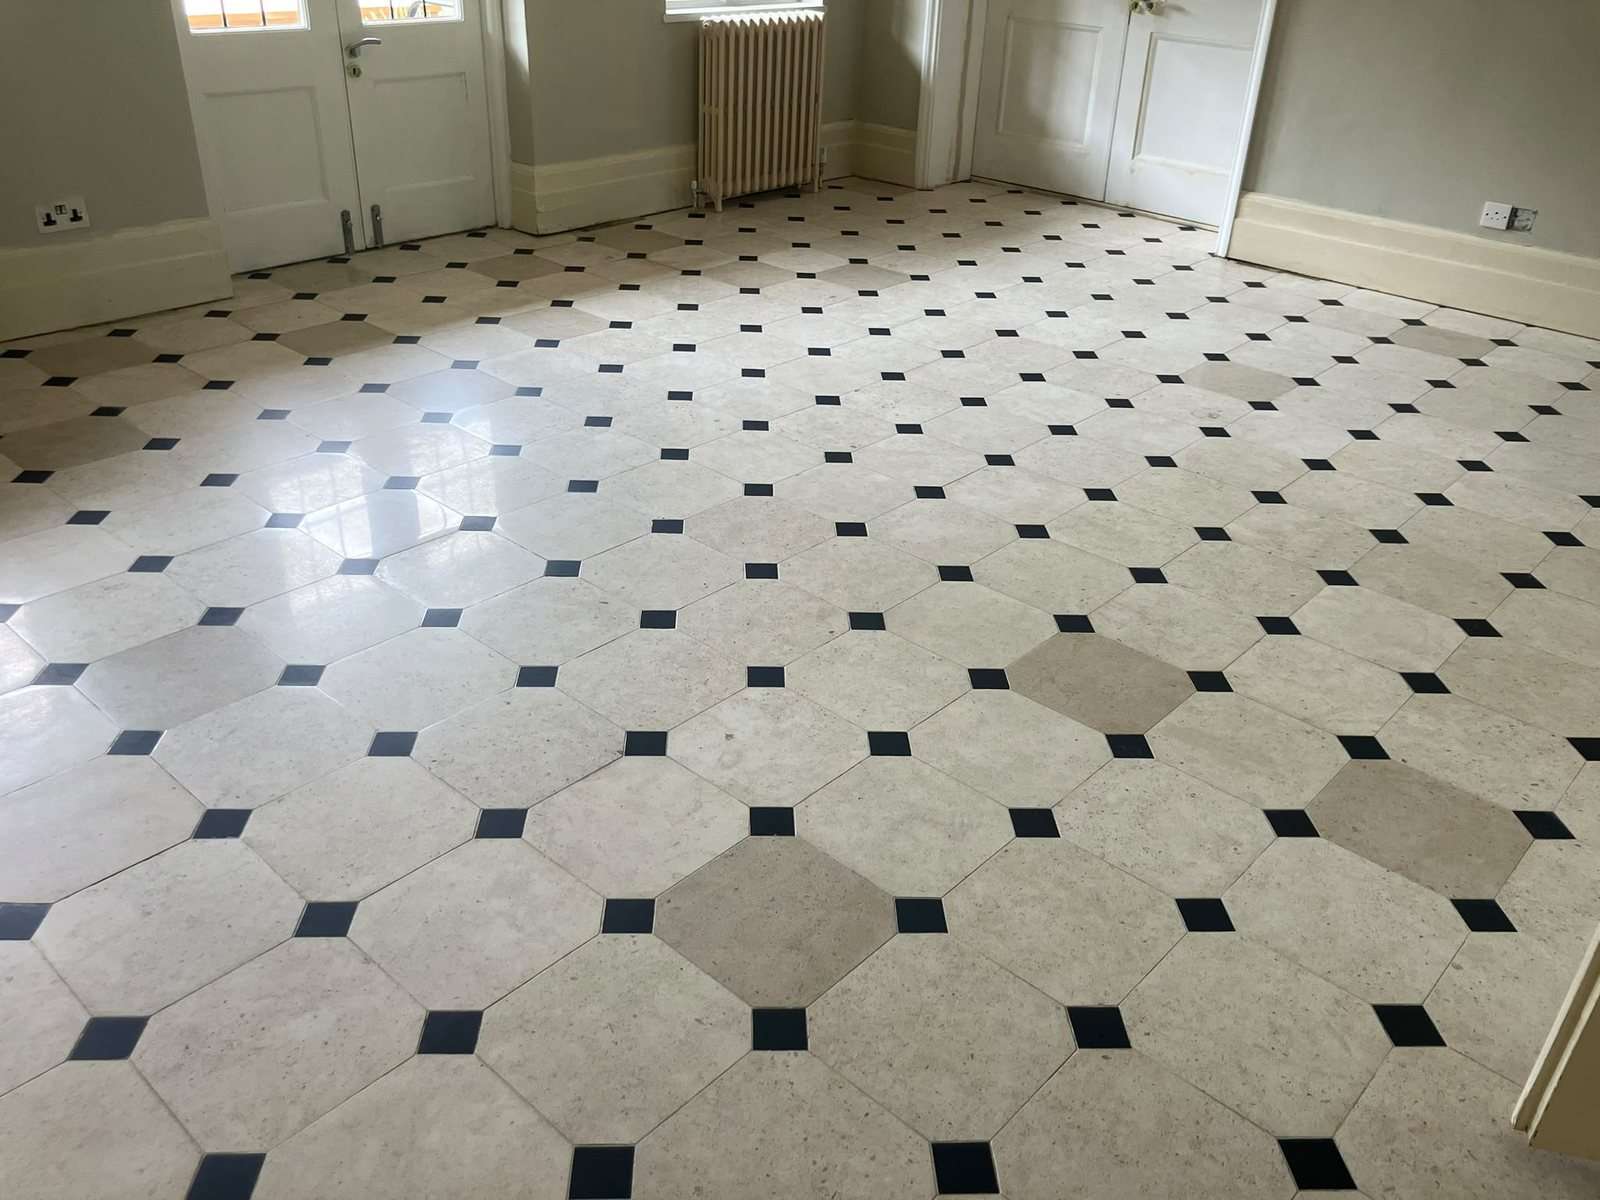
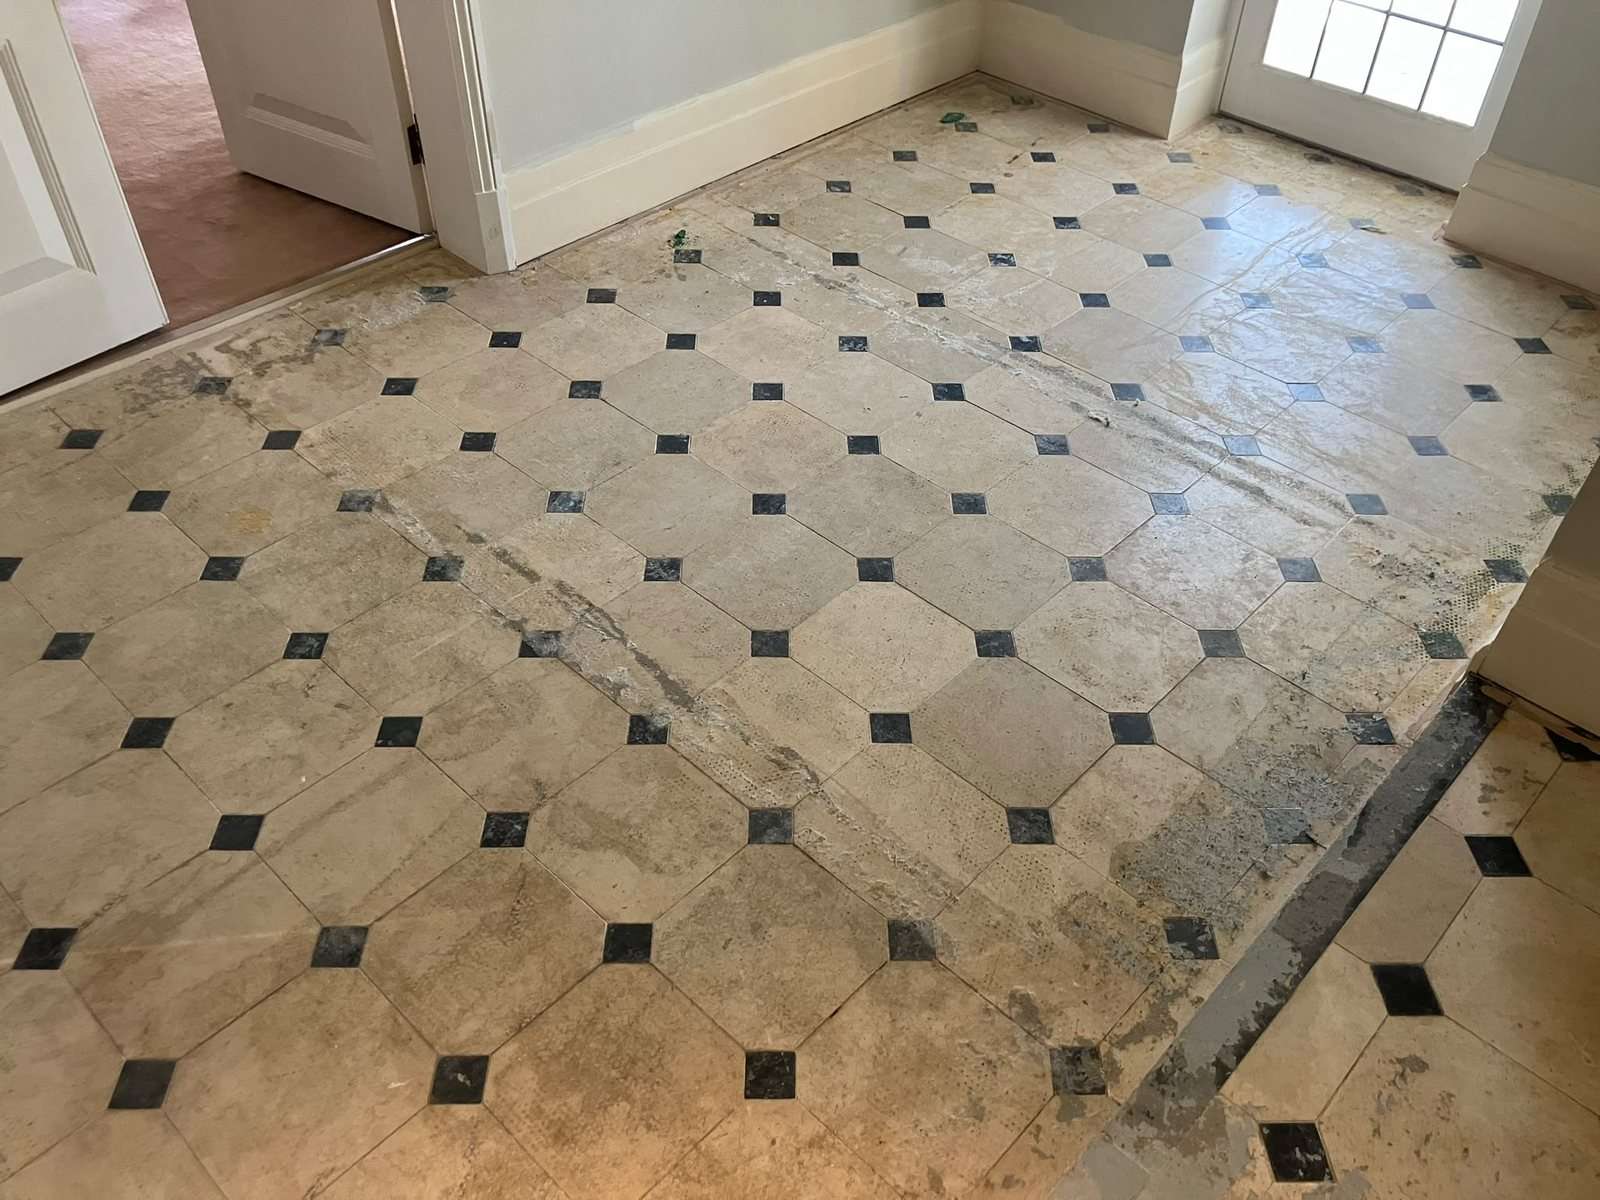
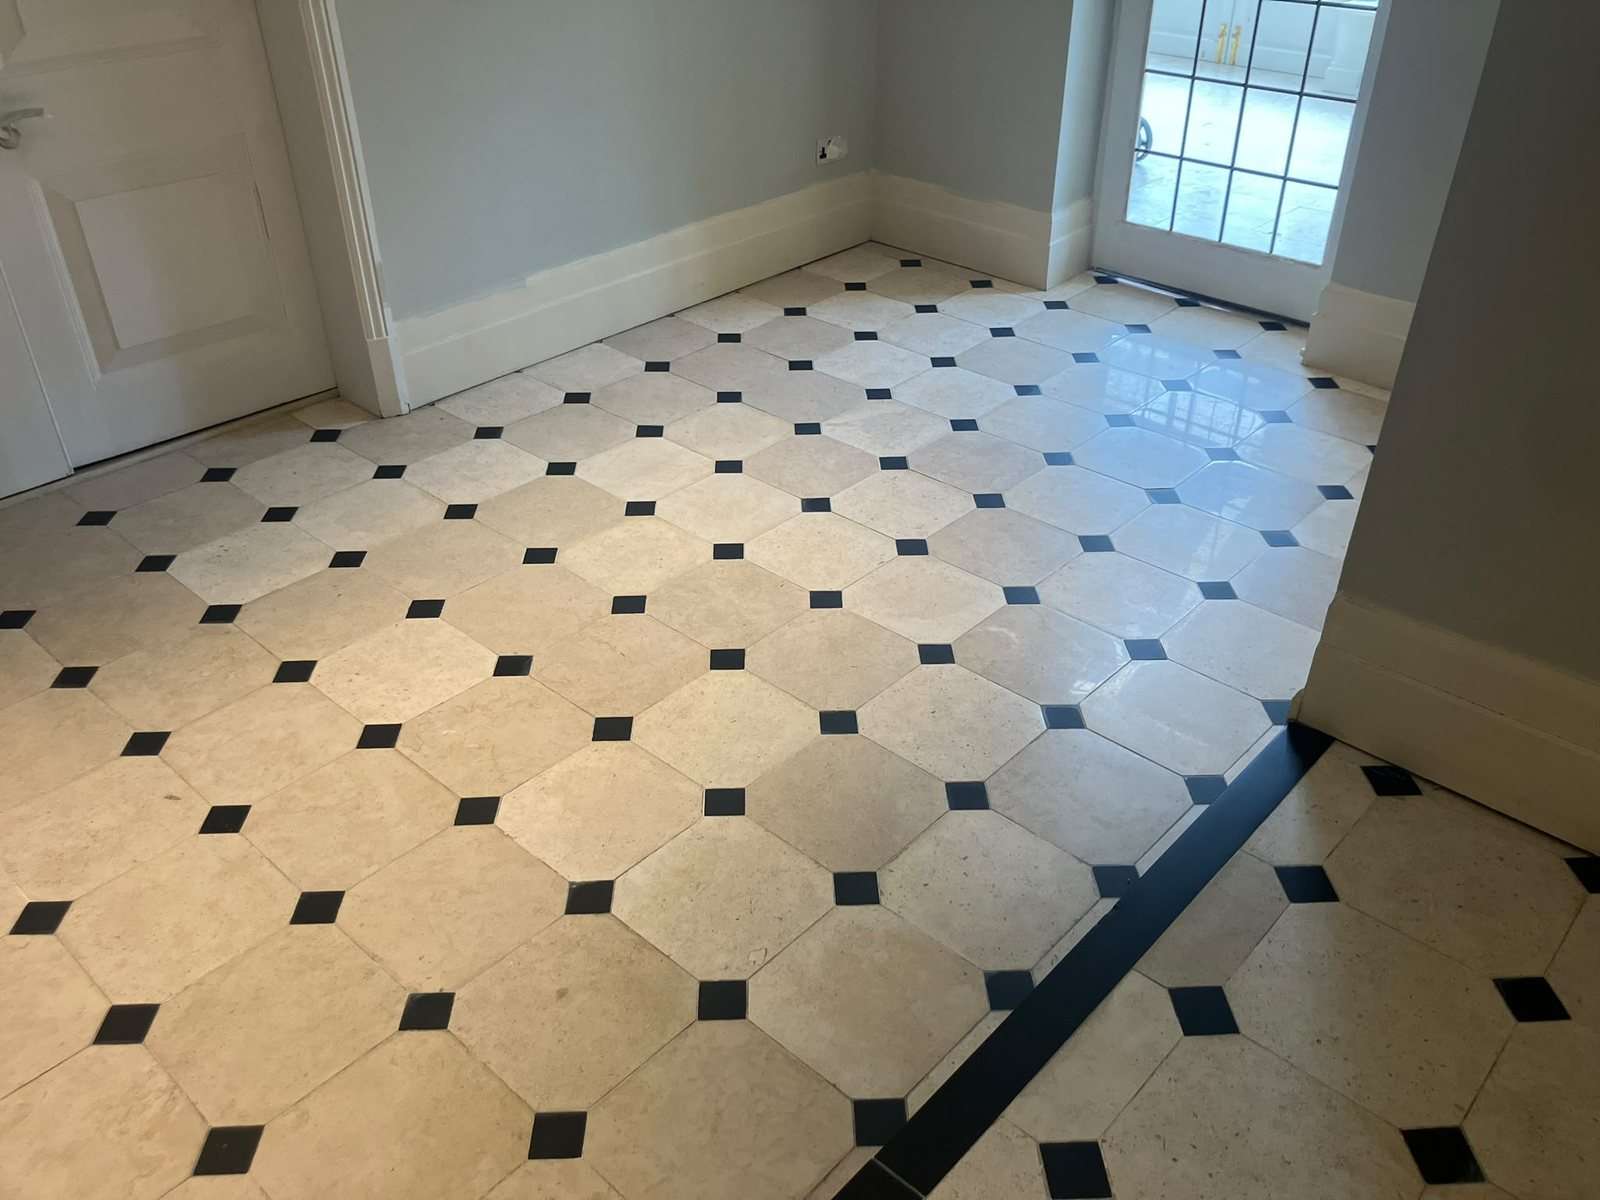
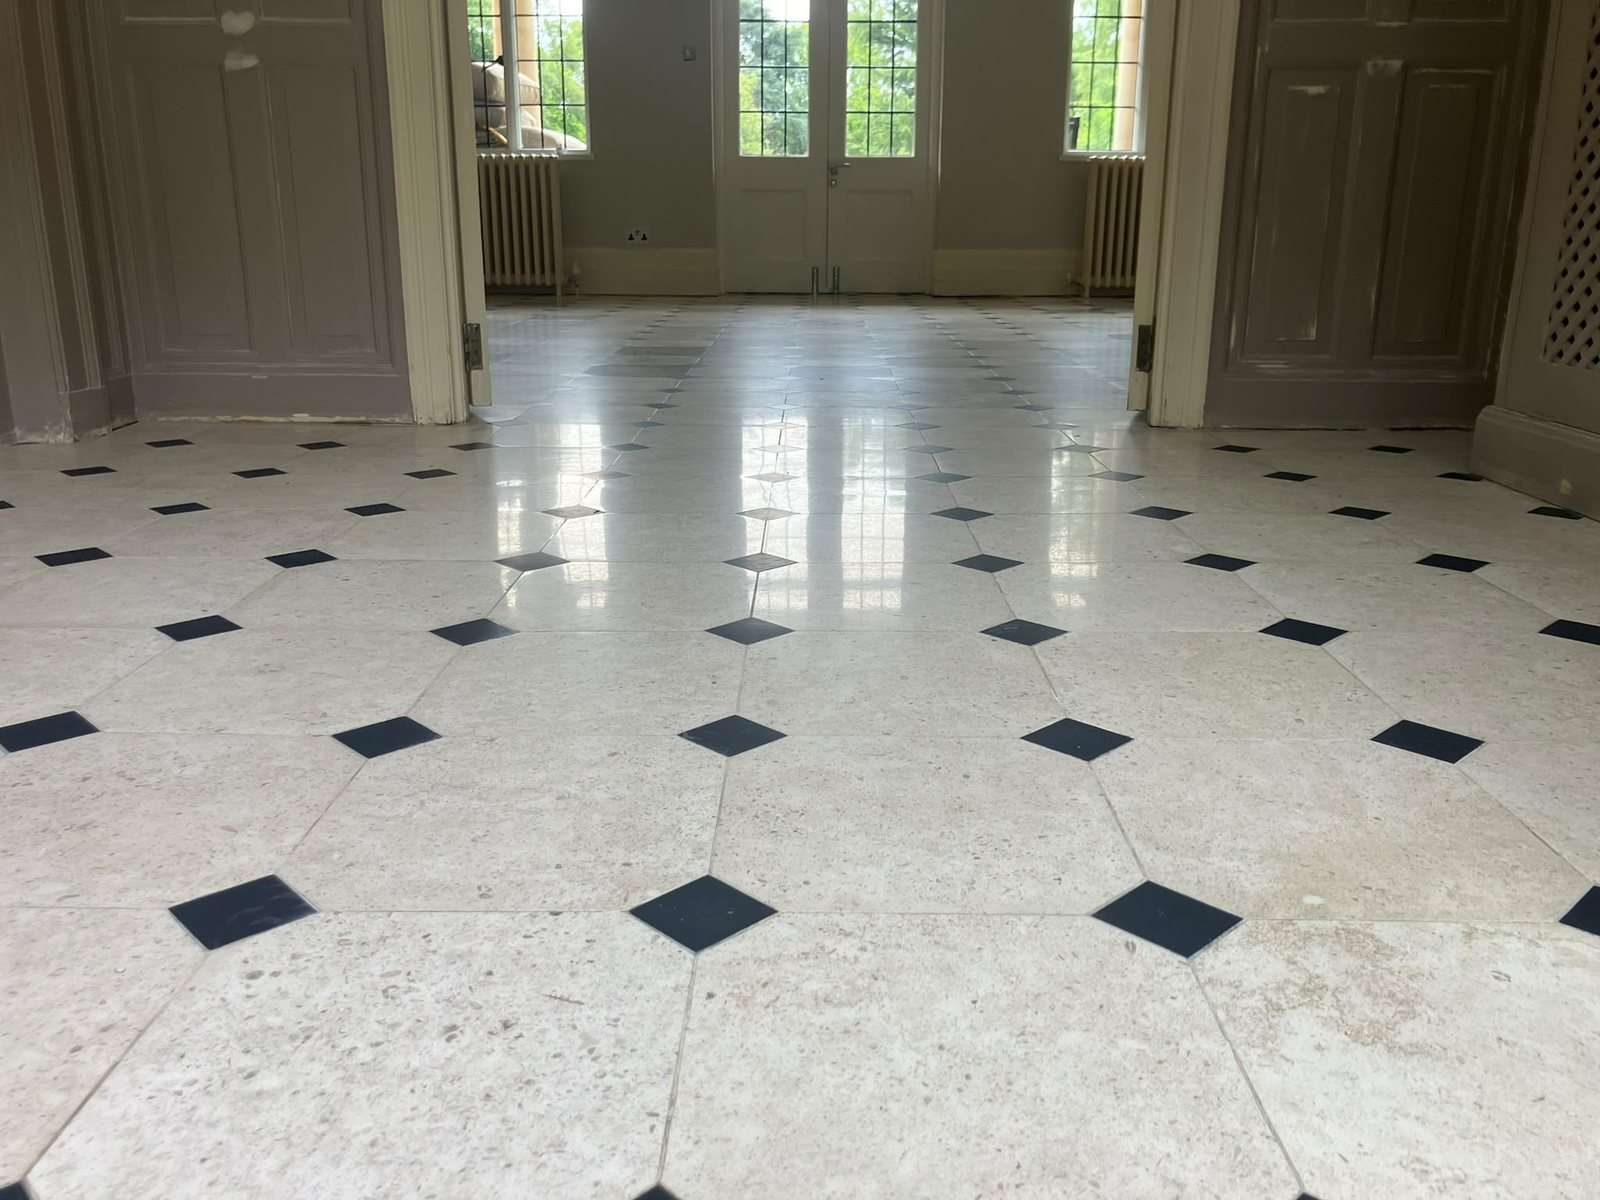
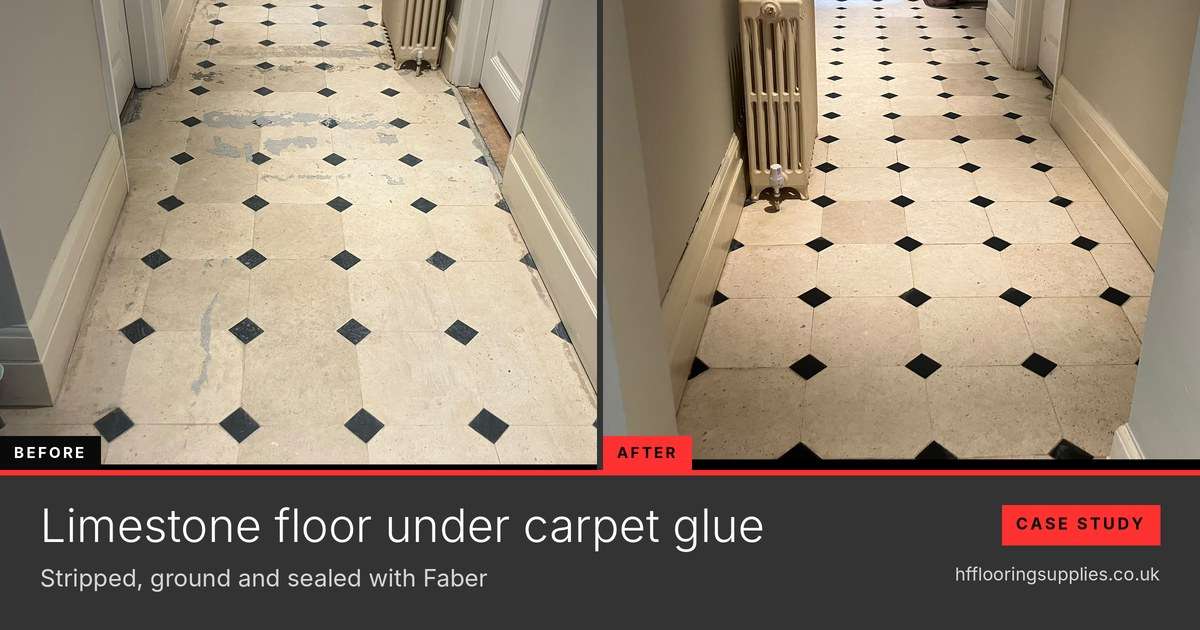
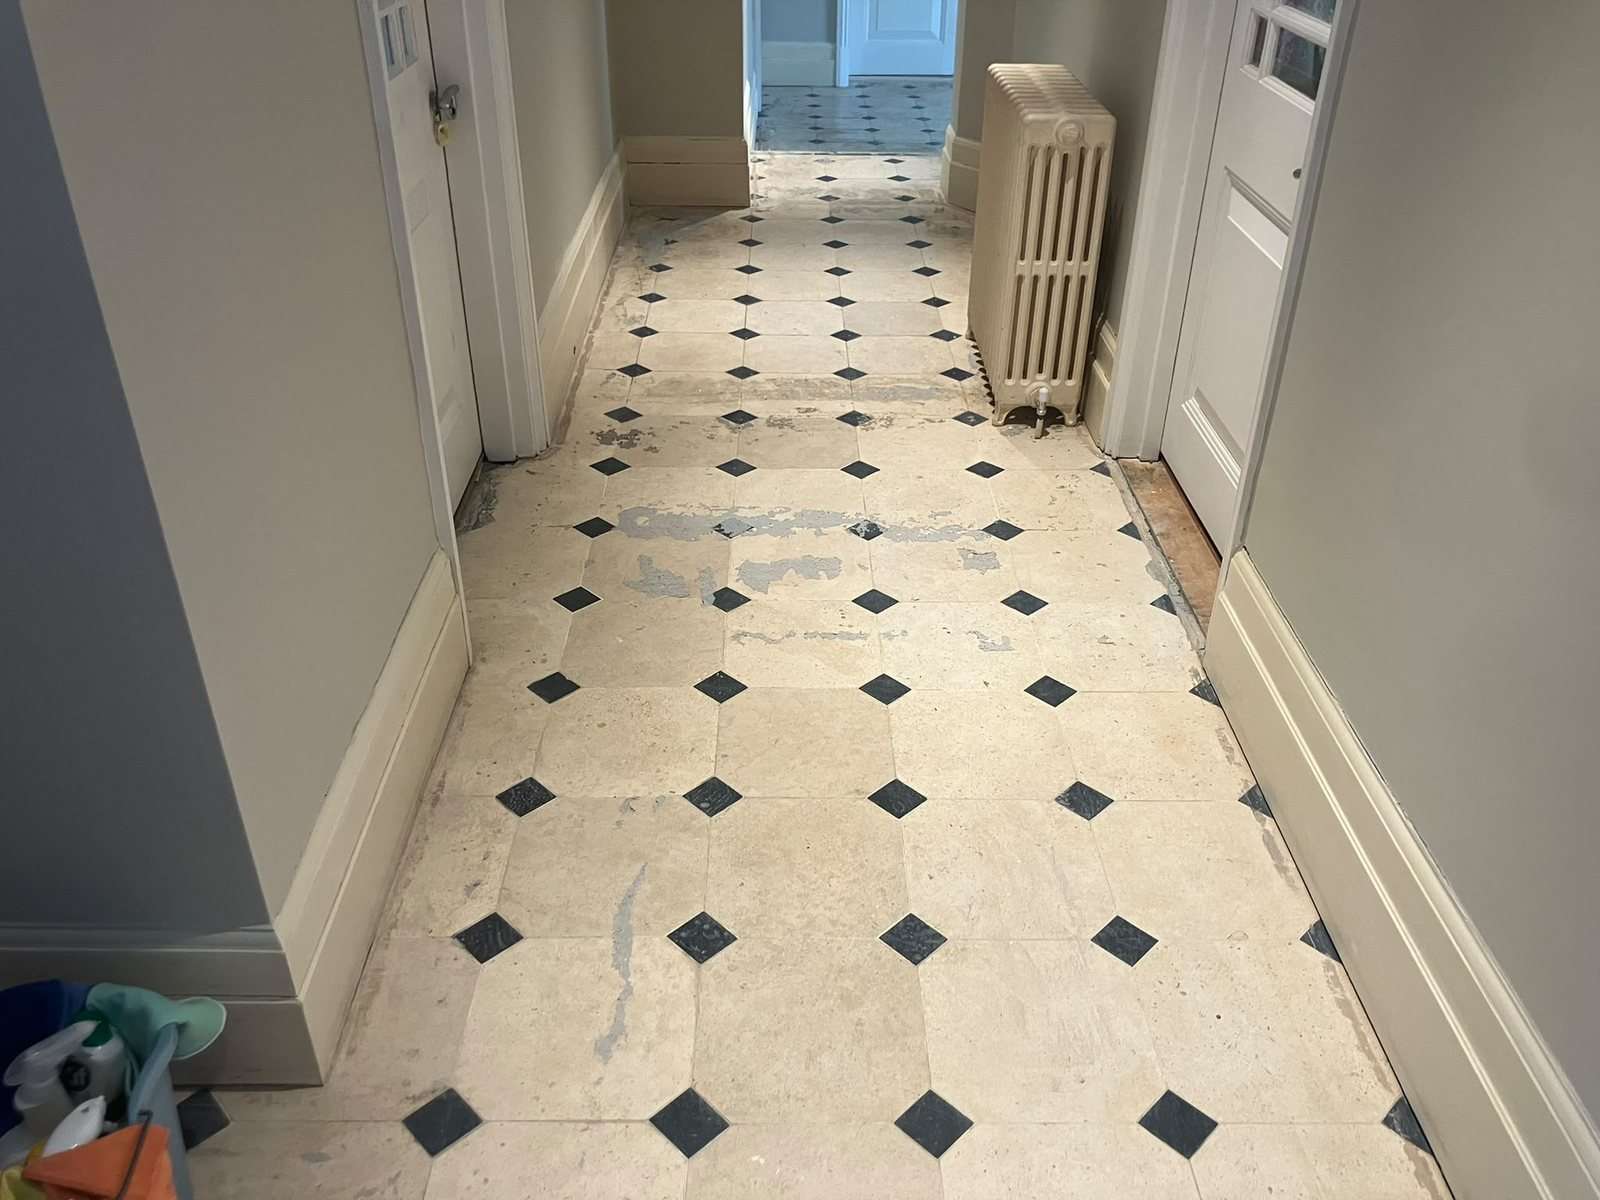
This limestone floor, with its classic pattern of black inset squares, had been hidden under carpet for more than 30 years. When the carpet came up, it left behind a thick layer of carpet glue, with three decades of dirt trapped between the glue and the stone.

Stonelab took it on. They stripped every trace of the glue, ground and resurfaced the floor through five grits to flatten it and bring up the sheen, filled the cracks with colour matched resin, and protected the finished stone with two coats of a water based impregnating sealer.

This case study covers what was done and why, the Faber products used at each stage, and how to look after a restored limestone floor. Every product is available from HF Flooring Supplies, with trade pricing for contractors.

Limestone hallway floor with black inset squares, covered in old carpet glue and grey residue
Before
The same limestone hallway after glue removal, grinding and sealing by Stonelab
After

The hallway before and after. Photos by Stonelab.

The floor
Limestone with black inset squares. Hallways, an entrance hall and the main rooms of the house.
The problem
Covered by carpet for over 30 years, leaving a thick layer of carpet glue and trapped dirt, plus cracks across the floor.
The fix
Scrape and chemically strip the glue, grind and resurface in five passes, fill the cracks, then seal with a water based impregnator.
The result
A flat, even limestone floor with a beautiful subtle sheen, and an ecstatic client.
Restored by
Stonelab, Cobham, Surrey

The short version

  1. Strip: scrape off as much hardened glue as possible, then soften the last layers with solvent based strippers and an epoxy remover so the residue scrapes away.
  2. Grind: resurface the stone in five passes, each at a finer grit, to flatten the floor and close the pores for a natural sheen. Fill cracks with colour matched resin and grind them flush.
  3. Seal: once the floor is properly dry, apply two coats of a water based impregnating sealer to protect the stone and make cleaning easier.

Limestone is acid sensitive. Test every product on a hidden area first and never use acidic cleaners on it.

  • StoneLimestone with black insets
  • Under carpetMore than 30 years
  • GrindingFive passes, finer each time
  • SealerTwo coats, water based
For contractors

Trade prices are lower than the retail prices shown

Every price in this case study is the retail price before VAT. Trade account holders see their own lower trade price on every product once logged in.

Open a trade account

The Faber products used on this floor

Six Faber products took the floor from glue covered to sealed. Aftercare products are at the end of this case study.

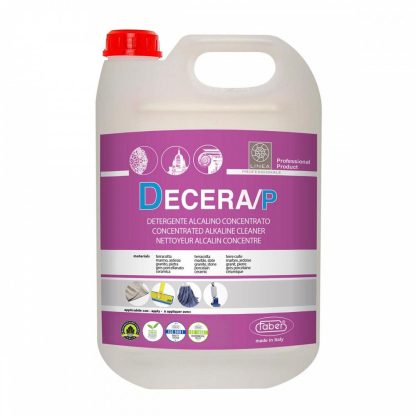
  • Faber Decera P concentrated alkaline cleaner
    StripFaber Decera PConcentrated alkaline cleaner for wax, resin and greasy residueRetail from £8.19 + VATTrade price: log in to see itView product
  • Faber Dec 21 wax and treatment remover
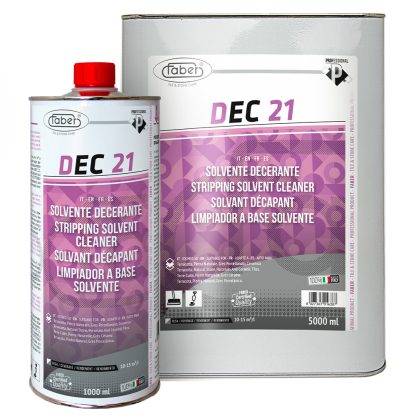
    StripFaber Dec 21Solvent based remover for wax, sealers and old treatmentsRetail from £12.05 + VATTrade price: log in to see itView product
  • Faber Epoxy Remover 750ml
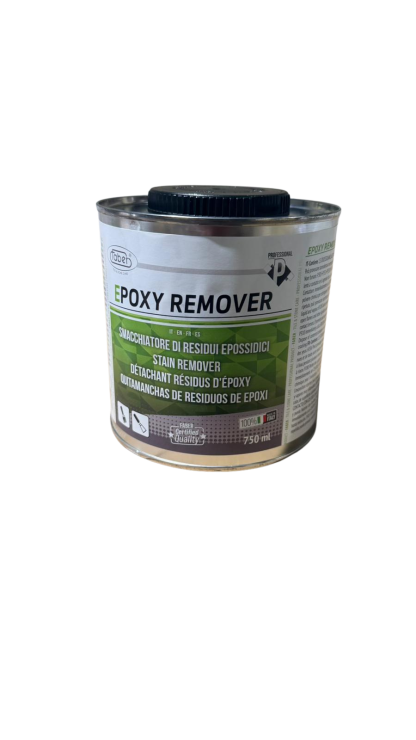
    StripFaber Epoxy RemoverSolvent based stripper for epoxy, resins and mastics, 750mlRetail £27.86 + VATTrade price: log in to see itView product
  • Faber Limestone Densifier hardening sealer for limestone
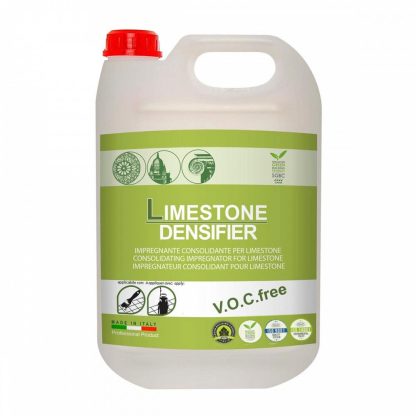
    GrindFaber Limestone DensifierWater based hardener for limestone, an aid to polishingRetail from £18.55 + VATTrade price: log in to see itView product
  • Faber Hidro Protector MM water based stone impregnator
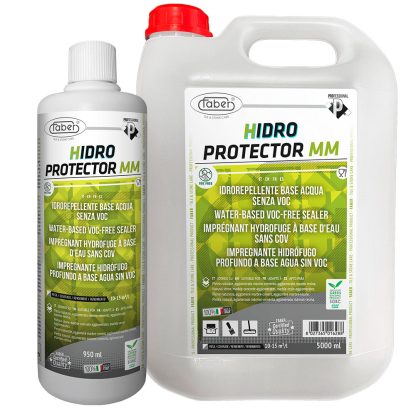
    SealFaber Hidro Protector MMVOC free impregnator against damp, salts and stainsRetail from £28.41 + VATTrade price: log in to see itView product
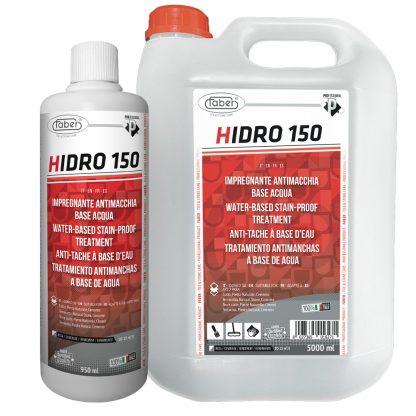
  • Faber Hidro 150 water based stain proof impregnator
    SealFaber Hidro 150Water based stain proof impregnator, food contact certifiedRetail from £30.14 + VATTrade price: log in to see itView product
01
The starting point

Thirty years under carpet

Limestone with black inset squares is a classic floor for a period house, and this one runs through the hallways, the entrance hall and the main rooms. At some point it was carpeted over, and the carpet stayed down for more than 30 years.

When it was finally lifted, the stone underneath was covered in a thick layer of carpet glue. The glue had also trapped years of dirt between the carpet and the stone, so the floor was patchy, grey and stained, with cracks running across it in places.

Limestone entrance hall after the carpet was lifted, stained and dirty with a crack running across the floor
Before
The same limestone entrance hall after restoration by Stonelab, clean and even with the crack filled
After

The entrance hall before and after. Note the crack across the floor in the before photo. Photos by Stonelab.

  • Thick carpet glueHardened adhesive over much of the floor, which has to come off completely before any grinding or sealing.
  • Trapped dirtDecades of dirt held between the glue and the stone, staining the surface.
  • CracksCracks across the floor that needed filling so the finished surface would be seamless.
  • An acid sensitive stoneLimestone etches with acid, so every product had to be safe on it.
02
Stage one

Removing the carpet glue

Stonelab started by scraping off as much of the hardened glue as they could. That does two jobs. It removes the bulk of the adhesive, and it lets the chemicals reach the lower layers of glue directly, rather than sitting on top of the thickest part.

They then applied a combination of solvent based strippers and an epoxy remover to melt down the last layers of glue, so the remaining residue could be scraped away with ease. The aim at this stage is a completely clean stone surface. Any glue left behind would clog the grinding tools and show through the finished floor.

  • Faber Dec 21A solvent based remover for wax, sealers, old treatments and greasy residues on stone, tile and porcelain.
  • Faber Decera PA concentrated alkaline cleaner for greasy dirt, wax and resins. Faber pairs it with Dec 21 for double stripping of stubborn residues.
  • Faber Epoxy RemoverA solvent based stripper that softens thick, cured synthetic residues such as epoxy, resins and mastics so they can be removed mechanically.
Scrape first, then strip

Chemicals work best on a thin layer. Taking off the bulk of hardened glue by hand first means the strippers reach the bottom layers and do far more work. See all Faber strippers and degreasers.

03
Stage two

Grinding, resurfacing and crack repair

With the glue gone, Stonelab ground and resurfaced the stone to create a much flatter, more uniform floor. They passed over the floor five times, with a finer grit on each pass. Each pass removes the scratches of the one before and gradually closes the pores of the stone, which is what brings up the shine.

During this stage they also filled the cracks across the floor with an epoxy resin colour matched to the stone, then ground it smooth so the repairs sit seamlessly with the rest of the floor.

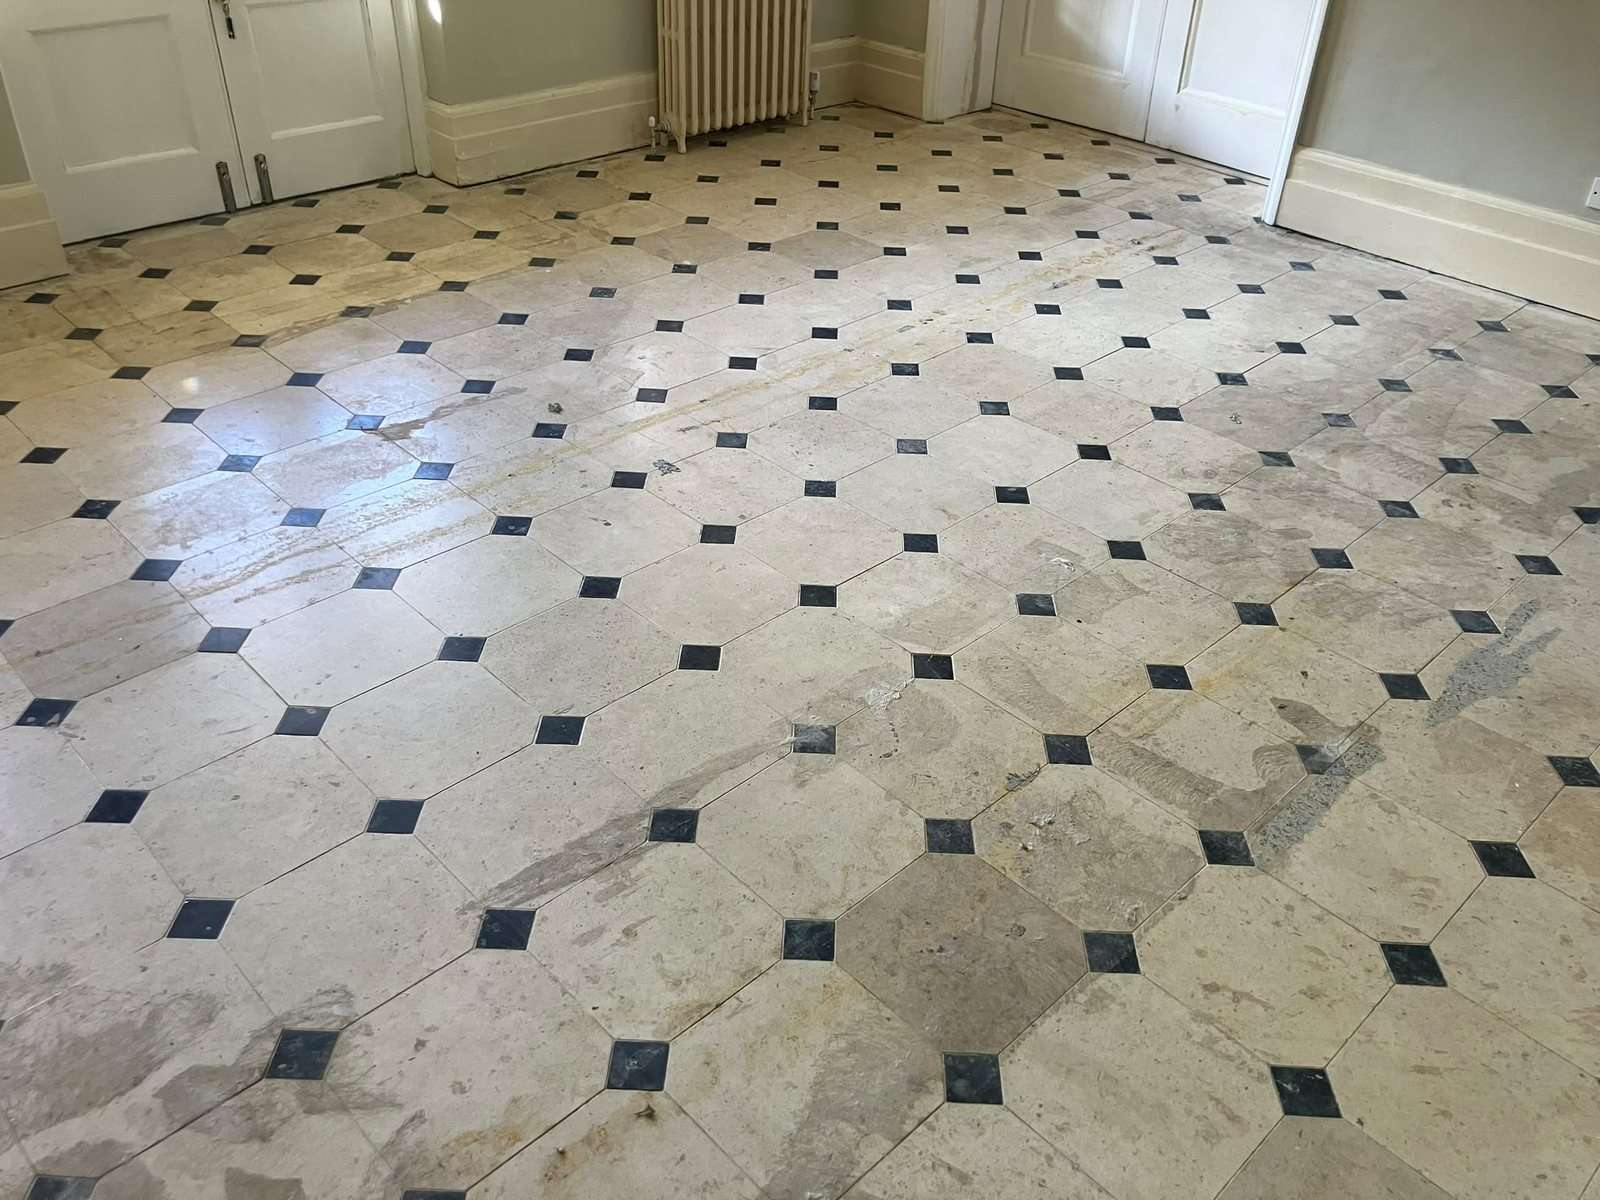
Large limestone room after the carpet was lifted, with glue residue, staining and patches
Before
The same limestone room after grinding and sealing, flat and even with a soft sheen
After

The main room before and after. Photos by Stonelab.

  • Flatten firstThe first, coarser passes remove residue and level the floor so the finer grits work evenly.
  • Five progressive passesSkipping grits leaves scratches that show in the final finish. Each step up refines the surface.
  • Colour matched repairsTint the filler to the stone before it goes in, then grind it flush with the floor.
Where Limestone Densifier fits

Faber Limestone Densifier is made for this stage on limestone. Applied during the grinding sequence, it hardens the stone from within and reduces how much water the stone soaks up, so machines work faster, drying between stages is quicker and diamond tools last longer. It also primes the stone for the stain proof sealer that follows.

04
Stage three

Sealing the stone

Once the floor had been given time to dry out properly, Stonelab applied two coats of a water based impregnating sealant. An impregnator soaks into the stone rather than sitting on top as a film, so it protects the limestone without changing its look, and it makes general cleaning and maintenance much easier going forward.

Limestone garden room floor before restoration, with glue, residue and dark staining
Before
The same limestone garden room after restoration and sealing, bright and even
After

The garden room before and after. Photos by Stonelab.

  • Faber Hidro 150A water based, stain proof impregnator that keeps the stone breathable and its look unchanged. Certified safe for food contact. Faber recommends applying it after Limestone Densifier for the best combined protection.
  • Faber Hidro Protector MMA VOC free, water based impregnator that penetrates the full thickness of the stone, protecting against rising humidity, salts, staining and yellowing.
Hidro 150 coverage
15 to 20 m² per litre
Second coat
At least 45 minutes after the first
Surface dry
About 1 hour
Before sealing
Floor fully dry
Let it dry first

Grinding uses water, and limestone holds on to it. Sealing too soon traps moisture in the stone, so give the floor the time it needs. Our Hidro 150 sealing guide explains why the right impregnator matters.

05
The result

A subtle sheen throughout

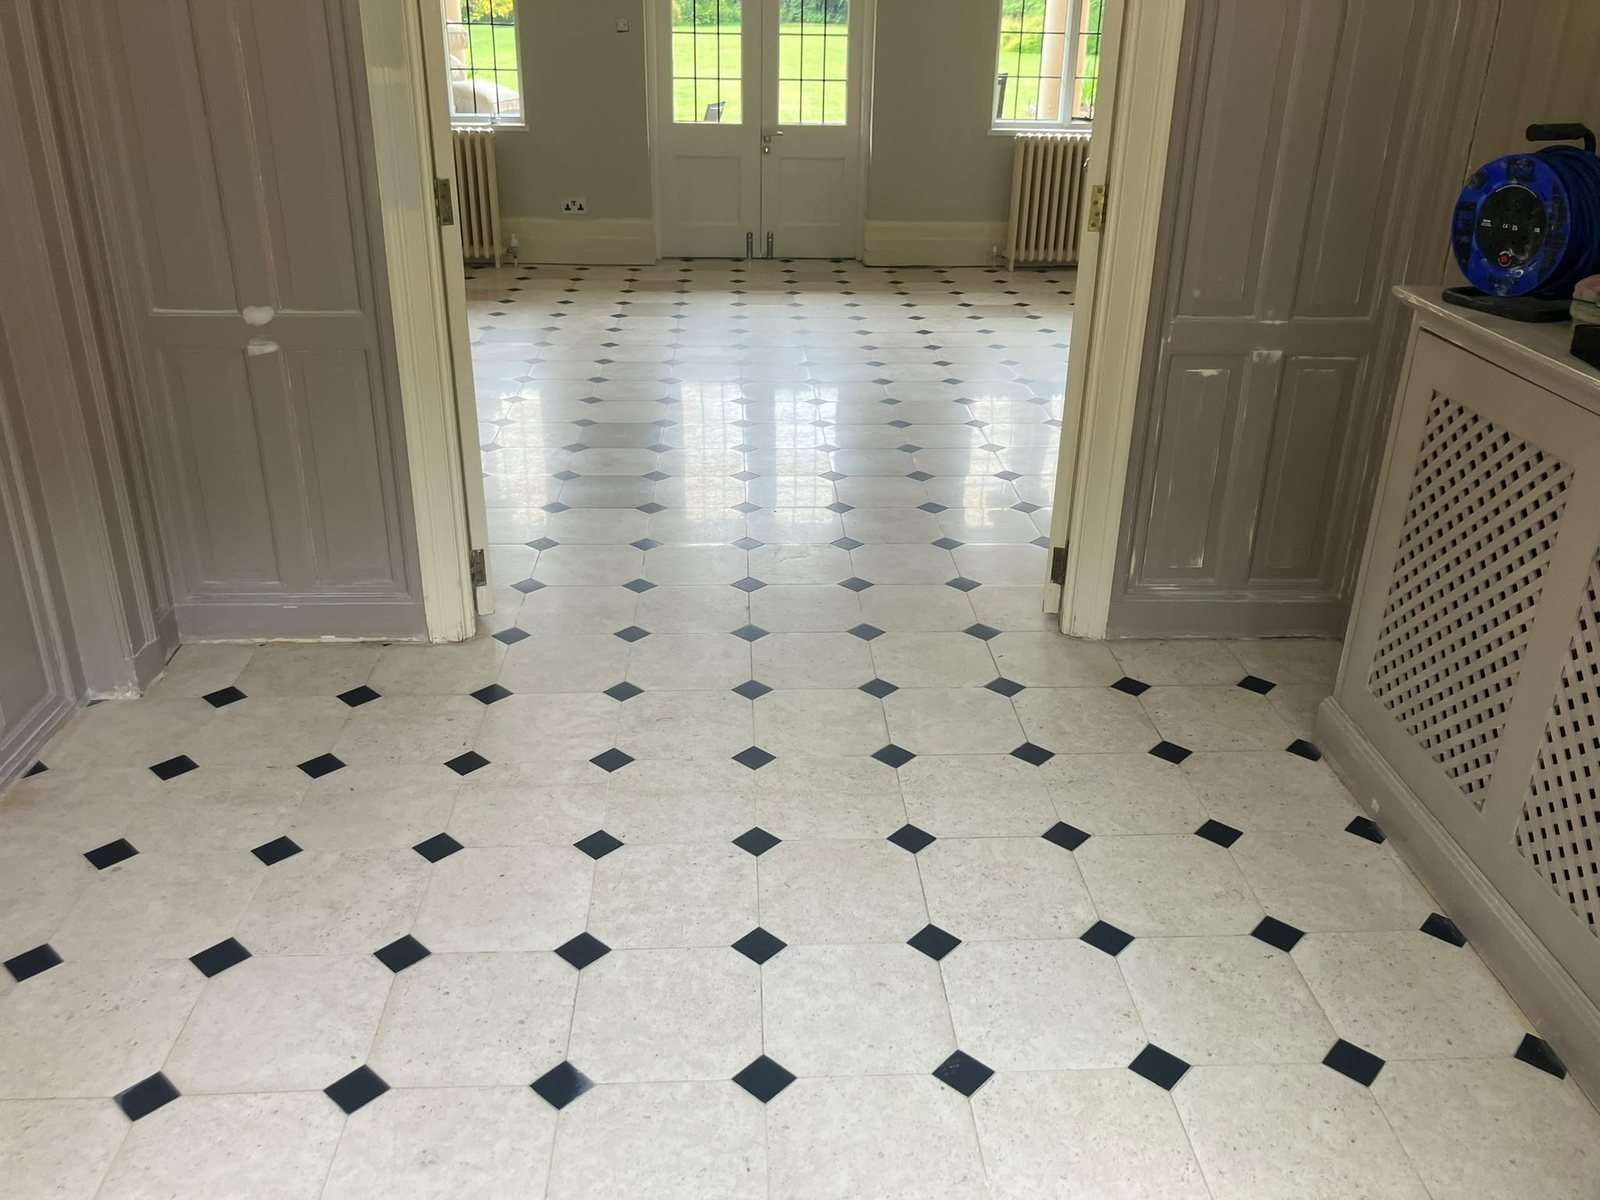
Compare the photos through this page. The glue, grey patches and staining are gone, the cracks have disappeared into the floor, and the limestone has an even, subtle sheen right through the house. In Stonelab's words, a beautiful subtle sheen across the whole floor for an ecstatic client.

Restored limestone floor with black insets running from the entrance hall into the main room
Low angle view of the restored limestone floor showing its even sheen and reflections

The finished floor from the entrance hall through to the main room. Photos by Stonelab.
  • Clean stone: every trace of carpet glue and trapped dirt removed.
  • Flat and even: five grinding passes have levelled the floor and closed the pores.
  • Seamless repairs: colour matched fills ground flush with the stone.
  • Protected: two coats of water based impregnator, with the natural look of the limestone kept.
See it happen

Watch the job

Stonelab filmed the restoration. Watch the floor go from glue covered to finished.

Video by Stonelab.

06
Keeping it looking good

Looking after a restored limestone floor

A sealed limestone floor is easy to look after, as long as the cleaning products suit the stone. Limestone is acid sensitive, so the rule is simple: pH neutral products only.

  • Day to daySweep or vacuum to remove grit, then clean with Faber Neugel, a neutral gel made for absorbent stone that builds dirt resistance with every clean. AlgaFloor is a no rinse alternative.
  • Avoid acidsMany supermarket limescale and bathroom cleaners are acidic and will etch limestone. See why The Pink Stuff is a risk on stone.
  • Spills and stainsWipe spills up quickly. For anything that marks, our stain removal guide matches the remover to the stain.
  • An aftercare kitThe Complete Natural Stone and Tile Maintenance Kit has Faber Soap, AlgaFloor and Ciao Cal in one order.
07
Conclusion

Worth lifting the carpet for

Thirty years under carpet and a thick layer of glue looked like the end of this floor. A methodical approach brought it back: strip the glue completely, grind through the grits to flatten and close the stone, repair the cracks, and seal with a water based impregnator.

The key takeaways

  • Scrape off the bulk of hardened glue first, so strippers can reach the lower layers.
  • Combine solvent based strippers and an epoxy remover for stubborn adhesive residues.
  • Grind in progressive passes to flatten the floor and build a natural sheen.
  • Fill cracks with colour matched resin and grind them flush for a seamless finish.
  • Let the floor dry fully, then seal with a water based impregnator and clean with pH neutral products.
Floor restored by

Stonelab

Cobham, Surrey

A stone care company working since 1999, serving domestic and commercial clients across London, the Home Counties and the wider UK. Their services include stone floor cleaning and sealing, grinding and resurfacing, worktop and vanity polishing, staircase restoration, stain removal and chip and crack repairs.

Photos, video and project details in this case study come from Stonelab.

Visit Stonelab

Restoring a stone floor like this one?

We stock the Faber range for stripping, cleaning, sealing and maintaining natural stone, with technical support from people who restore real floors. Log in to see your trade price.

  • Orders placed Mon to Fri before 2PM are dispatched the same day for next working day delivery
  • Not sure which stripper or sealer suits your floor, or want to talk trade pricing? Contact us
Questions

Frequently asked questions

Who restored this limestone floor?

The floor was restored by Stonelab, a stone care company based in Cobham, Surrey. Stonelab has worked in the industry since 1999 and serves domestic and commercial clients across London, the Home Counties and the wider UK.

How do you remove old carpet glue from a limestone floor?

Start by scraping off as much of the hardened glue as you can, so the chemicals can reach the lower layers. On this floor Stonelab then used a combination of solvent based strippers and an epoxy remover to soften the last layers of glue, which could then be scraped away. Always test any product on a small hidden area first.

Why grind a limestone floor?

Grinding and resurfacing flattens the floor, removes damage and old residue, and gives an even surface to work with. Working through the grits in stages, as Stonelab did with five passes, gradually closes the pores of the stone and builds up a natural sheen.

What does Faber Limestone Densifier do?

It is a water based treatment made for limestone. It hardens the stone from within, reduces how much water the stone absorbs during polishing, protects against rising damp and efflorescence, and acts as a primer for a stain proof sealer applied afterwards.

How were the cracks in the limestone repaired?

Stonelab filled the cracks with an epoxy resin colour matched to the stone, then ground it smooth so the repair blends into the rest of the floor. For crack and chip repairs in stone, HF Flooring Supplies stocks Faber GL 88 polyester mastic and tinting pastes.

What sealer is best for a restored limestone floor?

A water based impregnating sealer that protects without changing the look of the stone. Stonelab applied two coats once the floor had dried. Faber Hidro 150 is a water based, stain proof impregnator that is certified for food contact, and Hidro Protector MM is a VOC free treatment that also protects against rising damp and salts.

Can I use acidic cleaners on limestone?

No. Limestone is acid sensitive, so acidic cleaners and many supermarket limescale removers will etch and dull it. Use a pH neutral cleaner such as Faber Neugel or AlgaFloor for routine cleaning.

How do I look after a restored limestone floor?

Sweep or vacuum regularly and clean with a pH neutral cleaner. Faber Neugel suits absorbent stone such as limestone and builds dirt resistance over time. The Complete Natural Stone and Tile Maintenance Kit includes Faber Soap, AlgaFloor and Ciao Cal.

Do trade customers get lower prices?

Yes. The prices in this case study are retail prices before VAT. Trade account holders see their own lower trade price on every product once logged in. Open a trade account to get started.

All Faber products mentioned in this case study are available from HF Flooring Supplies.

Posted on — Leave a comment

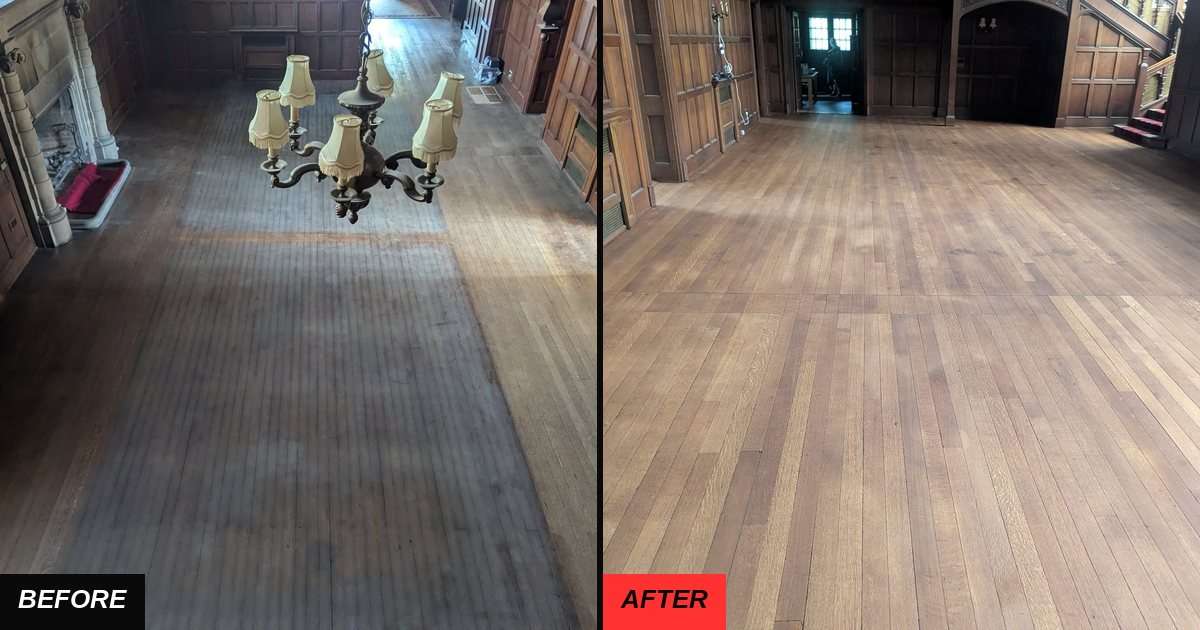
Higham Hall Oak Floor: Sanded and Oiled with Miracle Oil 2K

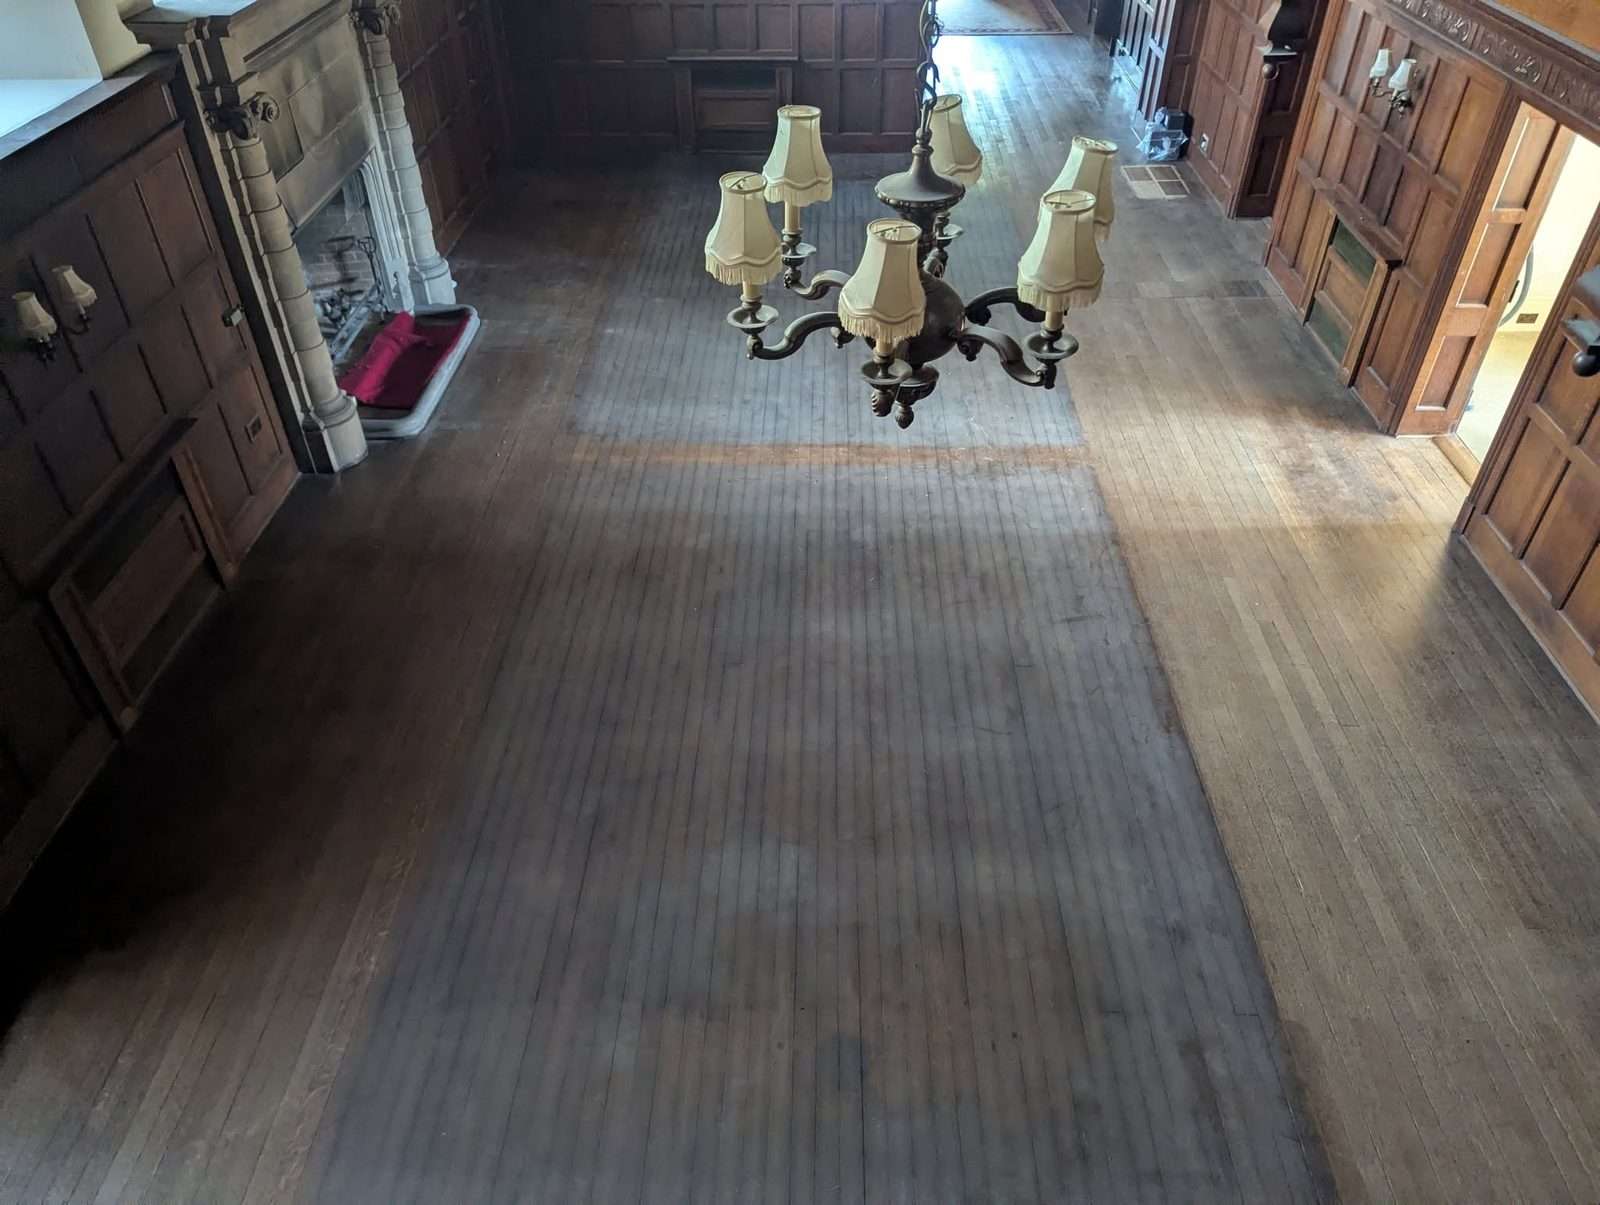
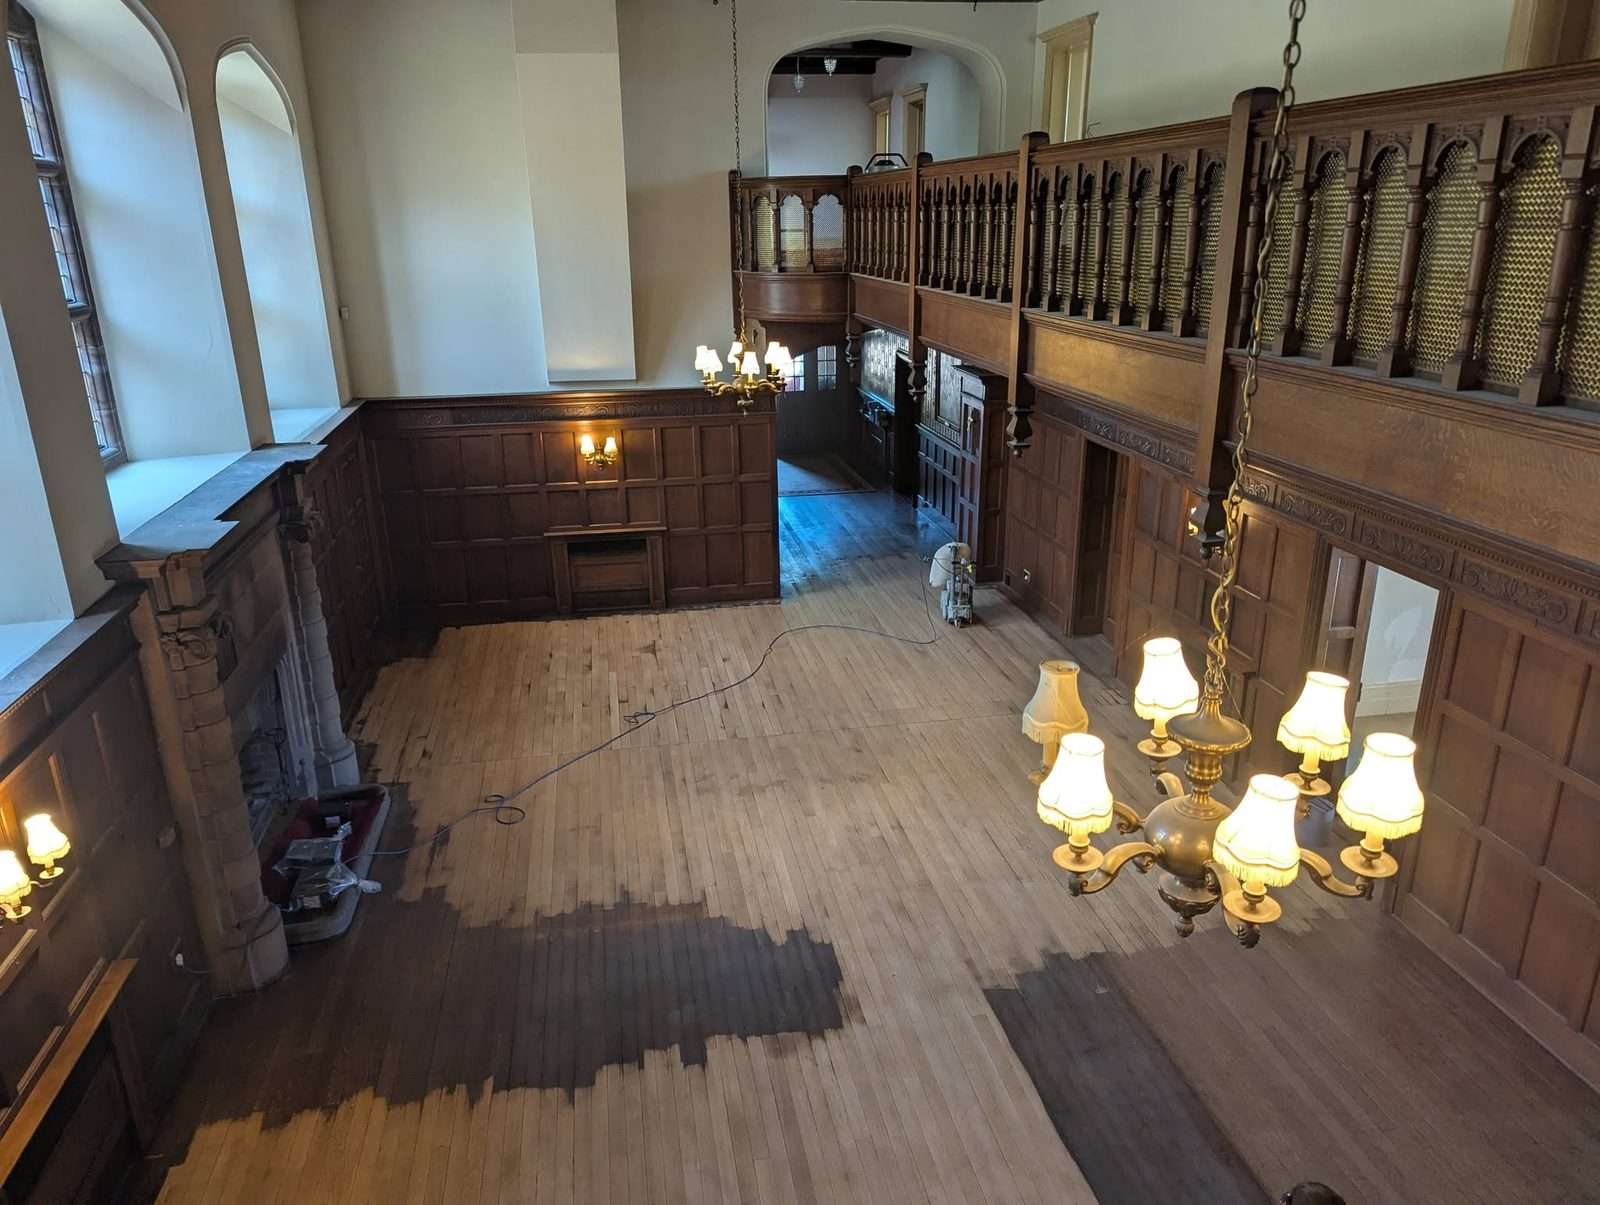
Higham Hall is a historic building with a great deal of dark oak panelling, and underneath it all runs an Old English oak floor. After years of wear, the floor had gone dark, patchy and tired. Sanding and refinishing about 144 sqm of it is a serious job.

BC Stone and Floor Care took it on with a two person team. They sanded back through the grits to bare oak, used dust controlled sanding with H class extraction, water popped the timber to bring out more depth of colour, and finished the whole floor in Arboritec Miracle Oil 2K, a two component, 100% solid oil that enhances the natural timber while giving a durable, protective finish.

This case study covers what was done and why, how the oil system goes together, and how to look after the finished floor. Every Arboritec product is available from HF Flooring Supplies, with trade pricing for contractors.

Old English oak floor at Higham Hall before sanding, with a dark worn finish and patchy colour
Before
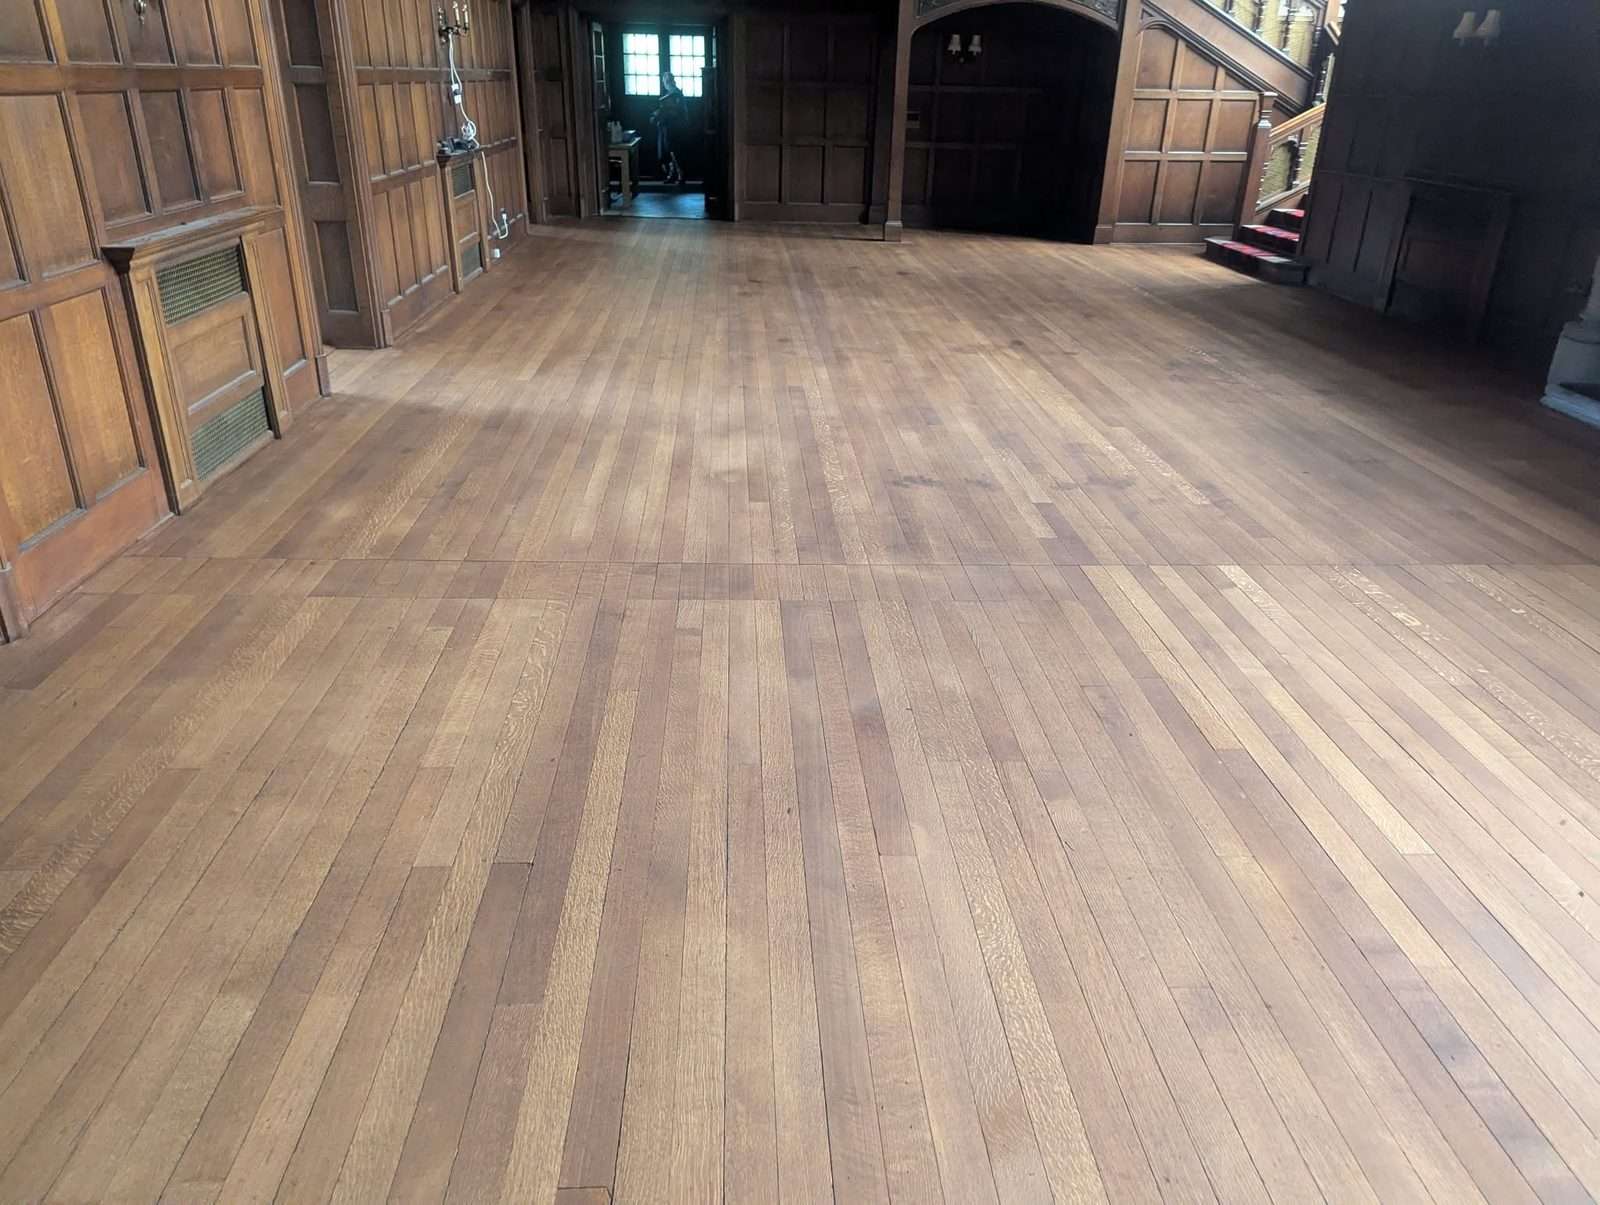
Old English oak floor at Higham Hall after sanding and refinishing with Arboritec Miracle Oil 2K
After

The oak floor at Higham Hall before and after. Finished in Arboritec Miracle Oil 2K. Photos by BC Stone and Floor Care.

The floor
Old English oak flooring throughout Higham Hall. About 144 sqm, surrounded by dark oak panelling.
The problem
An old, dark and uneven finish across a large historic floor, with existing coatings that had to come off before anything new could go on.
The fix
Progressive sanding to bare oak with dust controlled equipment, water popping to raise the grain, then Arboritec Miracle Oil 2K.
The result
A natural, matt oiled floor with the oak grain open and clear, in keeping with the character of the hall.
Finished by
BC Stone and Floor Care, Hinckley, Leicestershire

The short version

  1. Prepare: work progressively through the grits to remove the existing coatings and reach bare oak. Use H class dust extraction to capture fine wood dust and keep the working area cleaner.
  2. Water pop: lightly dampen the sanded floor to raise the grain, and let it dry thoroughly. It helps the oak develop greater depth of colour before the oil goes on.
  3. Oil: finish in Miracle Oil 2K, a 100% solid, two component oil that enhances the natural timber and leaves a durable, protective finish.

Light use after about 12 hours. Finish sanding at P120 at most, and always test a small area first.

  • FloorOld English oak
  • AreaAbout 144 sqm
  • TeamTwo person team
  • FinishArboritec Miracle Oil 2K
For contractors

Trade prices are lower than the retail prices shown

Every price in this case study is the retail price before VAT. Trade account holders see their own lower trade price on every product once logged in.

Open a trade account

The oil used on this floor

One product did the finishing on all 144 sqm. Aftercare products are at the end of this case study.

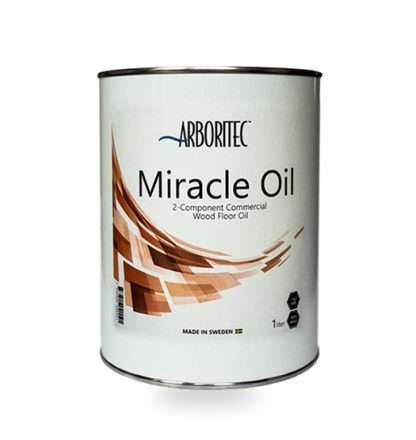
Arboritec Miracle Oil 2K two component wood floor oil

Arboritec Miracle Oil 2K

Retail from £71.25 + VAT

Trade price: log in to see it

A 100% solid, zero VOC, two component oil. Available in Neutral, White, X White, Grey, Black, Brown, Red Brown and Red Mahogany, and the colours can be blended for bespoke tones.

View Miracle Oil 2K
01
The starting point

A big oak floor in a historic hall

Oak is the classic timber for a building like this. It is hard, stable and wears well, and the panelling in the photos shows how much of the hall's character comes from the same timber. A floor of this age and size takes more than a quick sand. It has to be done properly or the whole room shows it.

  • A dark, uneven finishThe old finish had worn unevenly over the years, leaving the colour patchy across the room.
  • Existing coatings to removeOil only works on bare timber. Every trace of the old coating had to be sanded off before the new finish could soak in.
  • A large areaAt about 144 sqm, the job needs planning. Batches of oil, working in sections and a steady rhythm matter as much as the products.
  • Panelling and fittings all aroundWith this much timber panelling and joinery in the room, keeping dust under control mattered as much as the finish itself.

The answer was a clear system. Sand to bare oak, control the dust, raise the grain, then oil. Each stage has one job.

02
Preparation

Progressive sanding with dust control

BC Stone and Floor Care worked through the grits progressively. Starting with the coarser abrasives removes the existing coatings and levels the boards, and each finer grit then removes the scratches left by the one before. Skipping grits leaves scratches that only show once the oil goes on.

All the sanding was dust controlled. BC used professional sanding equipment with H class dust extraction, which captures fine wood dust at the machine. That keeps the working area cleaner, protects the panelling and fittings, and means the finish goes onto a floor that is properly clean.

Higham Hall oak floor partway through sanding, with the sanding machine and dust extraction hose at work in the hall
During sanding

Partway through the sanding at Higham Hall, with the dust controlled equipment at work. Photo by BC Stone and Floor Care.

  • Progressive gritsWork up through the grits in order. Our sanding belt guide helps you choose.
  • H class extractionFine dust is the part you cannot see. Capturing it at the machine keeps it off the panelling and out of the air.
  • Bare timber before oilEvery bit of old coating has to go. Oil cannot penetrate a film, so any left behind shows as a patch.
  • Stop at the right gritFor an oil the final sanding grit should be P120 at most, so the timber stays open enough to take it.
Dust control is part of the finish

Dust left on a floor ends up in the oil. A thorough dust off after the final sand, with the extraction running throughout, is what gives a clean, even result.

03
The extra step

Water popping the oak

Before the oil went on, the team water popped the floor. Water popping means lightly dampening the sanded timber so the grain rises, then letting it dry completely. BC Stone and Floor Care use it on oak to help the timber develop greater depth of colour before the oil is applied.

  • Grain raised before oilingThe fibres are lifted now, before the oil, rather than being left to rise afterwards.
  • More depth of colourThe aim is a richer, deeper colour once the oil goes on.
  • Dry thoroughly firstThe floor has to be fully dry before oiling, so on a large floor allow plenty of time and keep the room ventilated.
04
The oil

Why Arboritec Miracle Oil 2K

Arboritec Miracle Oil 2K is a 100% solid, two component, urethane modified oil for wood floors. It penetrates the wood surface to give lasting protection and colour in one process. On oak it enhances the natural timber rather than covering it, which is exactly what a hall full of period oak calls for.

  • 100% solid and zero VOCThere are no solvents to evaporate, which is a sensible choice for a large floor indoors where people will soon be working and walking.
  • Colour and protection in one processIt soaks into the wood rather than sitting on top, so there is no film to peel or chip.
  • Fast to useThe hardener triggers a chemical cure, so the floor is ready for light use in about 12 hours rather than days.
  • A matt, natural lookIt gives a matt finish without the plastic look of a lacquer, and the sheen can be adjusted by buffing.
  • Easy to renewAn oiled floor can be renewed without a full sand, which suits a floor in a busy building.

How it goes onApplying Miracle Oil 2K

  1. Mix the oil. Combine Part A oil with Part B hardener at 1 to 20. Mixed oil has a pot life of about 4 hours, so only mix what you can apply in that time.
  2. Apply evenly. Spread 20 to 40 g/m² with a trowel, a short hair roller or a buffer machine.
  3. Wait, then buff. After about 15 minutes, buff the surface with a red or green polishing pad so the oil penetrates deeply and the finish is even.
  4. Finish buffing. Buff thoroughly with waffle cloths and finish with white polishing pads. The floor is ready for light use after about 12 hours.
Mix ratio
1 to 20 with Part B
Pot life
About 4 hours
Application rate
20 to 40 g/m²
Light use
After about 12 hours

At that application rate, one litre of oil treats roughly 25 to 50 m². As a guide, a floor of about 144 sqm needs roughly 3 to 6 litres in total. That is worked out from the manufacturer rate, not the quantity used on this job, and it varies with the timber.

Working a big floor in batches

With a 4 hour pot life, mix small batches and work in sections, so no oil is mixed that cannot be applied and buffed in time. On a large floor this matters more than anything else.

Always check the data sheet

Ratios, timings and application rates on this page summarise the manufacturer's guidance. Check the current technical data sheet for the batch you are using, and test a small area first.

05
The result

What changed

Compare the two photos at the top of the page. The same hall, the same oak, with the dark, uneven finish gone and the grain open and clear. The floor now sits comfortably with the panelling around it.

  • Colour: an even, warm oak tone in place of the dark, patchy finish, with the natural variation in the timber kept as part of the character.
  • Surface: the old coatings and wear are gone, leaving a clean, matt oiled finish.
  • Grain: open and clearly visible, enhanced by the oil rather than covered by a film.
  • Cleanliness: dust controlled sanding kept the work area clean throughout a large job.
06
Keeping it looking good

Looking after an oiled oak floor

Unlike a lacquered floor, an oiled floor can be renewed without a full sand, but only if it is cared for with the right products. The routine is simple.

  • Day to dayDust mop or vacuum, then clean with Arboritec Cleaner Concentrate. It is pH neutral and residue free, so it cleans without stripping the oil.
  • Every so oftenWhen the floor starts to look dull, use Arboritec Oil Refresher. It cleans and refreshes the oil at the same time. Choose the Original version for a natural oiled floor, as the White version is for white oiled floors.
  • When it needs moreFor a tired or neglected floor, Arboritec Satin Maintenance Oil gives a deeper clean and renews the protection.
  • Arboritec Cleaner Concentrate 1L
    CleaningArboritec Cleaner ConcentratepH neutral, residue free routine cleanerRetail from £28.03 + VATTrade price: log in to see itView product
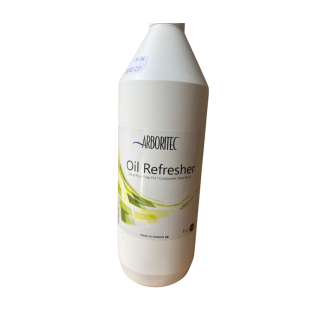
  • Arboritec Oil Refresher for oiled wood floors
    MaintenanceArboritec Oil RefresherWood floor soap that cleans and refreshes oiled floorsRetail from £24.30 + VATTrade price: log in to see itView product

Oil Refresher is mixed at 50 ml per litre of cold water and mopped on with a damp mop. As a guide, use it in place of your normal cleaner about every fifth clean.

07
Conclusion

A big floor done properly

A historic oak floor of this size rewards a methodical approach. Progressive sanding removes the old coatings, H class extraction keeps the dust under control, water popping brings out more depth of colour, and Miracle Oil 2K enhances the natural oak and leaves a durable, protective finish.

The key takeaways

  • Oil needs bare timber. Work progressively through the grits and remove every trace of the old coating first.
  • Dust control protects the room as well as the finish. H class extraction captures the fine dust at the machine.
  • Water popping oak before oiling helps the timber develop more depth of colour.
  • On a large floor, mix Miracle Oil 2K in batches that fit its 4 hour pot life, and work in sections.
  • Look after it with Cleaner Concentrate and Oil Refresher, and renew it without a full sand when the time comes.
Floor finished by

BC Stone and Floor Care

Hinckley, Leicestershire

A hard floor restoration business covering Leicestershire, Warwickshire and the Midlands. They sand and refinish wood floors using dustless sanding machines, and also restore natural stone, clean tile and grout, and care for vinyl, concrete and Victorian tiled floors.

BC Stone and Floor Care is owned by Chris Miles. Photos and project details in this case study come from the BC Stone and Floor Care project post.

Visit BC Stone and Floor Care

Planning a floor like this one?

We are the UK supplier for Arboritec, with stock on the shelf and technical support from people who finish real floors. Log in to see your trade price, then add the oil to the basket.

  • Orders placed Mon to Fri before 2PM are dispatched the same day for next working day delivery
  • Not sure which colour, quantity or top coat suits your floor, or want to talk trade pricing? Contact us
Questions

Frequently asked questions

Who restored the oak floor at Higham Hall?

The floor was sanded and refinished by BC Stone and Floor Care, a hard floor restoration business based in Hinckley, Leicestershire, covering Leicestershire, Warwickshire and the Midlands. A two person team worked on about 144 sqm of Old English oak flooring throughout the hall.

What is Arboritec Miracle Oil 2K?

It is a 100% solid, two component, urethane modified oil for wood floors. It has zero VOC, penetrates the wood to give protection and colour in one process, and is ready for light use in about 12 hours. It is available in Neutral, White, X White, Grey, Black, Brown, Red Brown and Red Mahogany, and the colours can be blended.

What is water popping and why was it done on this oak floor?

Water popping means lightly dampening the sanded floor so the grain rises, then letting it dry thoroughly before the oil goes on. BC Stone and Floor Care used it on this floor to help the oak develop greater depth of colour before oiling.

What does H class dust extraction mean?

H class is a rating for dust extractors that capture very fine dust, including fine wood dust. Using a sander connected to H class extraction keeps most of the dust out of the air, which keeps the working area cleaner and protects the people on site.

Can you oil a floor that already has an old coating?

Not over the top of it. The old finish has to come off first. On this floor the team worked progressively through the grits to remove the existing coatings and reach clean bare timber, which is what lets the oil soak in and do its job.

How much Miracle Oil 2K does a floor of 144 sqm need?

The application rate is 20 to 40 g/m², which is roughly 25 to 50 m² per litre. As a guide, a floor of about 144 sqm works out at roughly 3 to 6 litres in total. That is a calculation from the manufacturer rate, not the quantity used on this job, and it depends on the timber and how absorbent it is.

How long before I can walk on a floor oiled with Miracle Oil 2K?

It is ready for light use in about 12 hours. Mixed oil has a pot life of about 4 hours, so only mix what you can apply in that time. On a floor this size, mixing in batches helps.

How do I look after an oiled oak floor?

Clean day to day with Arboritec Cleaner Concentrate, which is pH neutral and residue free. Use Oil Refresher when the floor starts to look dull, and Satin Maintenance Oil for a deeper clean on a tired floor. An oiled floor can be renewed without a full sand.

Do trade customers get lower prices?

Yes. The prices in this case study are retail prices before VAT. Trade account holders see their own lower trade price on every product once logged in. Open a trade account to get started.

All Arboritec products mentioned in this case study are available from HF Flooring Supplies, the UK supplier for Arboritec.

Posted on — Leave a comment

Iroko Herringbone Parquet Restored with Arboritec Miracle Oil 2K

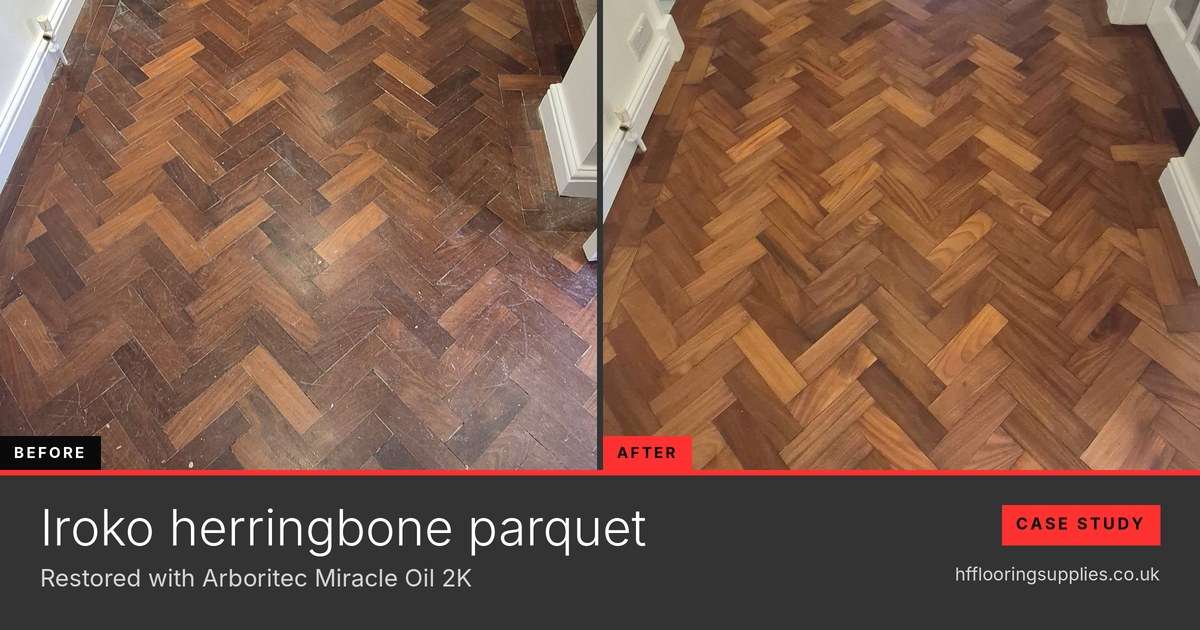
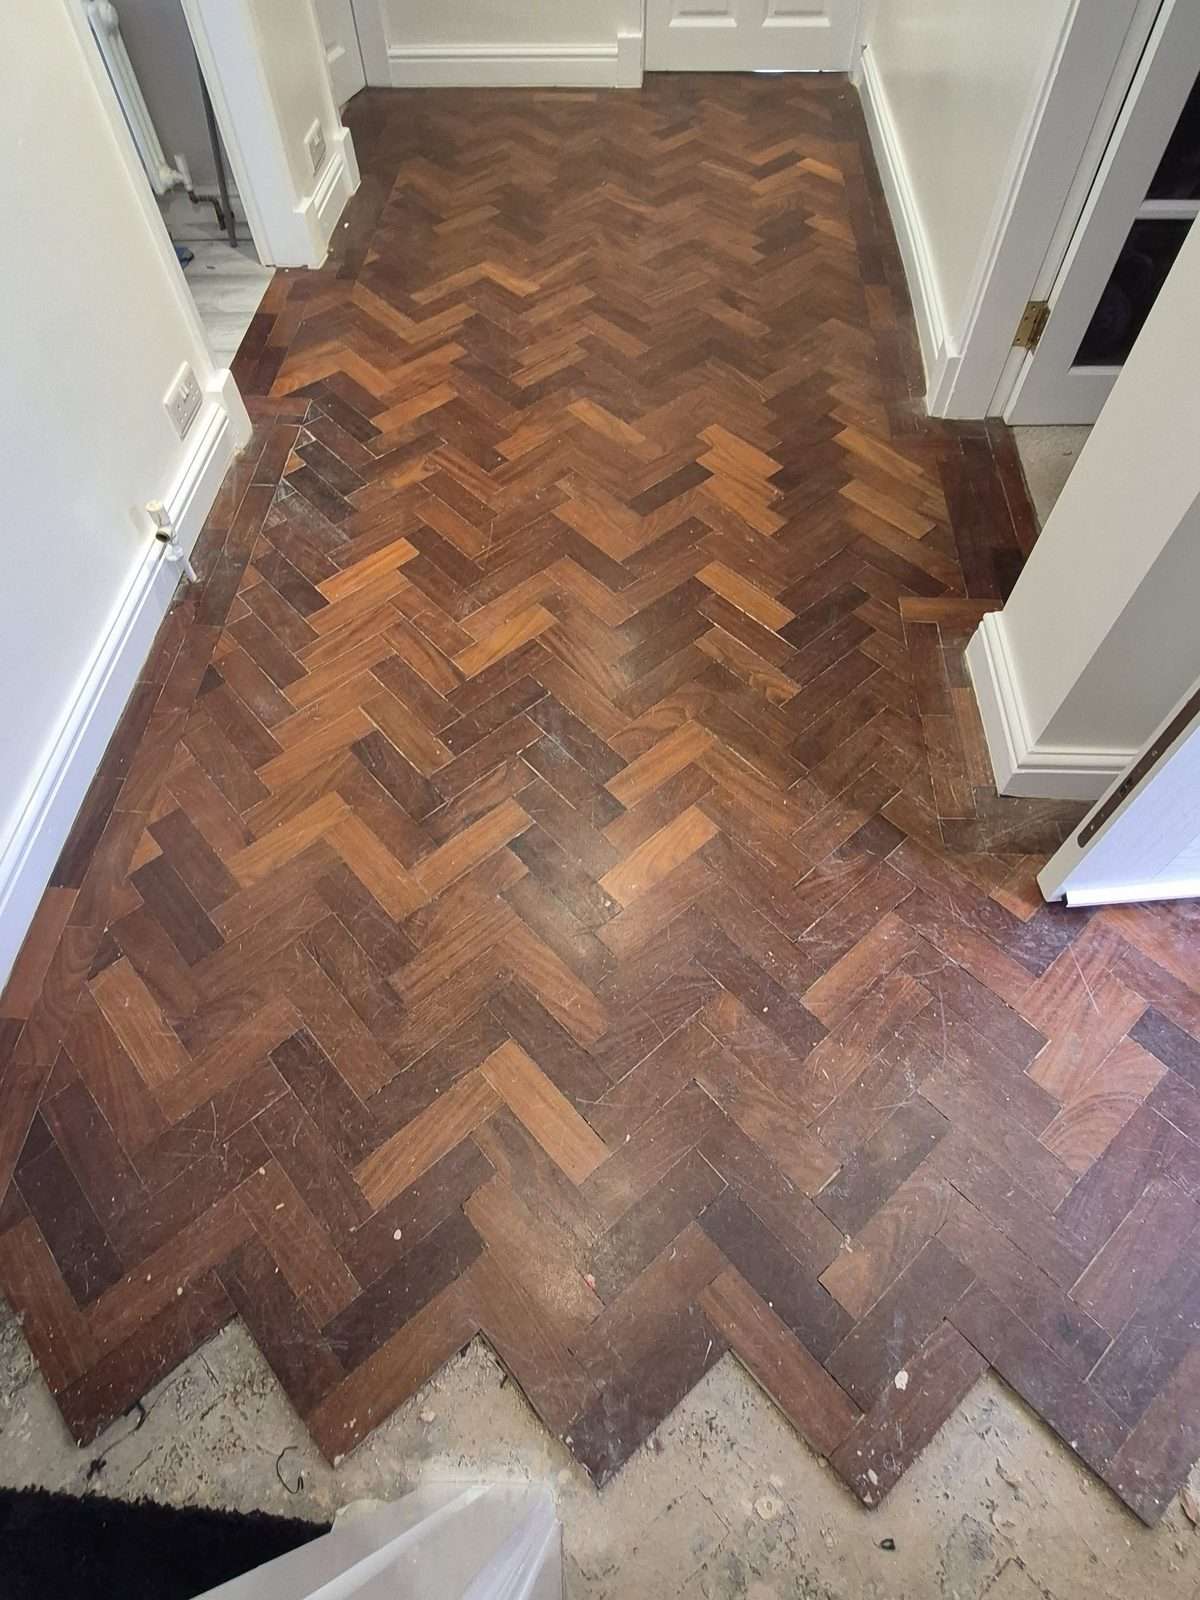
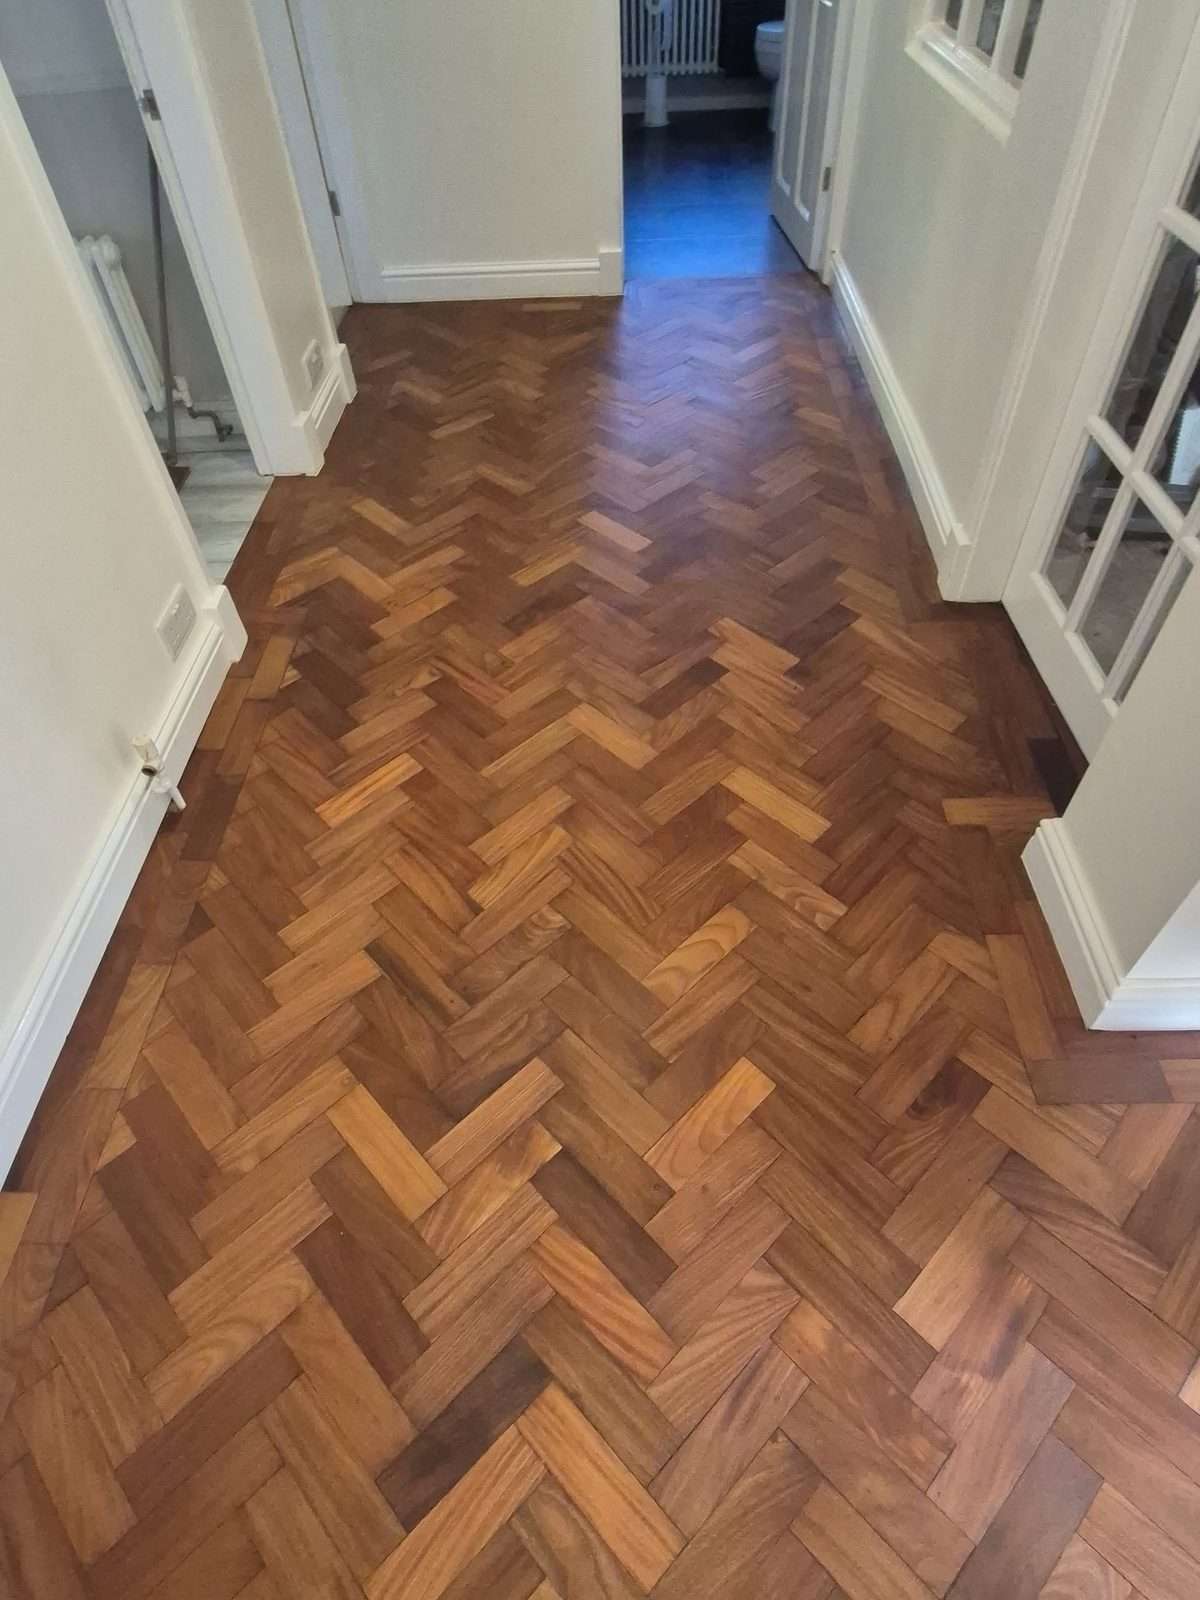
Before and after of an Iroko herringbone parquet hallway restored with Arboritec Miracle Oil 2K

Old herringbone parquet is one of the most rewarding floors to bring back, and one of the easiest to get wrong. This hallway is Iroko, laid in a classic herringbone pattern, and it had spent years under a dark, worn finish.

Before the work, the blocks were scratched, dull and marked, the colour sat heavy and brown under the old coating, and gaps had opened between the blocks. After sanding back, filling the joints with Arboritec FillerMix and finishing with Arboritec Miracle Oil 2K in Neutral, the same floor is a warm golden brown with the grain of every block clear to see.

This case study covers what was used and why, how the system goes together, and how to look after the finished floor. Every product is available from HF Flooring Supplies, with trade pricing for contractors.

Iroko herringbone parquet hallway before refinishing, with a dark worn finish and scratched blocks
Before
Iroko herringbone parquet hallway after refinishing with Arboritec Miracle Oil 2K in Neutral
After

The same hallway before and after. Finished in Arboritec Miracle Oil 2K, Neutral.

The floor
Herringbone parquet in Iroko. A hallway that takes the foot traffic of the whole house.
The problem
A dark, worn old finish, scratched blocks and gaps between them.
The fix
Sand back to bare timber, fill the joints with Arboritec FillerMix, then finish in Arboritec Miracle Oil 2K, Neutral.
The result
A warm, natural, matt oiled finish that shows the grain and lets the herringbone pattern read clearly.
Finished by
Hemmings Floor Restoration, Nottinghamshire

The short version

  1. Prepare: sand back to bare timber to remove the old dark finish, then fill the joints with FillerMix mixed with the floor's own sanding dust, so the filler matches the Iroko.
  2. Finish: one 2K oil, Miracle Oil 2K in Neutral. It is 100% solid and zero VOC, with no added pigment, so the colour you see is the timber.
  3. Protect: look after it with Cleaner Concentrate day to day and Oil Refresher when it needs freshening. In a busy hallway you can also top coat with a 2K waterborne finish.

Light use after about 12 hours. Finish sanding at P120 at most, and test a small area first on any exotic timber.

  • FloorIroko herringbone parquet
  • FinishMiracle Oil 2K, Neutral
  • JointsArboritec FillerMix
  • Light useAfter about 12 hours
For contractors

Trade prices are lower than the retail prices shown

Every price in this case study is the retail price before VAT. Trade account holders see their own lower trade price on every product once logged in.

Open a trade account

The products used on this floor

A joint filler to prepare the timber, then a 2K oil to finish it. Aftercare products are at the end of this case study.

  • Arboritec FillerMix waterborne joint filler for wood and parquet floors
    Step 1, jointsArboritec FillerMix 5LWaterborne, fibre reinforced joint filler, mixed with sanding dustRetail £70.00 + VATTrade price: log in to see itView product
  • Arboritec Miracle Oil 2K two component wood floor oil
    Step 2, finishArboritec Miracle Oil 2K, Neutral100% solid, zero VOC, two component oil. 1L and 2.8L NeutralRetail from £71.25 + VATTrade price: log in to see itView product
01
The starting point

What the floor looked like before

Herringbone parquet was often laid in stable, durable hardwoods, and Iroko, sometimes called African teak, was a popular choice. Iroko starts as a golden to medium brown and deepens with age and light, so an old floor can look far darker than the timber really is.

That is what the before photo shows. Under the old dark finish and years of marks, the blocks were hiding their real colour.

  • A dark, tired finishThe old coating had darkened and worn unevenly, so the floor looked heavy and flat and the pattern was hard to read.
  • Scratches and surface wearFine scratches and scuffs covered the blocks, the kind of damage a hallway collects over years of footfall.
  • Gaps between the blocksOpen joints collect dirt and make the pattern look uneven. They needed filling before any finish went on.
  • Natural variation from block to blockIroko varies in tone and grain. A good finish brings those differences into the pattern rather than hiding them.

Sanding back to bare timber deals with the finish and the scratches. The filler deals with the joints. The oil then brings the colour and the grain back. Each product has one clear job.

02
The oil

Why Miracle Oil 2K in Neutral

Arboritec Miracle Oil is a 100% solid, two component, urethane modified oil for wood floors. It penetrates the wood surface to give lasting protection and colour in one process. Neutral is the clear option in the range. It carries no added tint, so on Iroko the colour you end up with is the timber's own, enriched by the oil.

Arboritec Miracle Oil 2K two component wood floor oil

Arboritec Miracle Oil 2K, Neutral

Retail from £71.25 + VAT

Trade price: log in to see it

A 100% solid, zero VOC, two component oil. Neutral is sold in 1 litre and 2.8 litre sizes, and the colours can be blended for bespoke tones.

View Miracle Oil 2K
  • 100% solid and zero VOCThere are no solvents to evaporate, which makes it a sensible choice for occupied homes where indoor air quality matters.
  • Colour and protection in one processIt soaks into the wood surface rather than sitting on top, so there is no film to peel or chip.
  • Neutral lets the timber leadWith no added pigment, Neutral enriches the natural colour and grain of the wood, which suits a characterful timber like Iroko.
  • Fast to useThe hardener triggers a chemical cure, so the floor is ready for light use in about 12 hours rather than days.
  • A matt, natural lookIt gives a matt finish without the plastic look of a lacquer, and the sheen can be adjusted by buffing.
  • Easy to renewAn oiled floor can be renewed without a full sand, so the floor can be kept looking good for years.

HallwaysOil on its own, or with a 2K top coat

Miracle Oil 2K can also be top coated with Arboritec 2K waterborne finishes, such as Avenue 2K or Genuine, for added protection and easier maintenance. It is a useful option on a floor that takes the traffic of a whole house. Not sure which route suits your client? Our guide to oiled versus lacquered wood floors goes through it.

Miracle Oil 2K on its own

The look
Natural, matt and open grained, with the timber showing through.
Best for
Clients who want a natural oiled floor and are happy with periodic maintenance.

Miracle Oil 2K plus a 2K top coat

The look
The oiled colour, with a waterborne 2K finish over the top for added protection.
Best for
Hallways and other floors where wear and easier cleaning are the priority.
03
The joints

Filling the gaps with Arboritec FillerMix

Timber swells and shrinks with heating and the seasons, so gaps between parquet blocks are normal. Left open, they collect dirt and break up the pattern. Arboritec FillerMix is a waterborne, fibre reinforced joint filler made for exactly this. You mix it with the sanding dust from the floor itself, and the putty that results matches the timber.

Arboritec FillerMix waterborne joint filler for wood and parquet floors

Arboritec FillerMix 5L

Retail £70.00 + VAT

Trade price: log in to see it

Waterborne and fast drying, with a solvent content under 1%. Also available in a 1 litre container. For indoor use on sanded bare wood and parquet.

View FillerMix
Joint width
Up to 2 mm per fill
Coverage
About 8 to 10 m² per litre mixed
Dry before sanding
At least 60 minutes
Solvent content
Under 1%

How to fillFilling a parquet floor with FillerMix

  1. Sand to bare wood. Typically to 60 or 80 grit. Keep the clean dust from the sanding.
  2. Shake the container. Make sure the FillerMix is well mixed before you open it.
  3. Make the putty. Stir the clean sanding dust into the FillerMix until it forms a putty like consistency.
  4. Fill every joint. Spread it across the floor with a spatula and work it into all the cracks and joints. Wider joints may need two or more applications.
  5. Let it dry. Allow at least 60 minutes, longer in cool or humid rooms.
  6. Sand smooth. Final sanding is typically with 120 grit. Then dust off before you oil.
Use clean dust from this floor

Dust from the bare timber is what makes the filler match. Dust from the early passes that remove old finish can carry coating residue, so use dust from sanding on bare wood.

Parquet moves

Fill the gaps that are open when you sand, and expect the occasional joint to move again with the seasons. A small touch up later is normal on any timber floor.

04
Step by step

The full system, from old finish to oiled floor

This is the sequence that takes a worn parquet floor to a finished oiled surface, using the manufacturer's recommended method for each product.

  1. Sand to bare timber. Remove the old finish and level the blocks. Iroko can hold hard mineral deposits that blunt abrasives faster than oak, so change belts and screens a little earlier. Our sanding belt guide helps you choose.
  2. Fill the joints. Mix FillerMix with clean sanding dust and work it into every gap with a spatula.
  3. Sand the filler flush. After at least 60 minutes, sand smooth. The final sanding grit should be P120 at most for an oil.
  4. Dust off. The floor needs to be completely free of dust before the oil goes on.
  5. Water pop the timber. Lightly dampen the floor to raise the grain, then leave it to dry thoroughly.
  6. Mix the oil. Combine Part A oil with Part B hardener at 1 to 20. Mixed oil has a pot life of about 4 hours, so only mix what you can apply in that time.
  7. Apply evenly. Spread 20 to 40 g/m² with a trowel, a short hair roller or a buffer machine.
  8. Wait, then buff. After about 15 minutes, buff the surface with a red or green polishing pad so the oil penetrates deeply and the finish is even.
  9. Finish buffing. Buff thoroughly with waffle cloths and finish with white polishing pads. The floor is ready for light use after about 12 hours.
Mix ratio
1 to 20 with Part B
Pot life
About 4 hours
Application rate
20 to 40 g/m²
Light use
After about 12 hours

At that application rate, one litre of oil treats roughly 25 to 50 m². A hallway like this one needs very little, which is part of what makes a 2K oil good value on small and medium floors.

Always check the data sheet

Ratios, timings and application rates on this page summarise the manufacturer's guidance. Check the current technical data sheet for the batch you are using, and test a small area first on any exotic timber.

05
The result

What changed

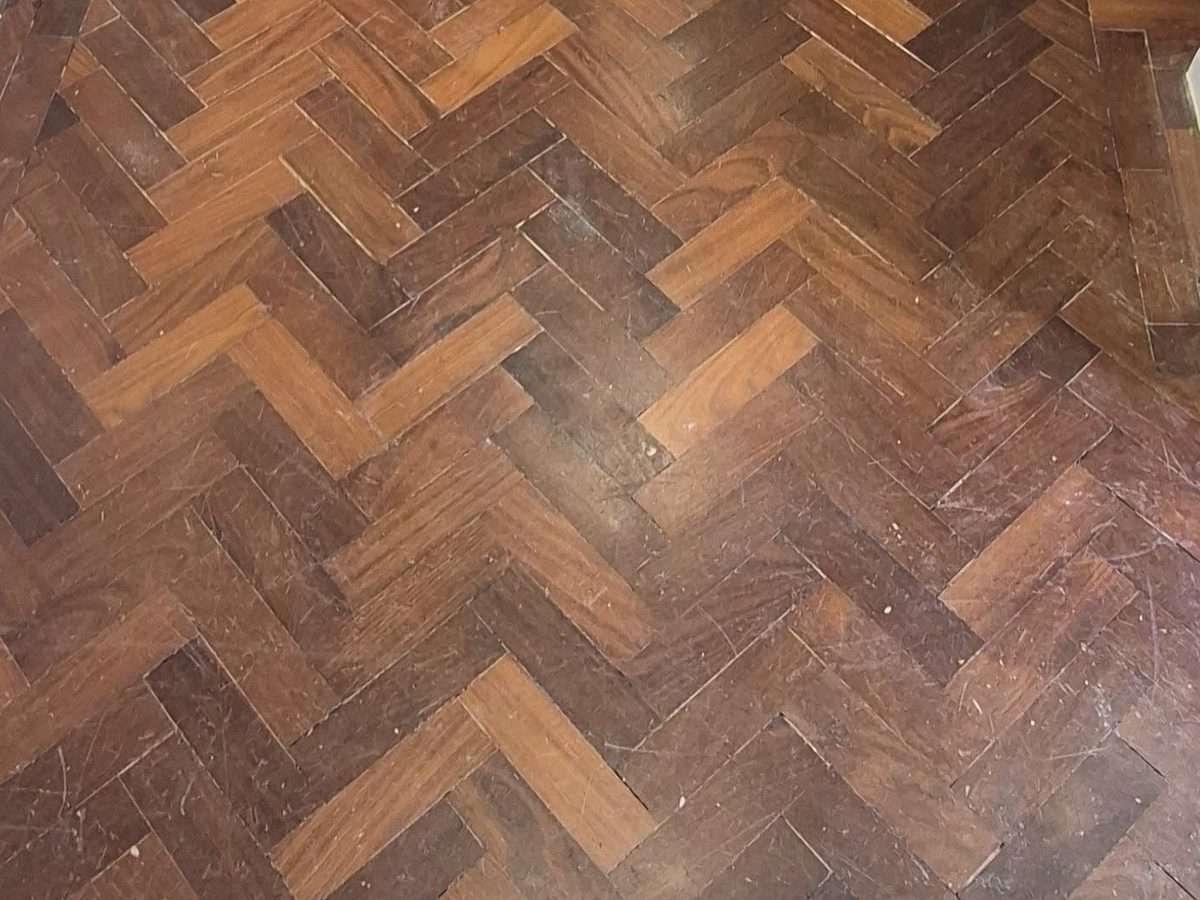
The close ups show the difference best. The same herringbone, the same timber, with the dark finish and the wear gone and the grain of every block back in view.

Close up of Iroko herringbone parquet before refinishing, showing scratches and a worn dark finish
Before
Close up of Iroko herringbone parquet after Arboritec Miracle Oil 2K in Neutral, showing open grain and tight joints
After
  • Colour: from a heavy dark brown to a warm golden brown, with the natural variation between blocks kept as part of the pattern.
  • Surface: the scratches and wear are gone, leaving a clean, even, matt finish.
  • Joints: filled and level, so the herringbone reads as one continuous floor rather than a set of blocks.
  • Grain: open and clearly visible, enriched by the oil rather than covered by a film.
06
Keeping it looking good

Looking after an oiled Iroko floor

Unlike a lacquered floor, an oiled floor can be renewed without a full sand, but only if it is cared for with the right products. The routine is simple.

  • Day to dayDust mop or vacuum, then clean with Arboritec Cleaner Concentrate. It is pH neutral and residue free, so it cleans without stripping the oil.
  • Every so oftenWhen the floor starts to look dull, use Arboritec Oil Refresher. It cleans and refreshes the oil at the same time. Choose the Original version for a Neutral floor, as the White version is for white oiled floors.
  • When it needs moreFor a tired or neglected floor, Arboritec Satin Maintenance Oil gives a deeper clean and renews the protection.
  • Arboritec Cleaner Concentrate 1L
    CleaningArboritec Cleaner ConcentratepH neutral, residue free routine cleanerRetail from £28.03 + VATTrade price: log in to see itView product
  • Arboritec Oil Refresher for oiled wood floors
    MaintenanceArboritec Oil RefresherWood floor soap that cleans and refreshes oiled floorsRetail from £24.30 + VATTrade price: log in to see itView product

Oil Refresher is mixed at 50 ml per litre of cold water and mopped on with a damp mop. As a guide, use it in place of your normal cleaner about every fifth clean.

07
Conclusion

Three products, one clear job each

Herringbone parquet rewards good preparation. Sanding removes the old finish, FillerMix closes the joints so the pattern reads clearly, and Miracle Oil 2K in Neutral brings back the colour and grain of the Iroko without hiding it.

The key takeaways

  • An old dark finish can make a timber look far darker than it is. Sand back to bare wood and let the real colour show.
  • Mix FillerMix with clean sanding dust from the same floor, so the filler matches the timber, and sand it flush before you oil.
  • Neutral Miracle Oil 2K adds no tint, so the floor takes its colour from the timber, with a matt, natural look.
  • For a busy hallway, a 2K waterborne top coat over the oil adds protection and makes cleaning easier.
  • Look after it with Cleaner Concentrate and Oil Refresher, and renew it without a full sand when the time comes.
Floor finished by

Hemmings Floor Restoration

Nottinghamshire

A Nottinghamshire floor restoration company covering Nottingham, Mansfield, Sutton in Ashfield, Chesterfield, Newark and the surrounding areas. They restore wood, parquet, natural stone and tiled floors.

Hemmings Floor Restoration is run by Paul Hemmings, a co founder of HF Flooring Supplies.

Visit Hemmings Floor Restoration

Planning a floor like this one?

We are the UK supplier for Arboritec, with stock on the shelf and technical support from people who finish real floors. Log in to see your trade price, then add the filler and the oil to the basket.

  • Orders placed Mon to Fri before 2PM are dispatched the same day for next working day delivery
  • Not sure which colour, quantity or top coat suits your floor, or want to talk trade pricing? Contact us
Questions

Frequently asked questions

Who restored this Iroko parquet floor?

The floor was finished by Hemmings Floor Restoration, a floor restoration company in Nottinghamshire covering Nottingham, Mansfield, Sutton in Ashfield, Chesterfield, Newark and the surrounding areas. The company is run by Paul Hemmings, a co founder of HF Flooring Supplies.

What is Arboritec Miracle Oil 2K?

It is a 100% solid, two component, urethane modified oil for wood floors. It has zero VOC, penetrates the wood to give protection and colour in one process, and is ready for light use in about 12 hours. It is available in Neutral, White, X White, Grey, Black, Brown, Red Brown and Red Mahogany, and the colours can be blended.

Can I use Miracle Oil 2K on Iroko parquet?

Yes. This floor is Iroko parquet finished in Miracle Oil 2K in Neutral, and the result is shown above. As with any exotic hardwood, test a small area first and follow the technical data sheet.

What does Neutral do to the colour of the wood?

Neutral carries no added tint. It enriches the natural colour and grain of the timber and leaves a matt, natural look. If you want a tone, the other colours in the range can be used or blended.

How do I fill gaps in a parquet floor before oiling?

Sand to bare wood, mix clean sanding dust from the floor with Arboritec FillerMix to make a putty, and work it into the joints with a spatula. It fills joints up to 2 mm in one go, and wider joints need more than one application. Leave it for at least 60 minutes, then sand smooth with 100g grit before you.

How long before I can walk on an oiled floor?

Miracle Oil 2K is ready for light use in about 12 hours, but can generally be walked on after 4 hours. Mixed oil has a pot life of about 4 hours, so only mix what you can apply in that time.

How much Miracle Oil 2K do I need?

The application rate is 20 to 40 g/m², which works out at roughly 25 to 50 m² per litre. Neutral is available in 1 litre and 2.8 litre sizes.

Can I top coat Miracle Oil 2K in a hallway?

Yes. It can be top coated with Arboritec 2K waterborne finishes such as Avenue or Genuine, for added protection and easier maintenance.

How do I look after an oiled parquet floor?

Clean day to day with Arboritec Cleaner Concentrate, which is pH neutral and residue free. Use Oil Refresher when the floor starts to look dull, and Satin Maintenance Oil for a deeper clean on a tired floor. An oiled floor can be renewed without a full sand.

Do trade customers get lower prices?

Yes. The prices in this case study are retail prices before VAT. Trade account holders see their own lower trade price on every product once logged in. Open a trade account to get started.

All Arboritec products mentioned in this case study are available from HF Flooring Supplies, the UK supplier for Arboritec.

Posted on — Leave a comment

How to Restore a Victorian Quarry Tile Floor: Cleaning, Deep Cleaning and Sealing Original Tiles

Anyone who has taken on a period property knows the moment. Underneath the carpet, or hidden behind a stud wall that finally comes down, there it is: a black and red quarry tile floor, probably well over a century old, dulled by decades of foot traffic, old wax and general grime, and now carrying a fresh layer of cement splashes and dust from the renovation work going on around it.

It looks tired rather than damaged, and the instinct is usually to reach for whatever is in the van, or even the old brick acid. That is the point where a lot of these floors get permanently scarred rather than restored.

This is one of the most common jobs HF Flooring Supplies customers bring to us, and it is exactly the job shown in the photos on this page: an original Victorian quarry tiled hallway, contaminated with construction residue, cleaned back to bare tile, then sealed with a breathable colour enhancer to bring the black and red tones back to life. This guide walks through the science behind each step and the specific products used, so you can repeat the result on your own floor without guessing.

  • FloorVictorian quarry tile
  • MethodAcid clean, alkaline clean, then seal
  • Also suitsTerracotta and other unpolished absorbent tile and stone
  • Time to read11 minutes
Victorian quarry tile hallway floor with cement contamination before cleaning
Before
Restored Victorian quarry tile floor after cleaning and sealing with Faber P147 Plus
After

The short version

  1. Cement haze, mortar splashes and efflorescence: dissolve with Faber Disycott, an inhibited acid cleaner.
  2. Old wax, grease and ingrained grime: lift with Faber 30, a concentrated alkaline deep cleaner.
  3. Finish: seal with Faber P147 Plus, a breathable treatment that enhances colour without a surface film.

Get the order wrong, or use too hard a brush on the thin black surface of older black tiles, and you risk permanent damage rather than restoration.

The kit used on this floor

Everything below was used on the hallway shown above, in this order.

  • Faber Disycott end of installation cleaner
    Step 1Faber DisycottAcid cleaner for cement haze, mortar and efflorescenceFrom £9.91 + VATView product
  • Faber 30 concentrated alkaline deep cleaner
    Step 2Faber 30Alkaline deep cleaner for wax, grease and grimeFrom £11.36 + VATView product
  • Faber Warrior single disc machine
    Step 3Faber Warrior single disc machine2.5 HP, 430mm single disc floor machine£1,950.00 + VATView product
  • Crobber M medium scrub brush
    Step 3Crobber M Medium scrub brushSafe agitation for thin surface fired black tilesFrom £55.56 + VATView product
  • Faber P147 Plus colour enhancing sealer
    Step 5Faber P147 PlusBreathable colour enhancing sealerFrom £45.17 + VATView product

Trade businesses need a trade account to see trade prices. Trade account information

Before you start

The science of Victorian quarry tiles: why the black tiles need extra care

Before any chemical goes near a period tiled floor, it is worth understanding what you are actually looking at. Victorian quarry tiles are unglazed, fired clay tiles, and in a classic black and red chequerboard hallway the two colours are very often not made the same way.

Red quarry tiles are usually full bodied. The colour runs all the way through the clay, so light surface wear over the decades has very little visual effect.

Black quarry tiles vary more. Many are full bodied too, but older tiles, particularly those made before 1900, can be black only on the top, with a thin black surface fired onto a red body rather than a clay that is black all the way through. That thin black surface is exactly what gives these floors their rich, almost slate like appearance, but it also means the black layer can be worn through by anything too aggressive, revealing the red body underneath.

Full bodied quarry tile

Colour depth
Colour runs all the way through the tile. Red tiles, and many black ones.
Risk from aggressive scrubbing
LowMinor wear does not change appearance.

Older surface fired black quarry tile

Colour depth
Black on the top only, over a red body. Found on older tiles, particularly pre 1900.
Risk from aggressive scrubbing
HighAbrasive pads or stiff brushes can wear through the black to the red body underneath.

This is why brush and pad selection matters just as much as the chemicals you choose, which is covered in the machine and brush section below.

01
Step 1

Removing construction contamination: cement haze, mortar splashes and efflorescence

Renovation work almost always leaves cementitious residue on an exposed floor, whether that is dried mortar splashes, cement haze, or the white efflorescence that forms as mineral salts migrate to the surface and dry. These deposits are alkaline, and an ordinary detergent, which is often mildly alkaline itself, will not touch them.

The fix is to go the other way on the pH scale. Faber Disycott is an acid based cleaner with an approximate pH of 1.5, formulated with what Faber calls an inhibited acid, meaning the acid is buffered to dissolve cementitious and mineral deposits without behaving like an uncontrolled hardware store acid that can etch or damage the tile surface. In practical terms, the acid reacts with and breaks down the alkaline cement and mineral deposits, lifting them from the tile so they can be rinsed away.

Approx. pH
1.5
Dilution
20 percent for light haze, up to 40 percent for heavier or more porous contamination
Dwell time
10 to 15 minutes with occasional agitation
Finish
Rinse thoroughly with clean water

It is worth noting the pleasant, low odour formulation compared with a raw acid, which makes it far more workable indoors on a hallway floor than a traditional brick acid wash would be.

Test first

Even an inhibited, buffered acid cleaner should be tested on a small, inconspicuous area first, since tile bodies, grout and glazes vary.

Faber Disycott
Faber DisycottThe cement and haze remover. From £9.91 + VAT
Shop Faber Disycott
02
Step 2

Cutting through decades of grease and grime

Once the mineral contamination is dealt with, the older problem underneath usually remains: years, sometimes a century, of accumulated wax, grease from foot traffic and general ingrained grime sitting in the pores of the tile. This is a different chemical problem to the cement haze, because grease and wax are not mineral deposits, they are organic soiling, and acid does very little to them.

This is where Faber 30 comes in, a concentrated alkaline deep cleaner at around pH 11. Alkaline cleaners work on grease through saponification, the same basic chemical reaction that turns fat into soap: the alkaline solution breaks down the structure of the grease and wax so it becomes soluble and can be lifted from the tile and extracted, rather than just pushed around on the surface.

Wax stripping
Undiluted
Heavy degreasing
1 to 2 with water
Routine deep cleaning
1 to 6 with water

Apply and leave to dwell for 10 to 15 minutes with periodic agitation, then extract and rinse. It is formulated to be used on the full range of natural stone and porcelain without etching polished marble or acid sensitive stone, so it is a safe deep clean step across most period floor types, not just quarry tile.

Faber 30
Faber 30The deep cleaner for wax and grease. From £11.36 + VAT
Shop Faber 30
03
Step 3

Choosing the right machine and brush for a historic floor

Both of the cleaning stages above work far better with mechanical agitation than with a mop and bucket, but on a floor with a thin, surface fired black layer, the wrong brush can undo all the good the chemistry has done.

The job shown here used a Faber Warrior single disc machine, a 2.5 HP, 430mm single disc floor machine, fitted with a Crobber M Medium scrub brush. The Crobber M sits deliberately between a soft brush and a genuinely aggressive one, giving enough mechanical agitation to work the Disycott and Faber 30 solutions into the tile and lift contamination, without the abrasive bite of a harder brush that could strip through the thin black surface layer described above. For this reason, a medium brush was chosen specifically because of the tile construction, not as a default setting.

Which brush for which floor?

If you are working on a floor of full bodied tiles throughout, such as an all red quarry floor, a firmer brush can usually be used without the same risk. On a mixed black and red chequerboard floor like this one, treating the whole floor at the more cautious medium setting protects the black tiles without meaningfully slowing down the clean on the red ones.

Faber Warrior single disc machine
Faber Warrior2.5 HP single disc machine. £1,950.00 + VAT
View the machine
Crobber M medium scrub brush
Crobber M MediumThe brush for thin black tiles. From £55.56 + VAT
View the brush
04
Step 4

Drying before sealing

Once the floor has been cleaned, agitated and rinsed, it needs to be left to dry out fully before any sealer or colour enhancer goes down. This step is easy to rush, but a solvent based impregnating treatment needs a genuinely dry, absorbent surface to penetrate properly. Any residual moisture sitting in the pores of the tile will compete with the treatment for that same space, leading to patchy penetration and an uneven finish.

05
Step 5

Sealing and colour enhancement: why breathability matters on a period floor

With the floor clean, contamination free and dry, the final step is sealing. This is where a lot of period floors are damaged years after the original clean, because the wrong type of sealer is used.

Victorian solid floors like this one were laid directly onto a lime mortar bed, with no modern damp proof membrane underneath. That means ground moisture needs a route to migrate upward through the tile and evaporate at the surface. A standard film forming sealer sits on top of the tile like a layer of plastic, sealing that route off. Trapped moisture underneath a film forming coating on an older solid floor is a common cause of efflorescence returning, tiles lifting, or the coating itself failing and turning white or hazy.

Faber P147 Plus solvent based colour enhancing sealer for absorbent tile and stone

Faber P147 Plus

From £45.17 + VAT

Faber P147 Plus avoids this because it is a solvent based, non film forming treatment. Rather than sitting on the surface, it penetrates into the pore structure of the tile itself, so it does not create a barrier and the floor keeps its natural breathability.

At the same time, because the product is working from within the pores rather than on the surface, it intensifies the natural colour, depth and tonal variation of the tile, producing what is often described as a wet look effect with a matt rather than glossy finish. On this floor it brought the reds and blacks back to a much richer, more saturated tone than the dry, dulled tile that was there before cleaning, without leaving any surface film that could trap moisture underneath.

Shop Faber P147 Plus

P147 Plus is suitable for a wide range of absorbent surfaces including quarry tile, terracotta, limestone, sandstone, slate, and other unpolished or medium to highly absorbent stone. It is not suitable for polished surfaces, since the treatment needs an absorbent surface to penetrate into.

How to apply Faber P147 Plus

  1. Confirm the surface is completely clean and dry, ideally in a working temperature of 5 to 40 degrees Celsius.
  2. Apply an even coat across the tile using a brush, roller or cloth.
  3. Redistribute any excess product after 5 to 10 minutes so it does not pool or dry unevenly.
  4. Remove any remaining surface residue after 20 to 30 minutes using a floor polisher or clean cloth.
  5. Allow the floor to dry, which typically takes 1 to 2 hours, with the surface fully ready for normal use after 4 to 6 hours.
Safety

This is a solvent based product with a flash point below 23 degrees Celsius. Work in a well ventilated space and clean tools with white spirit rather than water.

Summary

Conclusion

Restoring an original Victorian quarry tile floor is really three separate problems solved in the right order: removing alkaline construction contamination with an acid based cleaner, removing decades of organic grease and wax with an alkaline deep cleaner, and only then sealing with a treatment that enhances colour without trapping moisture underneath a floor that was never designed to have a damp proof membrane. Get the order wrong, or use the wrong brush on a surface fired black tile, and you risk permanent damage rather than restoration.

For this job, that meant Faber Disycott to strip the cement contamination, Faber 30 for the deep alkaline clean, a Crobber M medium brush on a Faber Warrior single disc machine to protect the surface fired black tiles, and Faber P147 Plus to finish, breathable and colour enhancing in one step.

Bring the original colour back into your period floor

Order Faber P147 Plus from HF Flooring Supplies today. Trade businesses need a trade account to see trade prices.

  • Orders placed Mon to Fri before 2PM are dispatched the same day for next working day delivery
  • Not sure which product? Contact us
Questions

Frequently asked questions

Why do black Victorian quarry tiles wear differently to red ones?

Red quarry tiles are usually full bodied, meaning the colour runs all the way through the clay. Many black tiles are full bodied too, but older ones, particularly those made before 1900, can be black only on the top, with a thin black surface fired onto a red body. Aggressive scrubbing can wear through that thin black layer and expose the red body underneath, so these black tiles generally need a gentler brush than red ones on the same floor.

Can I use a strong acid cleaner like Disycott on a full tiled floor without testing it first?

No. Even an inhibited, buffered acid cleaner like Faber Disycott should be tested on a small, inconspicuous area first, since tile bodies, grout and glazes vary. Disycott is formulated to be gentler than a raw acid, but it is still an acid based product at around pH 1.5 and reacts with mineral deposits.

Do I need both an acid cleaner and an alkaline cleaner, or would one do the job?

Cement haze, mortar splashes and efflorescence are alkaline mineral deposits, which respond to an acid based cleaner such as Faber Disycott. Grease, wax and ingrained grime are organic soiling, which respond to an alkaline cleaner such as Faber 30. A floor with both types of contamination, which is common after building work on an older floor, generally needs both steps to come up properly clean.

Will Faber P147 Plus make my tiles look glossy or plastic looking?

No. P147 Plus is a non film forming treatment that penetrates into the tile rather than coating the surface, so it produces a wet look colour enhancement with a matt finish rather than a glossy, plastic looking coating.

Is it safe to seal a period floor that does not have a damp proof membrane?

A non film forming, breathable treatment like Faber P147 Plus is a suitable choice for this type of floor, because it does not create a surface barrier that would trap ground moisture underneath the tile. A film forming sealer is more likely to cause problems on this type of construction over time.

Can this same process be used on terracotta or other quarry tile floors, not just black and red Victorian tiles?

Yes. Faber Disycott, Faber 30 and Faber P147 Plus are all suitable for terracotta and other unpolished, absorbent tile and stone surfaces, not only Victorian quarry tile. The main thing to adjust for a different floor is brush selection, based on how durable the specific tile surface is.

How long after sealing with P147 Plus can the floor be walked on?

The surface typically dries within 1 to 2 hours, and is ready for normal use after 4 to 6 hours, though this can vary slightly with room temperature and ventilation.

What machine and brush combination was used on this floor, and why?

This floor was restored using a Faber Warrior single disc machine fitted with a Crobber M medium scrub brush. The medium brush was chosen specifically because the black tiles on this floor were surface fired rather than full bodied, so a brush firm enough to lift contamination but gentle enough not to abrade through the thin black surface layer was needed.

Posted on — Leave a comment

Wood Floor Lacquer Application Rate: Avoid Lap Lines

1. Introduction: The Floor Looked Perfect Until the Sun Came Through the Window

You’ve just finished the final coat. The floor looks flawless under the workshop lights, so you pack up, tell the client it’s ready, and head off to the next job. Three days later you get a call: “There are these faint lines running down the hallway — can you see them in this photo?” Under low, raking light — morning sun through a side window, or a lamp at floor level in the evening — a set of parallel streaks has appeared, running the exact width of your roller or applicator, spaced exactly where each pass overlapped the last.

Lap lines are one of the most common finish-quality complaints in wood floor refinishing, and they’re almost never a fault in the product. They’re a symptom of application rate — specifically, not enough finish going down per square metre for the coating to do what it’s designed to do. This article explains the mechanism behind lap lines, why “it looked even when I put it on” isn’t the same as “it was at the correct spread rate,” and how getting application rate right across your primer and lacquer coats is also what actually builds the protection you’re selling the client. We’ll use Arboritec’s system — First Coat, Seal Coat, Vibrant, Classic+, PolyRapid, and Avenue 2K — throughout, since it’s the only lacquer range HF Flooring Supplies stocks and every spread rate figure here comes straight from Arboritec’s own technical data sheets.

2. The Science of Flow, Levelling, and Wet Film Thickness

Every waterborne wood floor primer and lacquer is formulated to “flow and level” — meaning that once it’s on the floor, the liquid is meant to move slightly on its own, smoothing out roller stipple, brush marks, and the ridge where one pass overlaps the next, before it starts to dry. This isn’t automatic. It depends on there being enough liquid — enough wet film thickness — to actually flow.

Think of pouring golden syrup onto a warm pancake versus wiping a thin smear of it across with a knife. Pour a generous amount and it spreads out under its own weight, settling into a smooth, level layer with no ridges. Wipe on the thinnest possible smear and it stays exactly where the knife left it — every stroke mark, every overlap, stays visible because there simply isn’t enough volume of liquid to move and merge.

Wood floor lacquer behaves the same way. Arboritec’s own technical data sheets for Avenue 2K, Seal Coat, and Vibrant all use near-identical wording in the application instructions: apply a sufficient amount of product to ensure good levelling of roller or applicator marks. That’s not filler text — it’s the manufacturer telling you the spread rate figure on the same page is the minimum amount of wet film needed for the flow-and-level chemistry to actually work.

3. Why the Obvious Approach — Spreading It Further — Fails

A contractor who’s run short on a job, or who’s trying to make one tub stretch across a bigger area than it’s rated for, will often thin the application rather than order more product. It looks fine going on. Here’s why it doesn’t stay that way:

  1. A thinner wet film runs out of time to flow before it starts to set. Levelling only happens in the window before the coating begins to flash off and gel. Spread the same litre of product over more square metres and the film is thinner everywhere — which means it reaches that gel point faster, with less time and less material to smooth the overlap zones. The ridge where two passes meet doesn’t get the chance to melt into a single, continuous film.

  2. You lose the wet edge faster than you can work. Every waterborne finish needs the next pass to overlap into an edge that’s still wet, so the two merge into one film. Thin the application and that “still wet” window shrinks — by the time you’ve finished the next section and come back to lap in, the previous edge has already started to skin over. The result is a visible line, not a seam.

  3. “Looks even” and “at spec” are two different things. A coat can look perfectly uniform to the eye while sitting well below the product’s stated spread rate — waterborne lacquers are designed to look glassy and wet immediately after application regardless of how thin the film actually is. The lap lines and the thin dry film underneath both only become obvious once the coating has fully dried and cured, by which point the client has already seen it.

4. The Real Cost: Protection Is Built Coat by Coat, at a Specified Rate

Lap lines are the visible symptom, but the more expensive problem is invisible: under-spreading a primer or lacquer doesn’t just risk lap lines, it also means less dry film ends up on the floor than the system was designed to deliver. A wood floor’s wear resistance, chemical resistance, and scratch resistance aren’t abstract properties of the product in the tub — they’re properties of the cured film thickness that’s actually sitting on the wood, built up coat by coat. Spread a product too thin and you can apply the “correct number of coats” and still hand the client a floor that’s under-protected for the traffic it’s about to see.

This is exactly why Arboritec publishes a spread rate — in litres per square metre or square feet per gallon — for every product in its system, and why that number, not a visual check, is the actual specification:

ProductStated coverageCoats (typical system)
Arboritec First Coat (primer)10–12 m²/litre (50–60 m² per 5L tub)1 coat
Arboritec Seal Coat (primer)8–11 m²/litre (95–131 g/m² with a roller)1 coat
Arboritec Vibrant (primer)Approx. 9.8–12.3 m²/litre (400–500 sq ft/gallon per Arboritec’s TDS)1 coat
Arboritec Classic+ (1K lacquer)Approx. 9–11 m²/litre (45–55 m² per 5L tub)3 coats bare wood, or 2 coats over primer
Arboritec PolyRapid (1K lacquer)8–10 m²/litre2 coats over primer — see below
Arboritec Avenue 2K (2K lacquer)Approx. 9.8–12.3 m²/litre (400–500 sq ft/gallon per Arboritec’s TDS)2–3 coats over primer

Look closely at Classic+ against PolyRapid: PolyRapid has a noticeably lower spread rate — 8–10 m²/litre against Classic+’s 9–11 m²/litre — because it’s formulated with a higher viscosity (a 34/35-second rating, against a standard lacquer’s viscosity). That’s not a flaw or an inefficiency; it’s the entire point of the product. A higher-viscosity finish lays down a thicker wet film per coat at the same application effort, which is why Arboritec state that two coats of PolyRapid over primer deliver the same dry film build as three coats of Classic+. Application rate and viscosity are two sides of the same mechanism — they both control how much material actually ends up on the wood — which is exactly why you can’t compensate for spreading a product too thin by simply “adding another coat later” once the problem is already visible; you have to abrade back and correct it properly.

5. How to Get Application Rate Right on Every Job

  1. Check the TDS spread rate before you start, not while you’re applying. Work out the floor’s square metreage and calculate how many litres of primer and how many litres of lacquer you actually need at the manufacturer’s stated rate — don’t estimate by eye once you’re on your knees with a roller.
  2. Order enough product to hit the correct rate across the whole floor, with a margin. Running out mid-room and thinning the last few square metres to make a container stretch is the single most common cause of lap lines turning up in one specific area of an otherwise good job.
  3. Apply with the tool the TDS specifies. Arboritec recommends a 10mm roller for Avenue 2K, Classic+, and PolyRapid, and a lightweight T-bar applicator for the primers — the applicator affects how consistently the film thickness comes off in your hands, not just how it looks.
  4. Work in sections sized to your own speed, and always lap into a wet edge. Never come back to an edge that’s already started to flash off — if in doubt, work smaller sections rather than larger ones so you can always return to a genuinely wet line.
  5. Choose the right product for the coat count you need, rather than improvising with a standard one. If the job calls for fewer coats to save time on site, specify PolyRapid rather than thinning Classic+ or skipping a coat — the higher-build formulation is designed to deliver the same protection in fewer passes.
  6. Let each coat flow out undisturbed. Don’t go back over an area once it’s started to set to “fix” a patch you’re not happy with — that re-introduces exactly the ridge and lap-line problem the correct application rate was there to prevent. If a section genuinely needs correcting, let it dry fully, abrade, and recoat.

6. Conclusion

Lap lines aren’t a product defect and they’re not bad luck — they’re what happens when a waterborne primer or lacquer is spread thinner than the wet film thickness it needs to flow, level, and merge overlapping passes before it starts to set. The same under-application that causes lap lines is also quietly under-building the dry film that’s meant to protect the floor, coat by coat, at the rate the manufacturer tested and specified. Getting the application rate right — checking the TDS coverage figure, ordering enough product, and keeping a genuinely wet edge as you work — is what separates a finish that looks good in the workshop light from one that still looks good three years and a few thousand footsteps later.

Click here to shop the full Arboritec primer and lacquer range from HF Flooring Supplies and get the coverage rate right on your next job, first time.

Frequently Asked Questions — Wood Floor Lacquer Application Rate and Lap Lines

Q: What actually causes lap lines in a wood floor lacquer finish? A: Lap lines form where two overlapping passes of primer or lacquer meet but don’t merge into a single continuous film before the coating starts to set. This almost always happens because the product was applied at a lower rate — a thinner wet film — than the manufacturer’s stated coverage figure, giving the finish less material and less time to flow together at the overlap.

Q: How do I work out how much primer or lacquer I need for a floor? A: Measure the floor’s total square metreage, then divide by the product’s stated coverage rate from its technical data sheet — for example, Arboritec First Coat covers 10–12 m² per litre, so a 60 m² floor needs roughly 5–6 litres for one coat. Always round up rather than down, and calculate per coat if you’re applying more than one layer.

Q: Can lap lines be fixed once the lacquer has fully dried? A: Yes, but not by adding another coat on top without preparation. The affected area needs to be lightly abraded to key the surface and remove the visible ridge, then recoated at the correct application rate so the new coat can flow out properly. Spot-recoating without abrading usually just adds a second layer of the same problem.

Q: Does applying more product than specified give a glossier or better finish? A: No. Over-spreading past the stated rate risks pooling, sagging on any vertical surfaces like skirting, and a longer drying time, without improving durability — the manufacturer’s coverage figure is the tested rate for correct flow, levelling, and cure, not a minimum to be exceeded for a better result.

Q: What’s the practical difference between Classic+ and PolyRapid’s coverage rates? A: Classic+ covers approximately 9–11 m² per litre and is typically applied in three coats on bare wood (or two over a primer), while PolyRapid’s higher viscosity gives it a lower coverage rate of 8–10 m² per litre — meaning each coat lays down more material, so two coats of PolyRapid over primer deliver the same dry film build as three coats of Classic+.

Q: Why do temperature and humidity affect lap lines? A: Both primers and lacquers need a set window of open time to flow and level before they start to gel, and that window shortens in high temperatures or low humidity. Arboritec’s application instructions specify a 13°C–25°C range with 40–60% relative humidity, and recommend adding 2% Arboritec Extender in hot, dry conditions specifically to keep the open time long enough to avoid lap lines.

Q: Can I thin a waterborne lacquer with water to make it go further? A: No — Arboritec’s application instructions for Classic+, PolyRapid, and Avenue 2K all explicitly state not to dilute the finish. Diluting reduces the solids content of the film below what the product was formulated and tested at, undermining both the flow-and-level behaviour and the final dry film build regardless of how many coats you apply afterwards.

Posted on — Leave a comment

Deep Cleaning & Sealing Slate Floors: The Professional Guide

A customer comes in with a familiar story. Their slate hallway or kitchen floor has been down for ten, fifteen, twenty years. It used to have real depth to it. The blues and greys had character, the surface looked almost wet. Now it just looks tired.

They have mopped it with washing up liquid for years, maybe hit it with vinegar a few times when it looked especially grim, and the floor has responded by getting duller, not cleaner.

This is one of the most common problems we hear about at HF Flooring Supplies, and it is almost never actually a wear problem. It is a chemistry problem. Slate that looks flat and lifeless usually has two things going on at once: years of ingrained grime sitting in the stone's natural texture, and a sealer that either was never applied correctly or has worn out and stopped protecting the surface. Cleaning over the top of that with the wrong products just adds another layer to the problem.

The short version

  1. Deep clean first: strip the floor back to bare, uncontaminated stone with Faber 30, a concentrated alkaline deep cleaner.
  2. Match the sealer to your slate: Deep Enhancer for dense slate, Wet Look Eco or P147 Plus for standard or more porous slate, Hidro 150 for no colour change at all.
  3. Not sure which? A simple water test on clean, dry stone tells you whether your slate is dense or porous.

Sealing over contaminated stone locks the problem in, so never skip the deep clean.

  • FloorSlate, cleft surface
  • MethodDeep clean, rinse, dry, then seal
  • CleanerFaber 30, alkaline at around pH 11
  • Cleaner dwell time10 to 15 minutes

The products in this guide

A deep clean followed by one of four sealers, chosen by how dense your slate is.

  • Faber 30 concentrated alkaline deep cleaner
    Deep cleanFaber 30Alkaline deep cleaner for ingrained grease and old residueFrom £11.36 + VATView product
  • Faber Deep Enhancer colour enhancing impregnator
    Dense slateFaber Deep EnhancerSolvent based colour enhancer for low porosity slateFrom £46.59 + VATView product
  • Faber Wet Look Eco water based colour enhancing sealant
    Porous slateFaber Wet Look EcoWater based, subtle natural colour deepeningFrom £54.91 + VATView product
  • Faber P147 Plus colour enhancing sealer
    Porous slateFaber P147 PlusSolvent based, stronger colour enhancementFrom £45.17 + VATView product
  • Faber Hidro 150 water based impregnator for natural stone
    No colour changeFaber Hidro 150Water based, breathable stain proof impregnatorFrom £30.14 + VATView product
01
The science

Why slate behaves differently to other stone

Slate is a metamorphic rock. Clay minerals and volcanic ash are compressed under heat and pressure until they form the dense, layered structure that gives slate its characteristic cleft surface. That splitting along planes structure is what makes slate slate, and it is also exactly why it needs different treatment to something like granite or marble.

The cleft surface is not flat. It has natural micro fissures and texture variation across every tile, and those fissures do two things: they absorb liquid more readily than the stone's overall density would suggest, and they trap residue from anything you clean it with that does not rinse away completely. A neutral looking cleaning product that would be fine on smooth porcelain can build up in slate's texture over years and leave the floor looking permanently dull, no matter how often it is mopped.

Slate also is not chemically uniform. Most commercial slate is predominantly quartz and mica, both broadly acid resistant, but almost all of it contains at least some calcite or dolomite. Acidic cleaners, vinegar being the classic offender, react with those minerals slowly and invisibly. You will not see damage after one clean. You will see it after two years of regular vinegar cleaning, by which point the surface texture and colour have both changed permanently.

Density and porosity also vary significantly by where the slate came from.

Slate typeTypical densityPorosityColour character
Welsh slateVery denseLowDark blue grey, subtle
Brazilian slateVery denseLowDark, fine grained
Spanish slateDenseLow to mediumConsistent dark grey
Westmorland greenMediumMediumGrey green, strong cleft
Indian black slateVariableMedium to high, origin dependentFine texture, can look flat unsealed

This variation matters for cleaning and it matters even more for sealing, because the sealer that suits a dense Welsh slate is not necessarily the one that suits a more porous Indian black slate. More on that in section 04.

02
The mistake

Why cleaning over the problem never works

Every ineffective slate cleaning routine follows the same pattern, and it is worth being specific about why it fails.

  • Household cleaners redistribute soilWashing up liquid cuts light surface grease well enough on a smooth worktop, but on slate's textured surface it leaves a surfactant film in the fissures rather than lifting soil out of them. The floor looks temporarily cleaner and then dulls again within days.
  • Sealing over contamination locks it inIf you apply any impregnating sealer, even the correct one, over a surface that still has grease, old wax residue, or years of surfactant build up in its texture, the sealer cannot penetrate properly. You end up sealing in the contamination rather than protecting clean stone.
  • Acidic and abrasive products compound damageVinegar etches calcite bearing minerals. Baking soda is mildly abrasive. Neither causes obvious damage on day one, which is exactly why people keep using them. The damage is cumulative and only becomes visible once it is already significant.

The only way to actually fix a dull, ingrained slate floor is to strip it back to bare, chemically clean stone first, and that is a job for a proper alkaline deep cleaner, not a mop and washing up liquid.

03
Stage one

Deep cleaning with Faber 30

Faber 30 2.0 is Faber Chimica's concentrated alkaline deep cleaner, and it is the correct product for exactly this problem: ingrained grease, foot traffic soiling, and old residue that routine cleaning cannot touch. It is rated safe for slate among the other natural stones on its approved surface list.

Faber 30 concentrated alkaline deep cleaner

Faber 30 2.0

From £11.36 + VAT

Concentrated alkaline deep cleaner, available in 1 litre and 5 litre bottles.

Shop Faber 30

How it works

  • High alkalinity, around pH 11It breaks down organic soiling through saponification, the same chemical process that turns fat into soap. Grease and oily grime that are otherwise insoluble in water become water soluble and lift away in the rinse, rather than just being smeared around.
  • Dwell time does the real workFaber 30 needs 10 to 15 minutes of contact time to fully penetrate the micro fissures in slate's cleft surface and act on soiling sitting below the visible surface, not just on top of it.
  • Three dilution strengthsMatch the chemistry to the job. Used undiluted it will strip old wax or polymer coatings. At 1 to 2 it handles heavy ingrained grease. At 1 to 6 it is calibrated for periodic deep cleaning rather than a full strip.
  • Safe on acid sensitive stoneThe alkalinity that dissolves grease does not etch calcite the way an acidic cleaner would, which matters given how much UK slate contains at least some calcite.
Full strip of wax or polymer
Undiluted
Heavy ingrained grease
1 to 2 with water
Periodic deep clean
1 to 6 with water

How to use it on slate

  1. Prepare the floor by sweeping or vacuuming loose debris, and treat manageable sections rather than the whole floor at once.
  2. Dilute to the strength that matches the job: 1 to 2 for a genuinely neglected floor with heavy ingrained soiling, 1 to 6 for a periodic deep clean on a floor in reasonable condition.
  3. Apply the solution evenly across the section with a single disc machine or stiff brush, working it into the cleft texture.
  4. Wait 10 to 15 minutes, agitating periodically to help the solution penetrate the fissures fully.
  5. Extract with a wet vacuum, then rinse thoroughly with clean water.
  6. Let the floor dry completely before moving on to sealing.
Do not skip the rinse or the drying time

Any alkaline residue left on the surface can interfere with how a sealer cures afterwards, and sealing a damp floor traps moisture beneath the sealer and compromises the result.

04
Stage two

Sealing slate: matching the product to your stone

This is the step most DIY slate restorations get wrong. Not because sealing is complicated, but because there is not a single best slate sealer. The right choice depends on your slate's density and porosity, and on whether you want the floor to look natural or to have its colour deepened.

Step 4.1Test first: is your slate dense or porous?

Before choosing a sealer, do a simple water test on clean, dry stone. Drop a small amount of water onto the surface and watch what it does.

Water beads and sits on top

What it means
Denser, lower porosity slate. The water sits for a while before slowly darkening the stone. Typically Welsh, Brazilian, or good quality Spanish slate.
Best suited to
Faber Deep Enhancer

Water absorbs and darkens quickly

What it means
More porous slate. This is common with Indian black slate and some Westmorland green.
Best suited to
Faber Wet Look Eco or P147 Plus

Step 4.2Dense, low porosity slate: Faber Deep Enhancer

Faber Deep Enhancer is a solvent based colour enhancing impregnator built specifically for low absorption, compact surfaces where water based products struggle to penetrate efficiently. Its hydrocarbon carrier gets into dense material structure that water based enhancers cannot reach effectively. On genuinely dense slate, this is exactly the profile that suits it: it deepens the natural tone, delivers strong stain and water repellency, and leaves a matt finish with no added gloss or surface film.

Deep Enhancer offers a dwell time choice that is worth understanding.

20 to 30 minutes
Good, easily managed colour enhancement
45 to 60 minutes
Noticeably deeper colour and stronger protection, with residue slightly harder to remove

On a dense slate where penetration is naturally slower, the extended dwell time is usually worth the extra care at the removal stage.

How to use it

  1. Apply an even coat with a brush, roller, or lambswool applicator, covering the section fully.
  2. Redistribute any excess across the surface after 5 to 10 minutes so nothing pools.
  3. Wait 20 to 30 minutes for standard enhancement, or 45 to 60 minutes for maximum colour depth on very dense stone.
  4. Remove all residue thoroughly with a floor polisher and a white or lambswool pad. This step is critical.
  5. Clean equipment immediately with white spirit, not water. This is a solvent based product and water will not shift it from brushes or applicators.
  6. The surface is dry within 1 to 2 hours. Return the floor to normal use after 4 to 6 hours.
Remove every trace of residue

Anything left on the surface dries into a greasy patina that is genuinely difficult to remove later.

Step 4.3Standard or more porous slate: Wet Look Eco or P147 Plus

If your slate is more porous, with Indian black slate the most common example along with some Westmorland green, a compact surface product like Deep Enhancer is not the right fit. HF's own experience with slate restoration points to two better options instead.

Faber Wet Look Eco

Type
Water based colour enhancing impregnator
Look
Subtle, natural colour deepening that replicates freshly wetted slate, with a slight sheen and no surface film
Best for
Most residential slate floors, including Indian black and Westmorland green. Lower VOC and easier to apply in an occupied property.

Faber P147 Plus

Type
Solvent based colour enhancer
Look
Noticeably stronger, more dramatic colour enhancement. Matt rather than glossy, so the enhancement is about colour depth, not shine.
Best for
Restoration jobs where slate has faded significantly and the client wants the floor returned to how it looked when first laid

Both are applied in broadly the same way as Deep Enhancer: even coat, dwell time, then residue removal. Always check the specific technical data sheet for exact timings before starting, since dwell times differ between the two products.

Step 4.4No colour change at all: Faber Hidro 150

If the floor's natural colour is exactly what the customer wants preserved, which is common on conservation properties or where a very light slate would look wrong artificially darkened, Faber Hidro 150 is the right product regardless of density or porosity. It is a water based, breathable impregnator that penetrates the stone and protects against oil and water based staining without changing the colour, texture, or sheen of the surface at all.

Type
Water based, breathable
Drying
Fast drying
Certified
Food contact certified
Suitable for
Indoor and outdoor slate

How to use it

  1. Apply a thin, even coat with a brush, lambswool applicator, roller, or cloth.
  2. Wipe off any residue immediately with a clean dry cloth. Hidro 150 is fast drying and generally leaves nothing behind, but on more compact areas a slight residue can appear.
  3. Apply a second coat on highly absorbent slate, waiting at least 45 minutes after the first.
  4. The surface is dry within about an hour. Normal use can resume after 2 to 3 hours.
05
Conclusion

Clean first, then seal to match

Restoring a dull, tired slate floor comes down to getting two things right in order: strip out the years of ingrained grime and residue with a proper alkaline deep clean, then seal with the product that actually matches your slate's density and the finish you want, rather than whatever sealer happens to be to hand.

The key takeaways

  • Slate's cleft, textured surface traps residue from household cleaners in a way smoother stone does not, which is why it dulls even when it is being cleaned regularly.
  • Sealing over contaminated stone locks the problem in. Deep clean first, always.
  • Faber 30 handles the deep clean, using alkaline saponification and proper dwell time to break down grease and grime that mopping cannot touch.
  • Sealer choice depends on density: Deep Enhancer for dense, low porosity slate wanting colour enhancement, P147 Plus or Wet Look Eco for standard or more porous slate, and Hidro 150 wherever the natural colour needs to stay exactly as it is.

If your slate floor has lost its depth and character and mopping is not bringing it back, the fix starts with proper deep cleaning chemistry, not a stronger scrub.

Ready to bring your slate floor back?

Start with the deep clean. Order Faber 30 from HF Flooring Supplies and restore your slate floor properly today.

  • Orders placed Mon to Fri before 2PM are dispatched the same day for next working day delivery
  • Not sure which sealer? Contact us
Questions

Frequently asked questions

Can I seal my slate floor without deep cleaning it first?

No. Sealing over grease, old wax, or years of cleaning product residue traps the contamination beneath the sealer and prevents proper penetration. The result looks patchy and never achieves the finish the sealer is capable of. Always deep clean with Faber 30 and rinse thoroughly before applying any sealer.

How do I know if my slate is dense or porous?

Do a water test on clean, dry stone. Drop a small amount of water on the surface. If it beads and sits for a while before slowly darkening the stone, it is dense, low porosity slate suited to Deep Enhancer. If it absorbs and darkens quickly, it is more porous and better suited to P147 Plus or Wet Look Eco.

Is Faber 30 safe to use on all types of slate, including Welsh slate?

Yes. Faber 30 is formulated to be safe on acid sensitive stone, including slate containing calcite or dolomite, when used at the correct dilution and rinsed thoroughly afterwards. Welsh slate, Spanish slate, Brazilian slate, and Indian black slate can all be deep cleaned with Faber 30.

What is the difference between Deep Enhancer and P147 Plus for colour enhancement?

Deep Enhancer is formulated specifically for dense, low absorption compact surfaces and penetrates that type of structure efficiently. P147 Plus is a more general purpose solvent based colour enhancer suited to standard or more porous slate. Both give a matt, colour deepened finish rather than gloss, but choosing the one that matches your slate's porosity gives a better, more even result.

Can I use a water based sealer if I want strong colour enhancement?

Wet Look Eco is water based and gives a genuine but subtler colour deepening than the solvent based options. If maximum colour depth is the priority, for example on a faded floor being restored to its original appearance, P147 Plus (or Deep Enhancer, on dense slate) will give a more pronounced result than a water based product can.

How often does a sealed slate floor need re sealing?

Do a water bead test periodically. If water still beads on the surface, the sealer is active. Once water starts absorbing and darkening the stone, the sealer has depleted. In a typical residential setting this is roughly every three to five years, though heavy foot traffic will shorten that.

Are Deep Enhancer and P147 Plus safe to use indoors?

Both are solvent based with a flash point below 21°C, so they require good ventilation during application, no naked flames or ignition sources nearby, and appropriate PPE. They are safe for indoor use when applied correctly under these conditions. Faber 30 and Hidro 150, by contrast, are water based and do not carry the same flammability precautions.

All Faber products mentioned in this guide are available from HF Flooring Supplies. HF Flooring Supplies is a selected UK partner for Faber Chimica.

Posted on — Leave a comment

Nano Protection in Stone, Tile & Wood Care Products — Marketing Word or Real Science?

Walk into any stone care supplier, browse any trade website, or pick up almost any sealer in the surface care market and you’ll see it. Nano protection. Nano technology. Nano seal. Nano guard.

It’s everywhere. And nobody — not the suppliers selling it, not the contractors buying it, not the end users paying for it — is asking the obvious question.

Where’s the nano?

We read the SDS sheets so you don’t have to. Here’s what we found.


What Nanotechnology Actually Means

Nanotechnology is the manipulation and engineering of matter at a scale of 1 to 100 nanometres. To put that in context, a human hair is approximately 80,000 to 100,000 nanometres wide. A single red blood cell is around 7,000 nanometres. We’re talking about engineering at a scale that is genuinely extraordinary — and genuinely expensive.

At the nanoscale, materials behave differently to their bulk equivalents. Nano-engineered silica particles, for example, can penetrate stone pore structures at a molecular level and bond within them in ways that conventional particle-size chemistry cannot replicate. Nano-fluoropolymer particles can deliver water and oil repellency at concentrations that would be ineffective at larger particle sizes.

This is real science. It exists. It works. And it costs serious money to produce, stabilise, and deliver in a commercial product.

A genuinely nano-engineered surface care product reflects that cost. When you see nano claims at mainstream price points — and particularly when you see them on products that haven’t disclosed any nano-specific chemistry — it’s worth asking what you’re actually paying for.


The SDS Sheet — Your Most Important Tool

Every professional cleaning and sealing product sold in the UK and EU is legally required to have a Safety Data Sheet — an SDS — produced to a standardised 16-section format under REACH Regulation 1907/2006.

Section 3 of every SDS must disclose the composition of the product — every significant ingredient above regulatory disclosure thresholds, with its CAS number, concentration range, and hazard classification. This is a legal requirement. Manufacturers cannot omit significant ingredients. They cannot hide an active component that is present at a meaningful concentration.

The SDS is the most honest document a manufacturer produces about their product. It’s written for regulators and safety professionals, not for marketing purposes. And it tells you, with legal precision, what is actually in the bottle.

If a product genuinely contained engineered nanoparticles at a concentration sufficient to deliver the protection being claimed on the label, those nanoparticles would appear in Section 3 of the SDS with a CAS number.

This is where the nano story in stone and wood care gets very interesting indeed.


What You Actually Find in “Nano” Cleaners

Look at the SDS of products marketed as nano cleaners in the stone, tile, and wood care sector and the picture is consistent. You’ll find some variation of the following: water as the primary carrier, a surfactant system — ethoxylated alcohols, alkyl polyglucosides, or similar chemistry — sometimes a glycol ether co-solvent to assist penetration, sometimes a fragrance, sometimes a preservative or biocide.

These are conventional cleaning formulations. Good ones, often — surfactant chemistry is well understood and genuinely effective at lifting soiling from hard surfaces. But they are not nanotechnology. The nano claim adds nothing to the formulation, nothing to the cleaning performance, and nothing to the value of the product. It adds to the price.

Some nano-labelled cleaners in our sector also contain methanol — present as an impurity from cheap industrial ethanol used in the formulation. Methanol is genuinely toxic. It absorbs through the skin, metabolises to formaldehyde and formic acid in the body, and presents a real concern for professional cleaners using products repeatedly in enclosed spaces. A product with methanol in the SDS and nano on the label should prompt some serious questions about where the manufacturer’s priorities lie.

The cleaner you want for daily stone and tile maintenance is pH neutral, low residue, and honestly formulated. Faber AlgaFloor — pH 6.5, no rinse required, fully disclosed ingredients — costs less than 3p per litre of working solution at the recommended daily dilution. No nano required.


What You Actually Find in “Nano” Sealers

Sealer SDS sheets tell an equally consistent story.

The majority of solvent-based sealers marketed with nano claims contain a hydrocarbon solvent system — typically C9-C13 isoalkane fractions, white spirit derivatives, or turpentine substitutes — making up anywhere from 45% to 85% of the product by weight. A co-solvent such as butyl acetate or a glycol ether. And an active sealing ingredient — typically a fluoropolymer, silane, or siloxane — present at relatively low concentration and often described only generically in the SDS.

The hydrocarbon carrier is doing the delivery work. It carries the active ingredient into the stone pore structure and then evaporates, leaving the active chemistry behind. This is proven, well-established sealer technology. It works. It has worked for decades. But it is not nanotechnology.

The VOC content is the tell. Products with 80%+ VOC content by weight — classified as flammable liquids under UN1993 for transport — are overwhelmingly solvent carrier systems. Genuine nano-particle chemistry in surface care tends toward water-based or low-VOC systems, because nanoparticles can be stably dispersed in water without aggressive hydrocarbon carriers.

A product sitting at over £100 per litre, carrying a prominent nano claim, with VOC content above 80% and an ingredient list dominated by C9-C13 hydrocarbons and butyl acetate, is a solvent-based impregnator. Potentially an excellent one — the active chemistry it carries may perform very well. But the nano on the label is a marketing decision. It is not a chemistry decision.


What Honest Formulation Disclosure Actually Looks Like

To understand why the nano habit matters, it helps to look at what fully transparent chemistry disclosure looks like in practice. We stock Faber Chimica’s professional range, and their SDS sheets across the sealer product line are instructive — not because their products are perfect, but because every ingredient is named, every concentration is declared, and nothing hides behind a marketing word.

Take Faber Protex, a fast-drying solvent-based stain protection treatment for marble, granite, and natural stone. The SDS is completely direct. The primary ingredient is n-butyl acetate at 94–98% — the solvent carrier. Supporting it is a small fraction of C11-14 hydrocarbon isoalkanes and dipropylene glycol monomethyl ether. It ships as UN1123, Butyl Acetates Solution, a Class 3 flammable liquid. Protex doesn’t call itself nano. It doesn’t need to. It’s a fast-drying solvent impregnator, and the SDS tells you exactly that.

Now look at Faber P147 Plus, a solvent-based tonalising treatment for absorbent surfaces. The formulation is more complex: propylene glycol methyl ether acetate as the primary carrier at 30–35%, C9-C11 hydrocarbon isoalkanes at 21–25%, methyl acetate at 2.5–3%. Then, disclosed individually with CAS numbers, come the more interesting components: decamethylcyclopentasiloxane (D5) at 1–1.5% — flagged as a PBT substance — methanol at 0.5–0.6% with full toxicological data, and two cyclosiloxane components at trace concentrations, disclosed as PBT, vPvB, and endocrine disrupting. The SDS states this directly in Section 2.3. Faber doesn’t hide the regulatory complexity of these ingredients behind a nano label. They disclose it and let the professional decide.

Faber Wet Look Eco moves to water-based chemistry entirely. The primary active is poly amino functional siloxane, hydroxy-terminated — a silicone polymer — at 13.5–15%, with triethoxyoctylsilane as the penetrating silane component at 4–4.5%. The functional ingredients are named precisely. Not flammable, no UN number, no hydrocarbon carrier. It doesn’t claim nano. It tells you it contains triethoxyoctylsilane, and triethoxyoctylsilane is what does the work.

Faber Hidro 150, a water-based stain-proof impregnator, takes the disclosure further still. The active chemistry is tripotassium propylsilanetriolate — an alkali metal silanetriolate — at 1–1.5%. This is the molecule that bonds within the stone pore structure and creates the hydrophobic barrier after application. It’s present alongside propan-2-ol at 1–1.5% as a co-solvent, 1-methoxy-2-propanol at a trace fraction, and IPBC — a biocide — at below 0.05%. The full hazard profile of that biocide, including its aquatic toxicity and sensitisation classifications, is disclosed. Incombustible. pH 11 at 5% concentration. No nano claim. Just chemistry, named.

And Faber Hidro Protector MM, their eco-friendly water-based impregnator, goes further in a different direction entirely: sodium silicate at 21–22.5%, in a water carrier, with no organic solvents whatsoever. Inorganic mineral chemistry. pH 10–11. The ingredient is sodium silicate and the SDS says so.

This is what the range looks like when a manufacturer tells you what is in the bottle. Solvent-based systems are named as solvent-based. Water-based silane chemistry is identified by the specific silane molecule. Inorganic chemistry is disclosed as inorganic. PBT substances are flagged. Biocides are declared. Nothing is summarised as nano.


The Comparison That Matters

Now hold that picture — five products, five fully disclosed formulations, five entirely different chemistry approaches for five different applications — and go back to the Lithofin NanoTOP SDS we looked at previously.

NanoTOP is a product literally named for its nano claim. The SDS shows hydrocarbons C9-C10 isoalkanes at 45–50%, n-butyl acetate at 15–20%, further C11-C13 isoalkane fractions at up to 20%, and a glycol ether carrier. VOC content: 80.5% by weight. Transport classification: UN1993, flammable liquid. Flash point: flammable. The word nano appears nowhere in Section 3. No nanoparticle CAS number. No engineered nano-silica. No nano-fluoropolymer. The active sealing ingredient — whatever is carrying the actual sealing function — is present in undisclosed form within a predominantly hydrocarbon solvent system.

It retails at over £100 per litre.

Compare that to Faber’s range. Hidro 150 names its active ingredient — tripotassium propylsilanetriolate — tells you its concentration, its pH, its hazard profile, and its transport classification. Wet Look Eco names triethoxyoctylsilane and poly amino functional siloxane and tells you the same. Hidro Protector MM tells you it’s sodium silicate and nothing else of significance.

None of these products claims nano. All of them tell you what the chemistry is.

This is not an argument that Lithofin make a bad product. NanoTOP may perform excellently as a solvent-based impregnator. The point is simpler than that: the word nano on the label and nothing in the SDS to support it is a gap between marketing and chemistry that every professional using these products deserves to understand.


Why the Cyclosiloxane Disclosure Matters Particularly

One detail from the P147 Plus SDS is worth pausing on, because it illuminates something important about what transparent disclosure looks like even when the news is complicated.

P147 Plus contains decamethylcyclopentasiloxane (D5) and two related cyclosiloxane components — OttmethylCiclotetrasilossano and Dodeca Metil Cicexasilossano — in trace concentrations. All three are on the REACH Candidate List. D5 is classified as a PBT substance. The cyclotetasiloxane is flagged as a PBT, vPvB, and endocrine disrupting substance. Faber discloses all of this in Section 2.3 and Section 3 without ambiguity.

Now consider: siloxane chemistry is frequently present in premium “nano” sealers — it’s one of the chemistries that nano marketing often gestures toward, implicitly or explicitly. If those sealers contain D5 or related cyclosiloxanes without disclosing them, that’s not just a marketing problem. It’s a regulatory compliance problem. And the contractor applying the product — often in enclosed commercial kitchen stone areas, hotel lobbies, or bathroom installations — has no way to make an informed assessment of occupational exposure if the ingredients aren’t declared.

Honest SDS disclosure protects the professional using the product. The nano label does not.


What Good Sealer Chemistry Actually Looks Like

Professional stone sealers work through a small number of proven mechanisms. None of them require a nano claim to justify their performance. The Faber range makes this concrete.

Silane and siloxane impregnation is the workhorse of professional stone protection. The mechanism — silane molecules penetrate the pore structure, react with the mineral substrate, and form a hydrophobic barrier below the surface — is fully understood, extensively researched, and completely effective. Faber Hidro 150 delivers this through tripotassium propylsilanetriolate. Faber Wet Look Eco delivers it through triethoxyoctylsilane. Both SDS sheets name the chemistry. Neither calls it nano.

Inorganic mineral consolidation through sodium silicate — as in Hidro Protector MM — is a different mechanism entirely. The silicate penetrates and reacts with the substrate itself, binding fine particles and consolidating the pore structure. It’s particularly effective against rising damp in dense natural stone. No organic solvents, no VOCs, genuinely eco. Still not nano.

Solvent-carried impregnation — as in Protex and P147 Plus — uses a hydrocarbon or ester carrier to deliver the active chemistry more aggressively into denser stone pore structures. The solvent evaporates; the active remains. Proven, fast, effective for difficult substrates. Honestly described in the SDS.

When you know what the active chemistry is — because the SDS tells you — you can choose the right product for the surface, the application, and the occupational environment. A solvent-based impregnator is not the right choice in a poorly ventilated space with prolonged application time. A water-based silane system is not the right choice on a very dense, low-porosity stone where solvent carry is needed to achieve penetration. These are professional judgements. They require professional information. The word nano gives you none of it.


Why Nobody in the Industry Talks About This

The surface care sector has quietly adopted nano as a premium signifier in the same way the food industry adopted artisan or the cosmetics industry adopted clinical. It implies advanced technology, superior performance, professional-grade results. It justifies a higher price point. And nobody upstream has an incentive to question it.

Distributors don’t ask because the margin is good. Retailers don’t ask because the word sells. Contractors don’t ask because they trust the brand. End users don’t ask because they assume someone upstream has done the due diligence.

Nobody reads the SDS.

This isn’t unique to any one brand or any one product. It is an industry-wide habit. Some of the most respected names in stone and wood care use the word nano on products whose SDS sheets contain no nano-specific chemistry whatsoever. They do so because it works as a marketing tool, because there is no regulatory definition of nano in the surface care sector that would prevent them, and because nobody is asking the question.

We’re asking the question.


How to Evaluate Any Stone or Wood Care Product

Before purchasing any cleaner or sealer — nano claim or otherwise — apply this process.

Request the SDS. Every supplier is legally obliged to provide it. If they won’t, that tells you something.

Look at Section 3. What is the carrier system — water or solvent? What are the active ingredients? Are they specifically named with CAS numbers? Is anything that would justify a nano claim — engineered nanoparticles, reactive nano-silica, nano-fluoropolymer — actually disclosed? Or is Section 3 a list of hydrocarbon solvents and generic carriers?

Look at Section 9. What is the flash point? What are the VOCs? A flash point in the low twenties and a flammable liquid classification confirms a hydrocarbon carrier. A product that is incombustible with no flash point is water-based. These are not minor details — they affect storage, handling, and application safety.

Look at Section 2.3. Are there PBT substances? Endocrine disrupting components? Candidate List substances? A manufacturer who discloses these honestly is giving you information you need. A manufacturer who doesn’t disclose them may have more to hide than a nano claim.

Look at the price relative to the disclosed chemistry. Does what’s in the bottle justify what’s on the label?

A cleaner built on citric acid, surfactant, and a grease-cutting agent is a cleaner. A sealer built on hydrocarbon solvents carrying a silane or fluoropolymer active is a penetrating impregnator. Both can be excellent products for the right application. Neither is nanotechnology — and neither needs to be to do its job well.


What We Stock and Why

At HF Flooring Supplies we stock Faber Chimica’s professional cleaning and surface care range alongside Arboritec wood floor treatments because these brands don’t rely on marketing language to justify their products. Their SDS sheets are complete. Their TDS sheets give real dilution ratios, real coverage figures, and real application guidance. Their chemistry is engineered for specific surface types and specific problems — and the SDS tells you exactly what that chemistry is, including where it’s complicated.

Full SDS and TDS documentation is available for every product we sell. For trade pricing and accounts visit hfflooringsupplies.co.uk or contact us directly.

Read the SDS. Know what you’re buying. Your surfaces — and your margins — will thank you.


Frequently Asked Questions

What does nano mean in stone sealers?
Nanotechnology refers to particles engineered at 1–100 nanometre scale. In genuine nano sealers these particles would penetrate stone at a molecular level and bond within the pore structure — and would be disclosed in Section 3 of the SDS with a CAS number. Most products using the word nano in stone care are conventional silane, siloxane, or fluoropolymer sealers in a hydrocarbon or water carrier. The word nano has no regulatory definition in the surface care sector and is widely used as a marketing term without supporting chemistry.

How can I tell if a stone sealer actually contains nano chemistry?
Request the Safety Data Sheet and look at Section 3. Genuine nano-engineered particles would be disclosed with a CAS number. If Section 3 lists only hydrocarbon solvents and generic carrier chemistry with no specifically named active sealing ingredient, the nano claim has no chemical basis. For comparison: Faber Hidro 150 names its active ingredient as tripotassium propylsilanetriolate with CAS number 93857-00-2. That’s what transparent disclosure looks like.

What is an SDS sheet and why does it matter?
A Safety Data Sheet is a legal document required under REACH Regulation 1907/2006 for all professional cleaning and sealing products. Section 3 must disclose all significant ingredients above regulatory thresholds with CAS numbers and concentrations. It tells you exactly what is in a product regardless of what the marketing material claims. Section 2.3 discloses PBT substances, vPvB substances, and endocrine disruptors. Section 9 gives you physical properties including VOC content and flash point. The SDS is the most honest document a manufacturer produces about their product.

Are nano stone sealers worth the money?
That depends entirely on whether the product genuinely contains nano-engineered chemistry — which you can only establish by reading Section 3 of the SDS. Most products marketed as nano sealers are conventional solvent-based impregnators. They can be excellent products. But a well-formulated silane or siloxane impregnator with transparent, fully disclosed ingredients at a fair price will outperform an overpriced product with a nano label and no supporting chemistry in the SDS. Read the SDS first. Always.

What is the best stone sealer for natural stone in the UK?
It depends on stone type, finish, porosity, and application environment. Faber Chimica’s professional sealer range spans water-based silane chemistry, inorganic mineral impregnation, and solvent-based penetrating treatments — all with fully disclosed chemistry and complete SDS documentation. Contact HF Flooring Supplies for advice on the right product for your specific surface.

What is silane siloxane sealer and how does it work?
Silane and siloxane sealers are penetrating impregnators that enter the pore structure of stone and react with the mineral substrate to form a water and oil repellent barrier below the surface. Silanes are smaller molecules that penetrate more deeply into dense stone; siloxanes work effectively closer to the surface on more porous substrates. Both are proven, well-understood sealing technologies that do not rely on nano claims to justify their performance. Faber Hidro 150 uses tripotassium propylsilanetriolate; Faber Wet Look Eco uses triethoxyoctylsilane. The SDS names both.

Can I use a daily floor cleaner on natural stone?
Yes, but it must be pH neutral. Acidic cleaners etch polished marble, limestone, and travertine. Alkaline cleaners used repeatedly can strip impregnating sealers over time. A genuinely pH neutral cleaner such as Faber AlgaFloor at pH 6.5 is safe for daily use on all sealed natural stone, polished porcelain, and glazed ceramics. At the recommended dilution AlgaFloor costs less than 3p per litre of working solution.

Why does mould keep coming back in tile grout?
Bleach-based mould removers decolourise mould at the surface but do not penetrate deeply enough to kill the full colony within porous grout. The dead organic matter then feeds the deeper mould growth, which re-establishes often faster than before. The correct approach is alkaline deep cleaning to physically lift the mould from the grout body, followed by an impregnating sealer to close the pores and prevent re-establishment.

What is the difference between a cleaner and a sealer for stone floors?
A cleaner removes soiling from the surface or pore structure of stone. A penetrating impregnator enters the pore structure and creates a water and oil repellent barrier that makes the stone easier to clean and more resistant to staining. The stone should be thoroughly cleaned before sealing and a suitable maintenance cleaner used regularly after sealing to preserve the treatment.

Posted on — Leave a comment

Floor Sanding Abrasive Grain Types: Aluminium Oxide, Silicon Carbide, Zirconia & Ceramic Explained

Ask most people what abrasive they are running and they will tell you the grit. 40, 60, 80, 100. Fair enough, grit decides how coarse the scratch is. But grit is only one part of the story.

The grain type decides how fast you cut and how long the belt lasts. The grade within that grain type decides whether you are paying for a harder mineral or just a marketing word. The backing decides whether the whole thing survives the job without cooking. And the grit standard, the coat, and the sequence decide whether all of that actually shows up as a clean, even floor.

Most spec sheets shout the grit and whisper everything else. This is a proper look at what is under the number, with real examples from the abrasives we stock and use ourselves, so it is not just theory.

The short version

  1. Grain: decides cut rate and belt life. Zirconia and ceramic fracture in tiny steps and stay sharp, which is why they last.
  2. Backing and coat: heavy X or Y cloth or a hybrid backing for belts, and a semi open coat for resinous wood and old finishes.
  3. Sequence: never skip a grit, and replace a belt as soon as it stops biting.

Two belts both labelled ceramic can behave completely differently, so check what is actually in the grain.

  • Grains coveredAluminium oxide, silicon carbide, zirconia and ceramic
  • Also coversBacking, open and closed coat, grit standards
  • BrandMenzer belts, discs, screens and pads
  • IncludesWhich abrasive to pick for each job
01
The basics

Two properties decide everything: hardness and toughness

Every abrasive grain lives or dies on two properties, and they pull in opposite directions.

Hardness is the grain's ability to scratch the material in front of it. It is measured on the Mohs scale, with talc at 1 and diamond at 10. For the four grains used in floor sanding and woodworking, the numbers sit surprisingly close together.

Mohs hardness of the four grains
  • Silicon carbideabout 9.5
  • Ceramic aluminaabout 9.4
  • Aluminium oxideabout 9.0
  • Zirconia aluminaabout 8.5

Toughness, or friability, is how the grain breaks down under pressure. This is the property people forget, and it matters more than raw hardness. A grain that never fractures just goes blunt and starts burnishing your floor instead of cutting it. A grain that fractures in a controlled way keeps snapping off tiny worn edges to reveal fresh sharp ones underneath, so it stays sharp as it wears. That is the self sharpening effect you will see quoted, and it is real physics, not marketing.

So the hardest grain on the list is not automatically the best. Silicon carbide is the hardest of the four, yet it has one of the shortest working lives, because it is brittle and sheds fast.

02
Staying sharp

How grains stay sharp: macro, micro and nano fracturing

This is the bit that separates a cheap belt from an expensive one, so it is worth understanding.

Silicon carbide and aluminium oxide

Structure
Monocrystalline. Each grain is essentially one large crystal.
How it breaks
Along big planes of weakness, with big chunks coming off at a time. It only does this a handful of times before the grain is spent. That is macro fracturing.

Zirconia alumina and ceramic alumina

Structure
Engineered grains built from thousands of tiny micron and submicron crystals packed together.
How it breaks
In tiny increments, shedding microscopic fragments rather than lumps. Zirconia can micro fracture hundreds of times across its life. Ceramic can do it thousands of times, which is why it is sometimes called a nano fracturing grain.

More fracturing events means the grain exposes fresh cutting edges again and again instead of dulling. That is the whole reason zirconia and ceramic hold their cut rate long after cheaper grains have gone smooth and started riding on top of the wood.

03
The grains

The four grains, and where each one earns its keep

One thing worth saying up front: the grain name on the box is the mineral, not the grade. Within every one of these families there is a quality and price ladder, driven by the purity of the mineral, how tightly the grain is graded for size, and the quality of the bond holding it down. A cheap silicon carbide and a premium silicon carbide are both silicon carbide, and they behave nothing alike. So treat the type as the starting point, not the whole answer.

Grain 1Aluminium oxide: the honest workhorse

Best for
Low pressure and finishing work
Weak spot
Wears quickly under drum sander pressure
Our pick
White fused grade for finishing

Blocky shaped grain with sharp edges. It is the most common abrasive on the market and it is cheap, but on its own under drum sander pressure it wears down too quickly to be the star of a heavy cut. Where it shines is low pressure and finishing work: orbital discs, hand sheets, and between coats abrading. Its blocky shape leaves a fine, consistent scratch pattern with no stray deep scratches, which is exactly what you want when you are keying a finish rather than removing timber.

And it is not one thing. Brown aluminium oxide, around 95% pure, is the tough, cheap, semi friable everyday grade. White fused aluminium oxide, 99% plus, is more friable and runs cooler, which makes it better for lacquers and between coats. Same aluminium oxide on the label, two different price points and two different behaviours. It is why we stock the white fused grade specifically for finishing work rather than a general purpose brown. Our Menzer UltraNet 150mm mesh discs and UltraPad discs in 150mm and 406mm all use white fused grain, precisely because a final sand or a lacquer cut back needs the cooler, more consistent cut rather than raw aggression.

  • Menzer UltraNet 150mm white fused aluminium oxide mesh sanding discs
    Mesh discMenzer UltraNet 150mmWhite fused aluminium oxide mesh discs, pack of 50£51.25 + VATView product
  • Menzer UltraPad 150mm white aluminium oxide sanding disc
    DiscMenzer UltraPad 150mm3 in 1 fleece, white aluminium oxide£44.56 + VATView product
  • Menzer UltraPad 406mm white fused aluminium oxide disc
    DiscMenzer UltraPad 406mm16 inch white fused aluminium oxide£69.62 + VATView product

Grain 2Silicon carbide: sharp, fast, and short lived

Best for
Screens, stone, screed and concrete
Weak spot
Friable, sheds heavily early on
Our pick
Menzer 406mm open net screens

The hardest of the four and the sharpest, with a long, pointy grain. It cuts raw wood and old coatings fast, and its sharpness can leave a lovely fine scratch, which is why it turns up on screens, mesh and finishing grits. It is also the standard grain for stone, screed and concrete, anywhere you are not cutting timber. The trade off is friability. It sheds heavily, especially early in its life, and those long grain fragments can occasionally dig in and leave an errant deep scratch. On screens you will sometimes see the shed grain get trapped and drag a coarse line across the floor. A brilliant tool for the right stage, but not a grain to lean on for a long, hard cut.

Are all silicon carbides the same? Not remotely. There is black silicon carbide, roughly 95 to 98% pure, which is the common, cheaper one, and green, 99% plus pure, which is harder, sharper and more expensive. On top of the purity, the thing that separates a good SiC from a cheap one is grading consistency, meaning how tightly the grain is screened to a uniform size. Cheap grain has a loose size spread, which means the odd oversized particle riding proud of the rest, and that is exactly what leaves rogue scratches you then have to chase out. Pay a bit more and you are often paying for consistency as much as purity.

Menzer silicon carbide 406mm open net sanding screen

Menzer silicon carbide 406mm screens

£31.37 + VAT

Built with a genuine open net mesh so dust pulls straight through rather than packing between the grains, keeping the screen cutting cool instead of glazing over.

Shop silicon carbide screens

Grain 3Zirconia alumina: the drum belt hard worker

Best for
Belt and drum sanding on demanding floors
Needs
Firm pressure to self sharpen
Our pick
Menzer Blue Zirconia

A tough, co fused grain, aluminium oxide married to zirconium oxide, long and spindly in shape. It micro fractures and self sharpens, so it lasts far longer than silicon carbide on hard woods and tough coatings. This is the go to grain for belt and drum sanding on demanding floors. One important catch: zirconia needs firm pressure to work. Starve it of load and it will not fracture and resharpen. It will glaze over and start generating heat instead of cutting. Give it the pressure it wants and it earns its place.

Here too there is a spread. Zirconia is sold in different alloy ratios, with grades around 25% and 40% zirconia, and the fineness of the crystal structure, set by how fast the melt is quenched in manufacture, makes a real difference to how well it holds up. A budget zirconia belt and a premium one can be a world apart in life and cut, even at the same grit.

This is the grain behind our own Menzer Blue zirconia belts, 200 x 750mm, and the matching 178mm edger discs. They use self sharpening zirconia alumina on a hybrid polyester reinforced backing rather than basic cotton cloth, semi open coated to resist lacquer and resin clogging. It is the everyday workhorse for general stripping and hardwood profiling.

  • Menzer Blue zirconia sanding belt 200 x 750mm
    Drum beltMenzer Blue Zirconia belt200 x 750mm, pack of 10, 24 to 100 gritFrom £35.62 + VATView product
  • Menzer Blue zirconia sanding disc 178mm
    Edger discMenzer Blue Zirconia disc178mm matching edger disc, 40 to 100 gritFrom £52.50 + VATView product

Grain 4Ceramic alumina: the premium grain

Best for
Exotic and very hard timbers, hardened finishes, sports floors
Needs
Adequate pressure and the right machine
Our pick
Menzer Ruby HD, 100% ceramic

This is the engineered end of the spectrum. Ceramic grain is made by a sol gel, or seeded gel, process. Alumina is grown from a gel and sintered below its melting point, producing a grain made of thousands of submicron crystallites, around 0.2 to 0.5 microns each, instead of a few big fused crystals. That ultra fine structure lets it shed microscopic fragments continuously. It stays sharp, runs cool, and lasts three to five times longer than a conventional aluminium oxide in the right application. It is the first choice for exotic and very hard timbers, aluminium oxide hardened finishes, and sports floors.

The newest ceramics go a step further with shaped grain. The grain is formed into precise triangular structures and stood up on the backing like rows of tiny cutting tools. Instead of ploughing through the surface, these points slice, fracturing into fresh sharp edges as they go, cutting faster and cooler with less pressure. 3M Cubitron and Norton RazorStar are the best known examples, though those specific products are aimed at metal grinding rather than wood.

The catch with ceramic mirrors zirconia: it is engineered to self sharpen under adequate pressure and the right machine. Run it too light and heat sensitive, and you never activate the mechanism you paid for. The belt glazes and you have spent premium money for a mediocre cut.

Our Menzer Ruby HD belts, 200 x 750mm, and 178mm discs are 100% microcrystalline ceramic, not a blend, on the same anti chatter hybrid backing as Blue Zirconia, semi open coated. Menzer's own testing has it outlasting a standard zirconia belt by up to three times on dense hardwoods and heavily coated floors.

  • Menzer Ruby HD 100% ceramic sanding belt 200 x 750mm
    Drum beltMenzer Ruby HD belt100% ceramic, 200 x 750mm, pack of 10, 40 to 100 gritFrom £68.37 + VATView product
  • Menzer Ruby HD ceramic sanding disc 178mm
    Edger discMenzer Ruby HD disc100% ceramic, 178mm matching edger disc, 40 to 100 gritFrom £76.87 + VATView product
04
Read the label

How much ceramic is actually in your ceramic belt?

Ceramic has the widest spread of the lot. At one end, an entry level ceramic belt that is mostly aluminium oxide, or zirconia, with a modest dose of ceramic grain. At the other, a high content shaped grain product with a grinding aid coating. Both wear the word ceramic and the price gap between them is enormous.

Here is the part the labels do not tell you. Grain type on a box is not a pass or fail, it is a spectrum. Because aluminium oxide is cheap and ceramic and zirconia are expensive, manufacturers routinely blend grains: a proportion of premium grain cut with cheaper grain to hit a price point. A belt sold as ceramic might be a minority of ceramic grain sitting in an aluminium oxide crowd, or blended with zirconia, which is itself a step down in price from true ceramic. Two belts, both stamped ceramic, can behave completely differently on the floor.

The blend content is rarely printed anywhere you can see it. So the only reliable way to judge is by behaviour. Does it hold its cut rate deep into the belt's life, does it stay cool, does it leave a consistent scratch, and how many square metres does it actually sand before it is done? A true high ceramic content belt keeps cutting when a blended one has quietly gone smooth.

This is exactly why it is worth being upfront about our own range rather than letting the word ceramic do the talking on its own.

Menzer Ruby HD

Grain
Stated plainly as 100% ceramic, no blend
Best for
Dense hardwoods, heavy restoration, drum and edger
Price
Belts from £68.37 + VAT, pack of 10

Menzer Purple HD 150mm

Grain
Honestly listed as a ceramic blend
Best for
A genuinely good disc for edging and worktop finishing on a Festool Rotex
Price
From £30.00 + VAT, priced lower than the 100% ceramic Ruby HD

Neither is the wrong product. But which one you are actually buying should be clear from the label, not something you have to guess at from how it performs three belts in.

05
The backing

The backing matters as much as the grain

Here is the mistake almost everyone makes: obsess over grit and grain, then grab whatever backing happens to be on the shelf. That is backwards. The backing is what carries the grain through the cut. It decides how the abrasive behaves under pressure, heat and flex, not just the mineral sitting on top of it. The backing needs to match how the abrasive moves during the job.

  • PaperThe cheapest and lightest, graded A to F or G. A weight is thin and flexible for fine hand work, and it climbs to E and F weight, the heavy, strong paper used for floor sanding discs, sheets and rolls. Light paper is fine for finishing. It has no place taking a heavy cut.
  • ClothGraded J, X and Y, jeans, drills, then the heaviest polyester. Far more tear resistant than paper, and it survives the constant flexing of a belt going round and round, which is exactly why floor sanding belts want a proper heavy X or Y cloth. A belt on a light backing will stretch, distort and tear before the grain is even worn out.
  • Film (polyester)A dead consistent, uniform thickness, so it leaves a very even scratch pattern with minimal clogging. Great for fine and between coats work.
  • Mesh or netLets dust pull straight through the whole face of the disc. Far less loading and a cooler cut, so the disc lasts longer and clogs less. It has become the standard for orbital and edge work with good extraction.

It is why Menzer build the Blue Zirconia and Ruby HD ranges on a heavyweight polyester reinforced hybrid backing rather than basic woven cotton cloth. That construction resists stretch under heat and load, so the belt tracks true on the drum from the first metre to the last instead of creeping. The fibre structure also damps machine vibration before it reaches the floor, which is what actually stops chatter marks rather than just reducing them.

The cheap discWhy the cheap disc is cheap, and why it cooks

Pick up a budget disc next to a quality one and the difference is in your hand before you have even sanded: the cheap one weighs almost nothing. That is not a bonus. It is a thin, poor backing with a mean, lightweight bond holding the grain on. And that lightness is exactly where it fails you.

A thin, cheap backing cannot take heat. Under a machine it builds up temperature fast, and once it is hot a few things go wrong at once. The bond softens and the grain starts shedding before it is actually worn, so you are throwing away sharp grit. The backing curls, loads up and glazes. And in the worst case that heat goes into the floor, with scorched timber, or a finish that softens and burns rather than abrades. A thin backing also wears through before the grain is spent, so you bin the disc with life still in it.

The real cost

You bought it because it was cheap by the box. You pay for it in discs per job, heat marks and time.

06
The specs nobody checks

Open coat vs closed coat, and grit standards

There is a second spec hiding on every belt and disc that has nothing to do with grain or grit: how much of the backing is actually covered in grain.

Closed coat

Around 90 to 95% of the surface carries grain. The most aggressive option, but on resinous pine, old wax, or a soft gummy old coating it loads up solid and starts sliding instead of cutting.

Semi open coat

Around a 30% reduction in coverage. Gaps give sanding debris somewhere to go, so the abrasive keeps clearing itself and stays cooler. Both Ruby HD and Blue Zirconia are built this way.

Open coat

Fully open, down to roughly 50 to 70% coverage. The most room for debris, for the materials that cause loading worst.

Those gaps give sanding debris somewhere to go instead of packing solid, so the abrasive keeps clearing itself and stays cooler for longer on exactly the materials that cause loading. It is a genuinely deliberate spec choice, not an afterthought. Wood is resinous and often carries old wax or finish residue, so a wood floor abrasive needs some relief built in, even at a small cost to outright aggression.

Compare that to something like Norton RazorStar, a metal grinding ceramic that runs fully closed coat. Metal does not gum up an abrasive the way timber does, so it manages heat through a grinding aid coating instead of through spacing. Same underlying physics, different substrate, different answer.

Grit standardsGrit numbers are not universal: P100 is not the same as 100

Here is a trap that catches people out without them ever realising why a sequence went wrong. There are two different grading standards for grit, and they do not always mean the same particle size.

FEPA

What it is
The European standard. Anything with a P in front of the number, such as P100 or P120.
Where you will see it
Most UK and European abrasives. It also holds a tighter tolerance band on particle size than CAMI.

CAMI

What it is
The American standard. Just a plain number with no P.
Where you will see it
A lot of US made or US branded product.

At coarse grits the two systems are close enough not to matter. Above roughly P220, though, they diverge. A CAMI graded 400 is noticeably finer than a P400, closer to a P800. Mix an unlabelled American product into a European graded sequence at the fine end and you can unknowingly skip a step, or double up on one, without the numbers ever telling you.

The sequenceWhy you cannot skip grits

This is the bit that makes the whole sequence work. Each grit only removes the depth of scratch left by the grit before it. An 80 grit belt leaves a scratch of a certain depth. A 100 or 120 that follows it is only deep enough to remove that 80 grit scratch, nothing more.

Skip from 40 straight to 80

The 80 sands the peaks of the 40 grit scratch pattern smooth, but it cannot reach into the valleys.

Work through the full sequence

Every grit does the job of removing the one before it, so the surface ends up properly level.

The floor can look perfectly sanded dry. Then you put oil or lacquer on it, the finish sits in those unreached valleys, and the coarse scratch pattern ghosts straight back through the coating, usually worse under raking light. The fix is simply not skipping. It is worth noting both Ruby HD and Blue Zirconia are stocked across the full 40g, 60g, 80g and 100g run for exactly this reason. The progression only works if you are not missing a rung.

07
Know when to change

The dull belt is not just slow, it is doing damage

A worn out belt does not announce itself. It fades, and a lot of contractors keep running it because it still feels like it is working. It is not. A spent grain stops shearing wood fibre and starts burnishing, polishing and case hardening the surface instead of removing material.

That matters for two reasons. First, a burnished surface takes stain and oil unevenly. The compressed, glazed timber absorbs less than timber that has been properly opened up by a sharp cut, and you get patchy, blotchy colour that has nothing to do with the wood species and everything to do with a belt that should have been changed twenty minutes earlier. Second, burnishing generates heat, and heat on a worn belt is how you end up with scorch marks and a belt that is now not just dull but glazed solid.

Learning to feel the difference is one of the more valuable, least talked about skills in this trade. A sharp belt bites and pulls the machine forward slightly. A dull one skates.

When in doubt, change it

The belt is cheap. The comeback is not.

08
Practical reality

Match the grain to the machine, and to the wood

A few practical realities worth having in your head before you buy.

  • Ceramic and zirconia need a machine that can drive themBoth grains rely on pressure to trigger the self sharpening fracture that makes them worth the money. Put a premium ceramic belt on a light or underpowered machine and you will never load it hard enough to activate what you paid for. Ruby HD and Blue Zirconia are both built for full size drum and belt sanders such as the Lägler Hummel, Bona Belt and Frank or Pallmann Cobra, which can actually deliver the pressure these grains need.
  • Match the mineral to the materialZirconia and ceramic are built for wood. The moment you are on stone, screed or concrete, or cutting back a hard old lacquer, silicon carbide is usually the better suited mineral, which is why it dominates screens and stone prep discs.
  • Watch the edger against the drumIf your edger is running a different grain or grade than your drum machine, the two leave subtly different scratch patterns, invisible dry and glaringly obvious once oil or lacquer catches the light. Buy matched grain families. Our Blue Zirconia and Ruby HD both come as a 200 x 750mm belt and a matching 178mm edger disc in the same grain and grade, so the edge lines up with the field instead of leaving a visible ring where the two meet.
09
The honest case

What it means on the job, and why the cheap belt is not cheap

Here is the honest case for spending more per belt. It comes down to two payoffs.

  1. A clean scratch pattern makes the next grit easier work. When a grain cuts consistently, it leaves an even scratch of predictable depth. The next grit up only has to remove that shallow, uniform layer, so one clean pass and the previous scratch is gone. When a grain is inconsistent or worn out, it leaves an uneven pattern with the odd deep stray scratch. Now the next grit has to chase those out, and you will sometimes have to drop back a grit to catch them.
  2. Longevity turns into cost per square metre and hours saved. A self sharpening grain holds its cut rate from the first metre to the last, so you change belts less often and every belt does more work. A cheap belt dulls, stops cutting, and starts burnishing, which is not just slow. It is a risk: heat, glazing, chatter, and burns that mean rework.

It is a genuine trade off worth doing the maths on rather than assuming.

Menzer Blue Zirconia belt

Price
Baseline
Belt life on demanding hardwoods
Baseline

Menzer Ruby HD ceramic belt

Price
Roughly double at the entry grit
Belt life on demanding hardwoods
Up to three times, on Menzer's own data

Pay twice, get three times the belt life on the jobs where it counts, and you have come out ahead on cost per square metre before you have even counted the saved belt changes and machine downtime. That is the quiet truth about quality abrasives: they do not just cost more, they earn more.

10
Quick pick

Which HF abrasive for the job

JobWhat we would reach for
Everyday stripping, general hardwood profiling (drum)Menzer Blue Zirconia 200 x 750 belt
Dense or exotic hardwoods, heavy restoration (drum)Menzer Ruby HD 100% ceramic 200 x 750 belt
Matching edger for everyday strippingMenzer Blue Zirconia 178mm disc
Matching edger for dense hardwood and restorationMenzer Ruby HD 178mm disc
Edging and worktop finishing on a Festool RotexMenzer Purple HD 150mm ceramic blend disc
Fine finishing and between coats (Bona FlexiSand and similar)Menzer UltraPad 150mm or UltraNet 150mm mesh
Final buffer sand, cutting back lacquer (16 inch buffer)Menzer UltraPad 406mm
Screens for stone, screed, or cutting back hard old lacquerMenzer Silicon Carbide 406mm screens

A few more habits worth keeping regardless of which abrasive you are running.

  • Backing: heavy X or Y cloth or hybrid reinforced backing for belts and drums, film or mesh for finishing. Be suspicious of any disc that feels weightless.
  • Grit numbers: check for the P. FEPA and CAMI are not the same particle size above P220.
  • Sequence: never skip more than one grit stage. The next grit can only remove the scratch the last one left.
  • A belt that has gone smooth mid job: it is not the grit, it is a spent grain. You are now burnishing, not cutting. Change it.

Match the grain to the job

We stock the full Menzer floor sanding range, belts, discs, screens and pads across zirconia, 100% ceramic, ceramic blend, and white fused aluminium oxide grains, so you can match the grain to the job rather than to whatever the wholesaler had on the shelf.

  • Orders placed Mon to Fri before 2PM are dispatched the same day for next working day delivery
  • Not sure which grain, grade or backing suits your floor? Get in touch
Questions

Frequently asked questions

What is the difference between open coat and closed coat sanding belts?

Closed coat means the grain covers 90 to 95% of the backing for the most aggressive cut. Open and semi open coats leave gaps between the grains, around 50 to 70% coverage for fully open and about a 30% reduction for semi open, so sanding debris has somewhere to go instead of packing solid. Resinous wood, old wax and gummy coatings need that relief to avoid loading and heat build up. Hard, clean timber can usually take a closed coat.

Is all zirconia sanding belt self sharpening?

Genuine zirconia alumina grain is inherently self sharpening because of its fine microcrystalline structure, but the zirconia content varies by product, commonly 25% or 40%, and cheaper grain can be blended with aluminium oxide to hit a price. It also only self sharpens under adequate machine pressure. Run it too light and it glazes instead of fracturing.

Can you skip grits when sanding a wood floor?

No. Each grit only removes the scratch depth left by the grit before it. Skipping a stage, 40 straight to 80 for example, leaves the coarser scratch pattern in the valleys, which looks fine dry but ghosts back through oil or lacquer once it is applied.

How do you know how much ceramic is in a ceramic sanding belt?

Manufacturers rarely publish the exact ceramic content, and many ceramic belts are blended with aluminium oxide or zirconia to hit a price point. The only reliable way to judge is by how the belt performs: whether it holds its cut rate, stays cool, and lasts the number of square metres a genuine high content ceramic should.

Do sanding belts and discs go off if stored too long?

The abrasive mineral itself does not degrade, but the resin bond and backing are sensitive to humidity and temperature swings. Damp storage softens the bond and curls the backing, and very dry conditions make it brittle. Properly stored abrasives can last years. Poor storage is the real risk, not age on its own.